Article by: Johan
Applies to: most early BMWs.
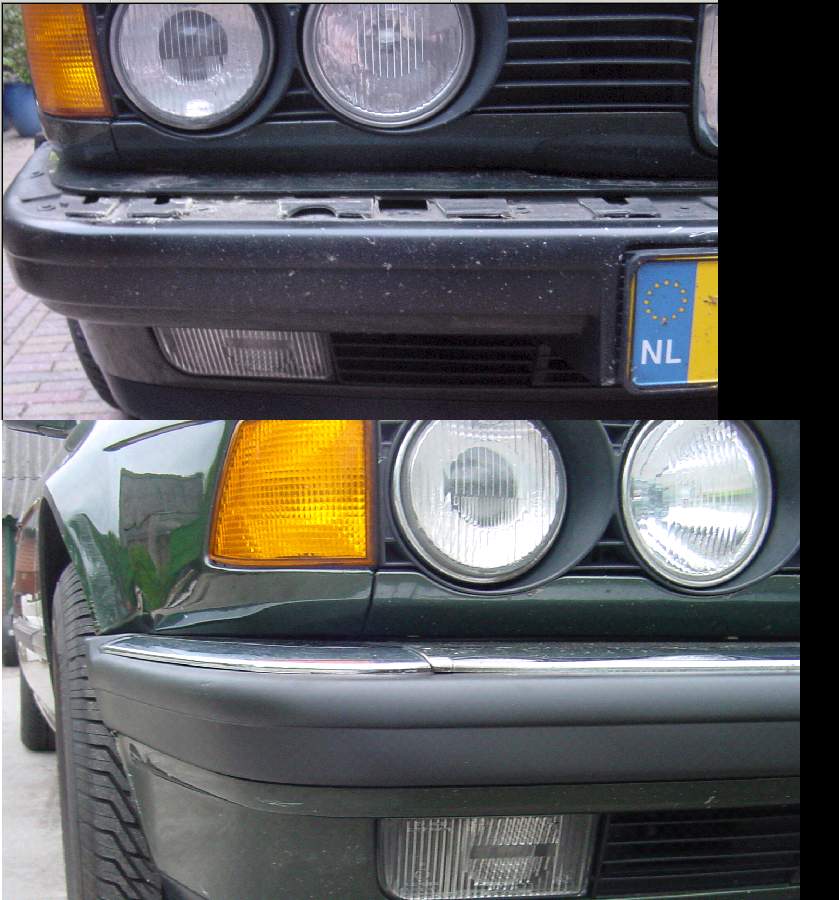
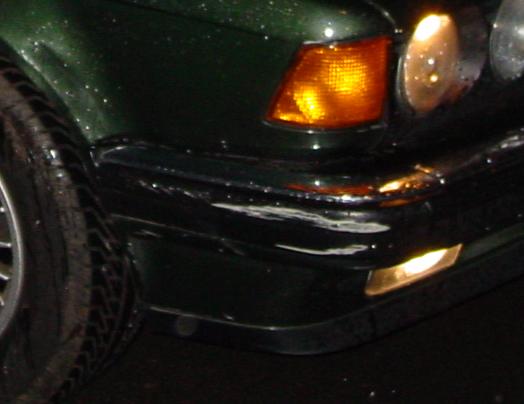
Problem: The bumper looks very ugly ! Not very surprising after 15 years . . . and someone using it as a bumper car only makes things worse:
Requirements:To respray the black parts on the bumper you’ll need:
- Sandpaper. I used 600 grit for the job.
- A can of black bumper spray.
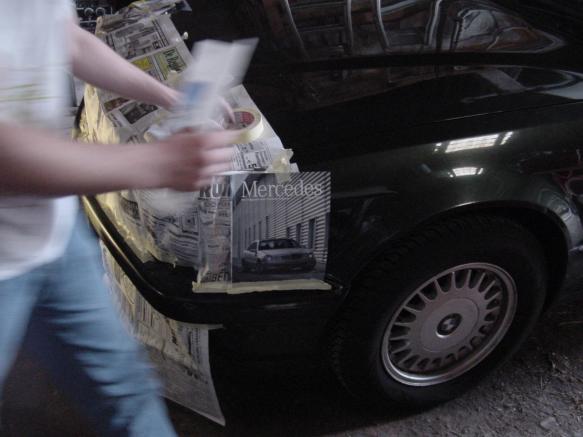
- Newspapers. Of course the latest copy of “Mercedes” magazine will do just fine.
- White mineral spirits (paint thinner) to clean the bumper before you spray it.
- Spray filler. I used some spray filler to even out some of the deeper scratches on the bumper.
Let’s get to work: It is a good idea to start by washing your car.
Of course if you have some children you can have them do it for you while you enjoy a cup of coffee.
Now it’s time take off the chrome (or black if you have a shadow line) bumper trim pieces and the front license plate.
You can also tape them off. If you decide to remove them you’ll find there is lots of muck under them.
If you have a headlight cleaning system remove the spray nozzles first.
The trims are held in place by four clips. Pull the trim piece forward a bit with your fingers, then push the clip’s tab in using a slim screwdriver.
The side trims are held in place by the front trim. They can be pulled off to the front after removing the front trim piece.
Now comes the fun part: sanding the black parts of the bumper until they become nice and smooth.
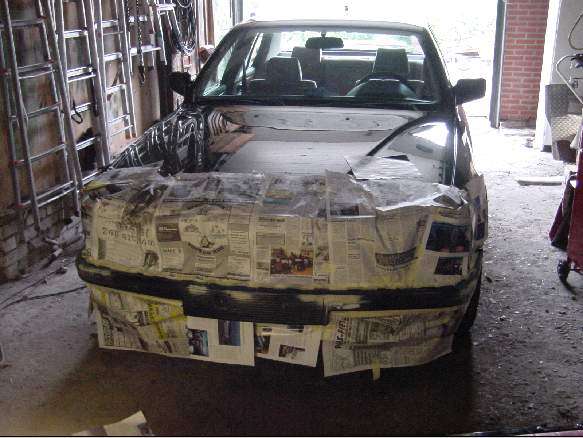
Clean the bumper with the paint thinner. Once clean, take the newspaper and tape off everything around the bumper area you don’t want coated black.
If you’re using filler start filling the deeper scratches.
The fun part of using filler is that you can get to do the fun part twice: start sanding the filled parts until they become as smooth as the rest of the sanded bumper.
Now that everything is nice and smooth it’s time to start spraying. The rule “less is better” applies here. Spray the paint on in multiple thin layers to avoid dripping.
Let the paint dry and your ready to replace the trims and enjoy your work.