Article by: Hairywithit
Applies to: BMWs with the M7x V12 engine.
Based on 1989/1990 750iL:
Symptom:
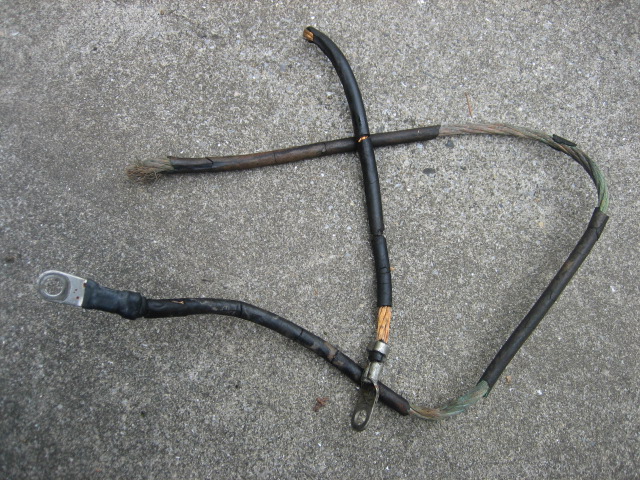
No obvious problems but was discovered by visual inspection. Insulation on the cable was badly cracked and failing at both ends of the cable tube.
https://www.shiftoem.com/dev/showparts.php?mospid=47365&typschl=GC83&diagid=11_4607
Description:
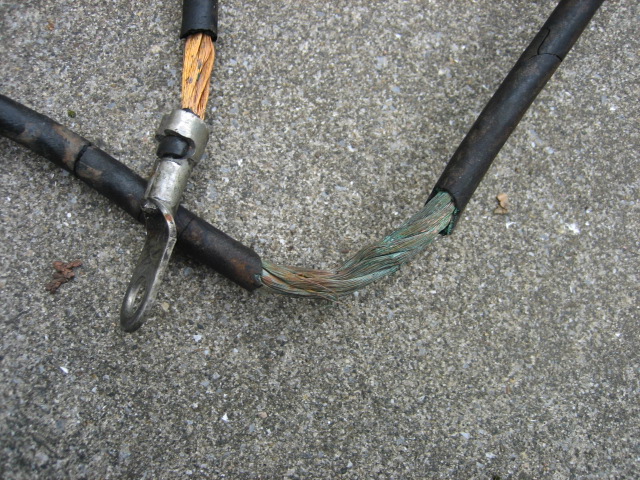
After nearly 20 years of continuous service the insulation has failed. While there is some argument that engine fires have been caused by shorts through the cable tube to ground, one problem that cannot be ignored is that the fine cable strands become badly corroded.
Corrosion → higher resistance → higher current drop across the cable → higher temperatures → cable fuses.
The battery also does not get the full voltage. Shogun’s car recorded a charge voltage of 11+??? volts before replacement of the cable and 13.2 – 13.4 after replacement.
BMW wants $830 for a replacement but you can do it for about 15$.
Time required:
About 4 hours: the nuts holding the cable tube to head may drive you crazy due to lack of space – drove me to drink fortunately.
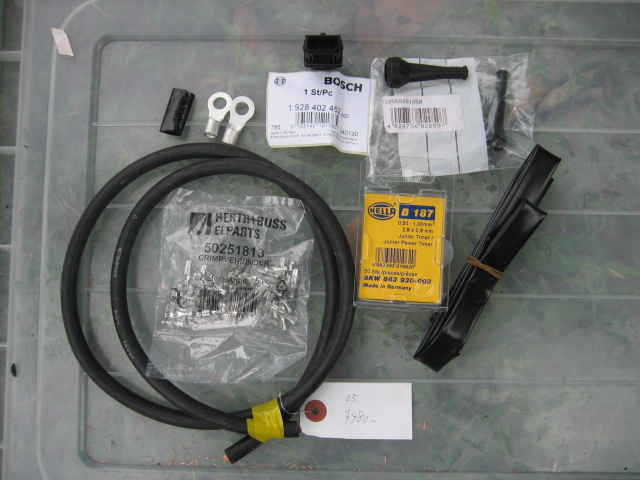
Parts:
- 80 cm length of high amperage, high temperature welding cable (exact length depends on the cable tube type – BMW kept changing the design so be careful about retaining and duplicating the original cable) *** Key dimension is the external diameter, must not exceed 12 mm to permit re-installation in the cable tube together with the Oil Level Sensor Wires.
Shogun’s final cable: 140 A. Fujidensen WTC 22 sq mm, 12 mm OD, high temperature and flame/chemical resistant. For good measure he wrapped it with Nitoms Proself, a thin heat resistant tape – looks silver in the photos. - 2 eyelets
- Shrink tube to suit eyelets/cable
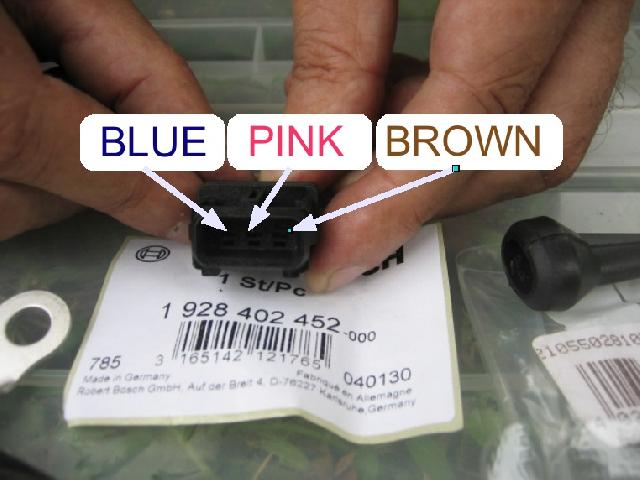
- Bosch 1928402452: 3 pin plug to replace Oil Level Sensor plug at Battery Post. If it has failed.
- Male flat pins for this plug: Hella B 187, 050-1.00 mm2, 2.8 x 0.8 mm
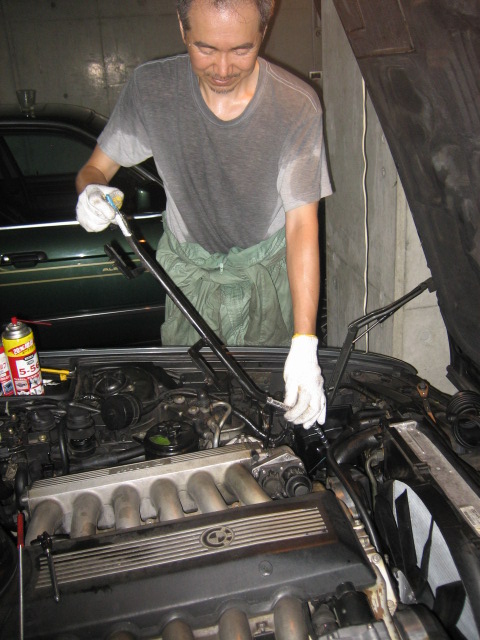
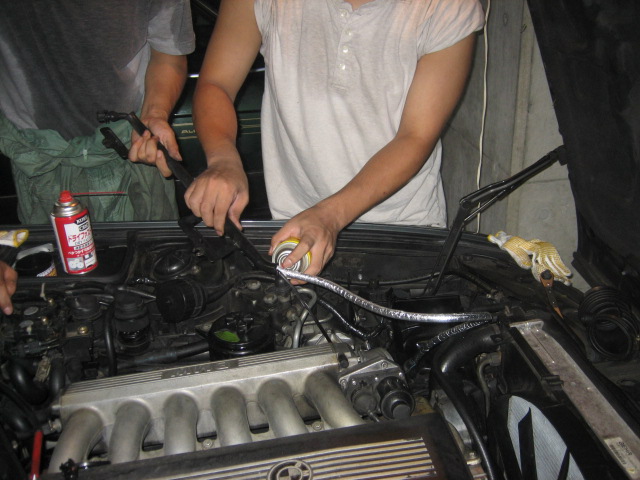
The Dirty Work Begins:
- Disconnect the battery.
- Release the 3 electrical plugs starting with X-11 and move them away from the Battery Post.
- Remove the cover from the Battery Post by lifting the inside vertical side and then moving the cover outwards.
- Remove the 13 mm nut holding the cable to the Battery Post – then the cable.
- Unplug the 3-pin connector for the Oil Level Sensor and release the 3 pins from the holder (if still good condition).
- Note the location of the 3 colored wires and release the pins if possible. Our plug just fell to pieces so the pins were undamaged.
- Remove the LHS MAS and intake boots, and the air filter.
- Remove the LHS distributor cap, plugs, and the 2 10mm acorn nuts holding the plug wire tray – remove the whole shebang to get some space.
Good idea: check the condition of the distributor center pin etc. Alternative is to remove only the plugs from the distributor cap – make sure you know which plug goes where, aftermarket caps and plugs do not have the BMW markings.
- Remove the 2 10mm bolts holding the cable tube to the rubber mounts on the head – one of ours failed through the rubber so it’s a wise idea to have some spares.
NOTE: if you have to remove a broken rubber mount put the spanner on just the nut attached to the rubber, there are 2 nuts next to each other.
Point: on this model the rear bolt requires a very short 10mm spanner – say only 5 cm long – for good clearance.
Unscrew the oil filter mounting bolts and tie the oil filter as far back as it will go.
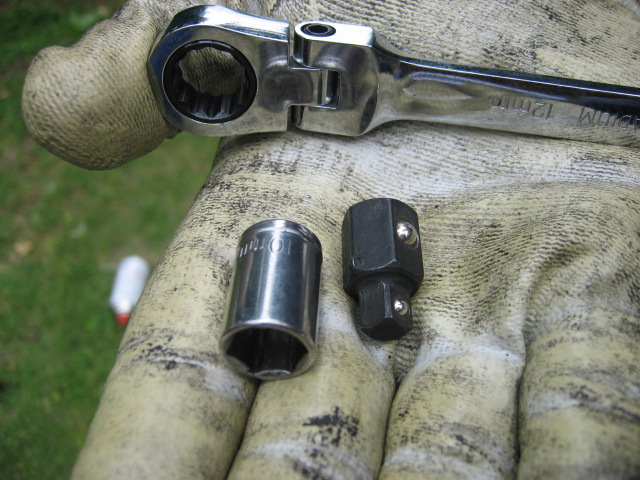
You need 13 mm and 10 mm wrenches with fine ratchet and swivel neck for clearance. We created one as shown.
- Remove the cable and sensor wire from the alternator.
Note the distances of the eyelets and plugs from the ends of the cable tube. - Cut and remove the cable, measure length and replicate with new cable.
NOTE: the 3 Oil Level Sensor wires are still attached so do not put any pressure on them.
- Check the 3 Oil Level Sensor wires for damage – ours looked to be okay.
Reinstall the 3 Oil Level Sensor wires and then the new cable. You might need dry lube to work the cable up the tube.
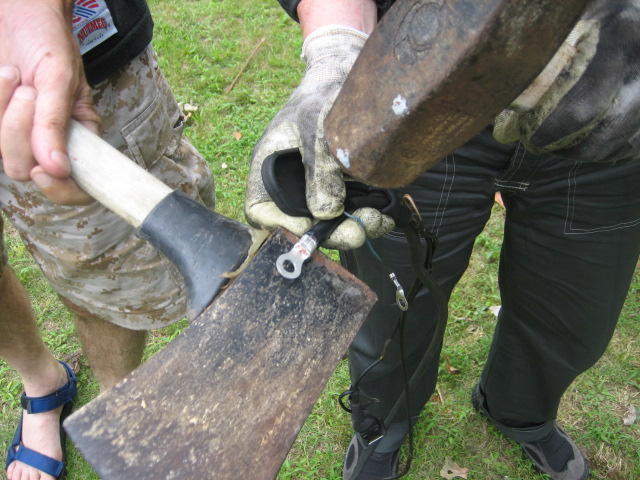
Add the eyelets – we crimped them using 2 axes but if your teeth are strong go for it. - Adjust the the distances of the eyelets and plugs from the ends of the cable tube.
- Installation is reverse of above.
NOTE: please take all care and remember that all repairs are at your own risk.
Insulation failure!
Corroded wires:
Parts:
Plug Wires Labeled:
Ad-hoc wrench for alternator nuts:
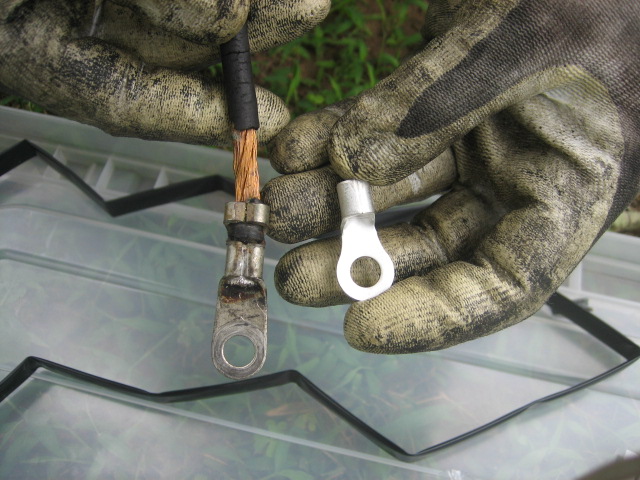
Old / New Eyelets:
Crimping Axes:
Cable Lubrication:
Cable Re-installation: