Article by: Greg
Applies to: all e32 and e34 models.
Before I set out to do the rear wheel bearing install on my M5, I looked for a DIY and didn’t really find anything so here’s my contribution:
It’s not that difficult of a job, so enjoy!
Tools needed:
- 3/8 and 1/2 drive ratchets
- 15mm, 17mm and 36mm deep socket
- 5mm, 8mm hex drivers
- 3/8 impact driver
- Small flat-head screwdriver
- Snap ring pliers and needle nose pliers
- 10 to 200 lb ft torque wrenches
- Dremel with cutoff and/or 3 arm puller
- Slide hammer with hub attachment
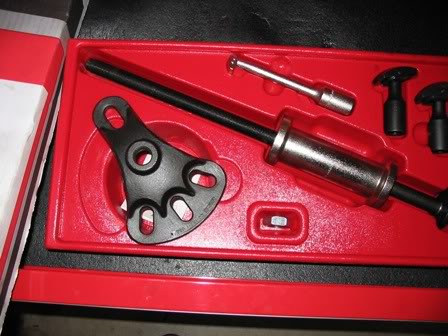
- SirTools BMW rear wheel bearing puller/insertion tool
- 1/2 drive impact
Here goes….
1 Jack rear of car and place on stands, chuck front wheels too for safety.
2 Remove rear wheels.
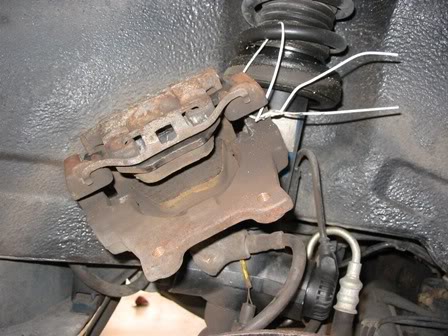
3 Using 15mm socket remove rear brake caliper and hang from rear spring using suitable wire (cut up a coat hanger):
4. Set the parking brake and using 3/8 ratchet with 8mm hex driver loosen and remove all cv/axle bolts. I removed the entire axle for better access and to clean up the parts while in there
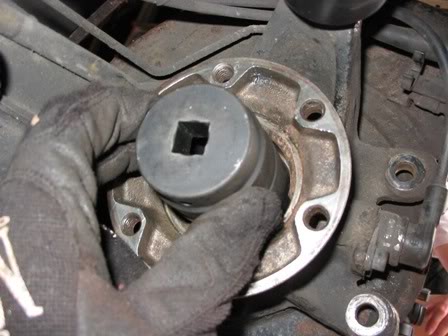
5. Using screwdriver and/or pick remove three pronged lock washer around 36mm nut inside rear of hub assembly
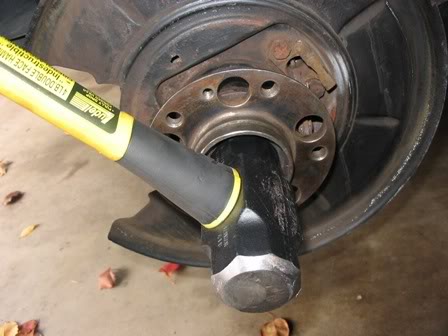
6. Take your 1/2 impact and 36mm deep socket and remove nut holding rear hub assembly
7. Release parking brake and using hand impact driver and 5mm hex driver remove the brake rotor retaining screw.
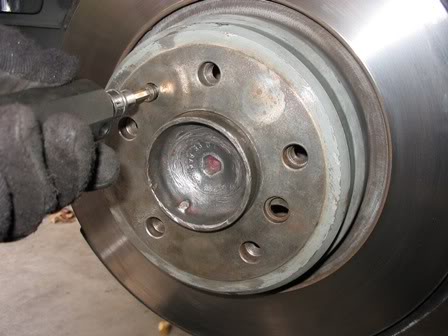
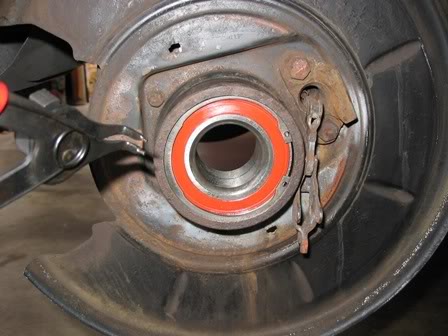
8 Remove parking brake retaining springs, set pins and parking brake shoes so you have full access to the outer hub assembly:
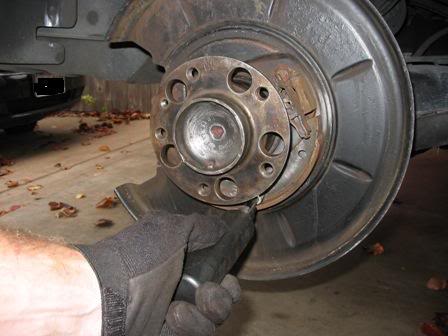
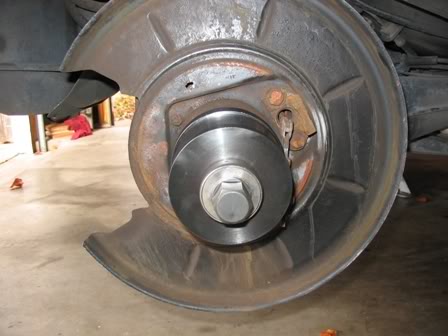
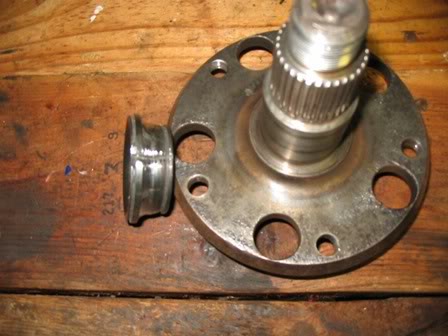
9. Using slide hammer attached to hub pull outer hub assembly from trailing arm (you will most likely get the inner race still attached to the hub).
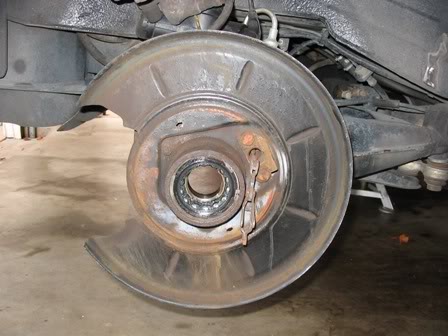
Then the rear hub should be free from the rear of the bearing.
You should be looking at something like this:
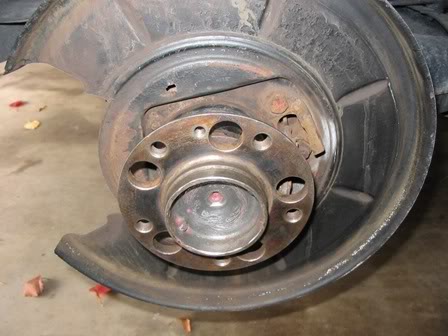
Attach flange to hub and using slide hammer pull it out (forgot to take a pic of the attached slide hammer) –
Get out the snap ring pliers or needle nose and remove the c clip.
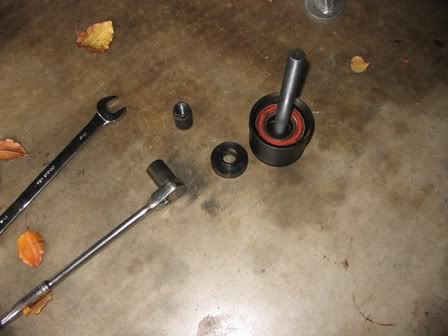
Now for the goods… building the puller ![]()
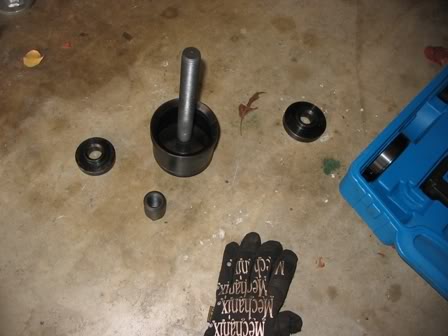
You will want to pick the correct size press fittings so that the rear press rests against the rear inner race of the bearing to help pull it out –
and the front pieces of the puller rest against the outer portion of the trailing arm and allow for the bearing to get pulled back into the press –
Get a cranking on the press and remove the bearing to see how it crapped its guts…
Go ahead and clean the inner portion of the trailing arm so that you can move forward to install the new bearing.
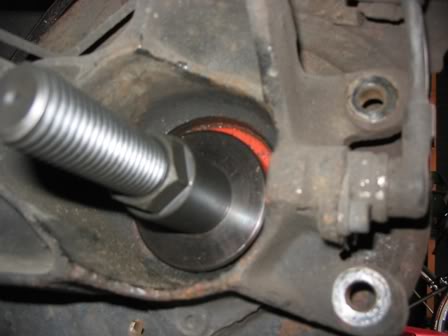
Prepare the press to install the new bearing by choosing the proper rear section that will hold firmly against the back portion of the trailing arm to allow the press to push in the new bearing –
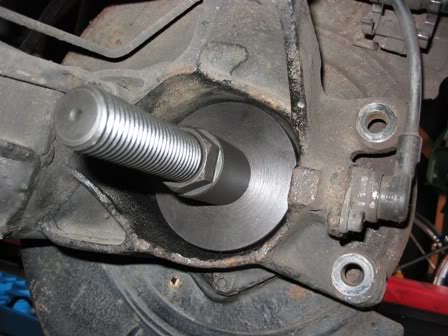
And a front section that aligns with the outer race to push in the new bearing –
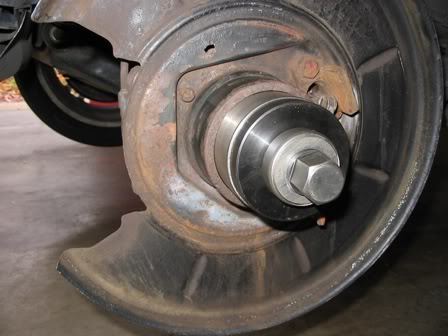
Press in the new bearing and install the c clip and you will see success –
I used a dremel to cut off the old inner race off of the outer hub assembly (be very careful not to cut all the way through the race or you will be buying a new hub – about 2/3 the way through the depth of the race it should crack and then pull right off)
Slowly and carefully not to damage the inner race and the rear section of the new bearing tap the outer hub into the bearing (I used a 5lb mini sledge and tapped slowly and very straight for a couple minutes to force it into the bearing)
Now we were ready to tap on the rear portion of the hub assembly (I used the 36mm deep socket and my mini sledge to tap it onto the splines of the outer hub assembly – take your time here as you do not want to stress the bearing nor press out the outer hub that you just installed)
Alright, reinstall parking brake assembly then you can install 36mm hub nut but you cannot torque to spec until you install the brake rotor and set screw (torque to spec) and then set the parking brake.
Properly torque the hub nut, install the locking plate and you are really close.
Reinstall the brake caliper and torque to spec then finally you can reinstall the cv/axle assembly (properly torqued), wheel (also properly torqued) and you are good to go for a test drive.
You might have to adjust the parking brakes but that is a 5 minute job and a good one to do while you are there.
Good luck and hope this helps!