Article by: Winston Fong
Article applies to: all e28 / e32 / e34 models
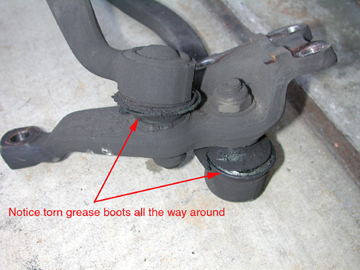
Does your E34’s steering wheel vibrate excessively at 50-60mph? Does the whole front end of the car vibrate excessively?
Especially after hitting bumps or driving diamond cut lanes in bad weather do you nearly lose control of the car? If yes your upper control arm bushing are worn out.
Possibly it could be out of balanced wheels so make sure they are balanced.
E34’s can use the 750 bushing directly without modification.
If you own a E24 6 series the suspension is almost exactly the same accept you have less room to fit a wrench for removal or tightening of the thrust arm to frame bolt.
Your bushing will also need to be milled from 56mm to 52mm maybe even 53mm.
I found that the milled Bavarian Autosport 750 bushings for the E28-E24 were milled to fit E28 (50mm) to much for the 6 and I did not like the fit in my M6 and would not buy them again.
The fit caused the ears to pinched the bushing rather than a nice even or flat squeeze across the metal face of the bushing (52mm=2.047 inches) (50mm=1.968 inches).
After slightly loosening the lug nuts jack up the car and place it securely on blocks or jack stands. Then remove the wheels.
If your replacing the front struts remove the tie-rods first. There are two methods to disassemble, tie-rod puller (easier method) or pickle fork.
Below is a OTC 7315 tie-rod puller (cost is about $50-60).
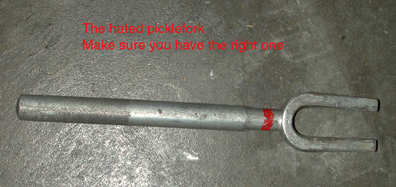
To the right is a pickle fork($25) you’ll also need a 4lbs hammer. If your using the pickle fork method make sure it’s the smaller one for tie-rods not for ball joints which are too big otherwise you’ll be pounding and cussing.
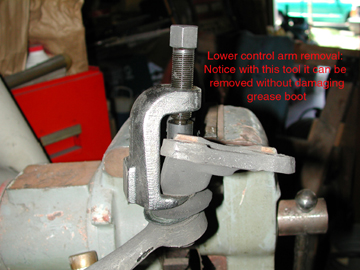
You should really spend the money and buy a good tie-rod puller, this method will make it very easy to remove the tie-rods and control arms.
If you need to reuse a part it will be able to remove it without damaging the grease cup. Believe me I’ve done both methods and the OTC puller makes it much easier.
This one has a swivel head on the end of the threaded shaft and is not a solid shaft puller making it work smoothly even if the end of the tie-rod is damaged from being pounded on causing the solid shaft pullers to slide off.
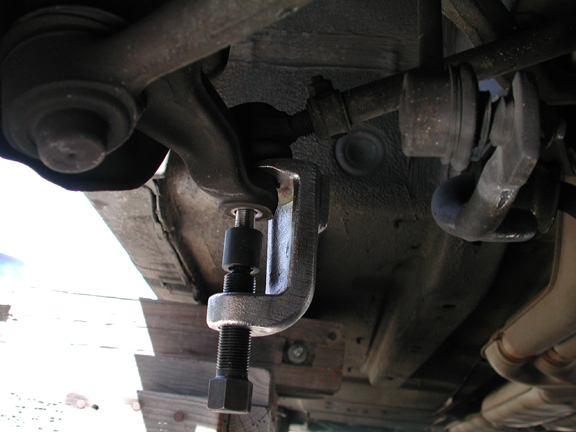
Tip: If the puller is really tight and feels like it is going to break, hit the socket with a hammer(steering plate).
The vibration will cause it to release. Another thing about using a tie-rod puller is I didn’t have to crawl under the car till the very end when I tightened the thrust arm to frame bolts after preloading it.
Remove steering plate by removing the 3 bolts on the bottom of it (one bolt removed already below).
Next remove the control arm to frame bolts on both upper and lower arms. Now hit the plate with a hammer it will fall out with the arms.
If you are not changing struts or don’t own a vise to hold control arms after you’ve removed them. Then remove steering plate from strut housing.
Then use puller to remove arms from plate before unbolting control arms from frame.
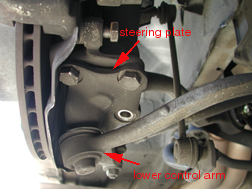
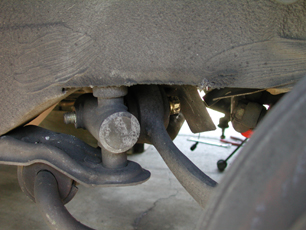
Lower control arm to frame bolt location:
Upper control arm to frame bolt location:
Remove the strut by removing the brakes, rotors, sensor wires at ABS, disc pad wear indicator, sway bar links, disc slider bolts.
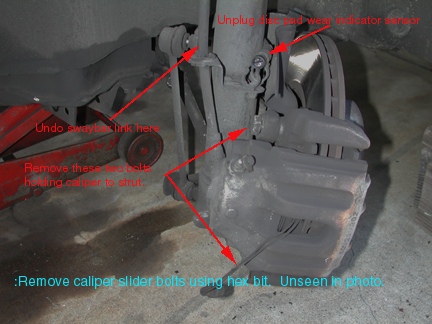
Then undo 3 upper strut bolts and remove.
Look at that finally got them out!
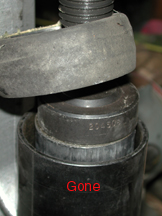
Notice the rotten strut bump stop below:
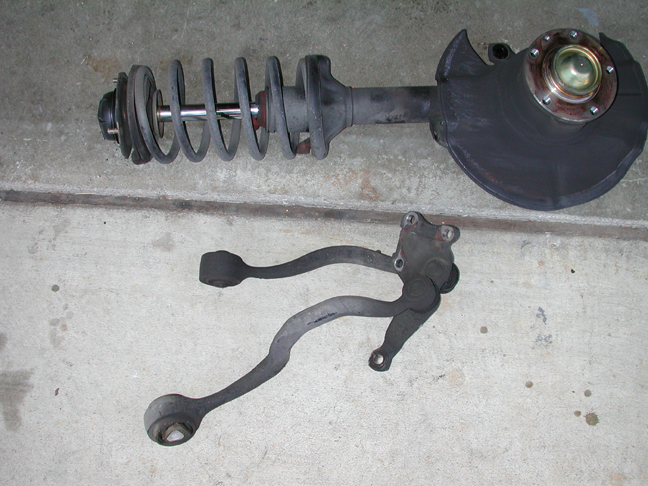
Place in vise to hold it and remove the lower control arm (left photo) and then upper control arm (right photo).
Leave the control arm nuts loosened when removing ball joints so the arms don’t fly off.
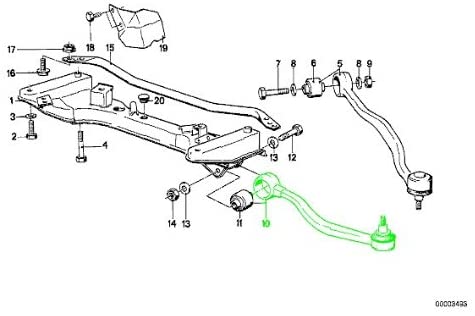
If not done so already you will need to have the new 750 bushings pressed into the new upper control arms by a machine shop.
If you have a ball joint press and a very large vise to hold the ball joint press you can do it yourself.
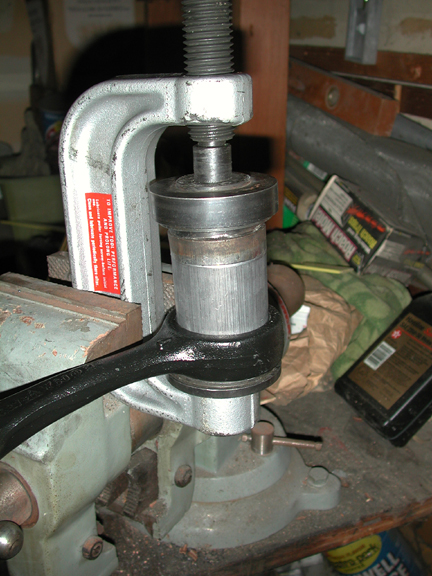
Ball joint press can be found for 90-$120dollars. I’m using a OTC ball joint press pictured below.
If you purchase the press in addition buy the 4wd ball joint service kit for Dana 44. It just happens to be the right size for pressing these bushing in and out.
Buy yourself a piece of pipe that will fit over the handle of your 1/2″ ratchet wrench and give you 12 inches of extra leverage.
This will make it easy to get enough torque for bushing removal without straining yourself.
Here is a site that sells OTC and other equipment. I’ve also found another ball joint press for less at their site.
It appears to be the same and looks to include Dana 44 pieces. I have not purchased anything from them so I can’t comment or recommend them but their prices are cheap.
I’ve done 4 front end rebuilds on Bimmers so far and the saving on labor from the first job more than payed for this equipment.
It can also be used to press out u-joints and small press jobs.
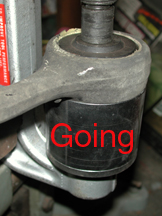
Below: Ball joint press being used to press in new 750 bushing.
If your using the same old upper arms (not recommended) press out the old bushings then press in the new ones.

Squeeze the new arms into the steering plate sockets. (Large slip joint pliers work good.) Then tighten the nuts.
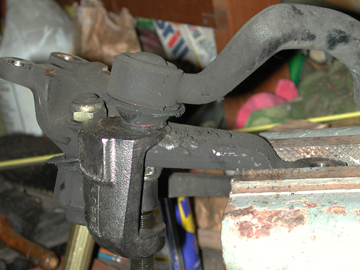
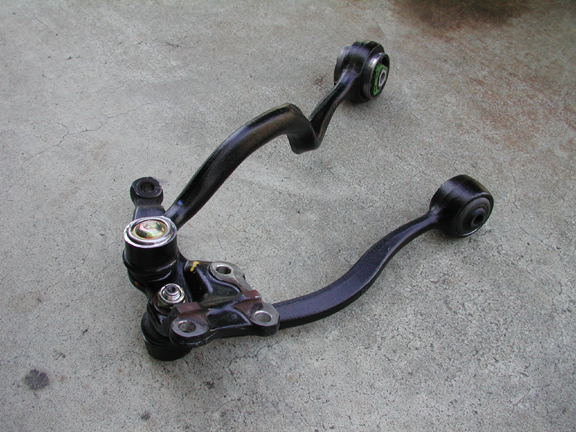
Steering plate and arms ready to go back in below.
Replacing the front struts should be done by a shop, unless you have a better strut compressor than below.
Using a strut compressor such as below is not really adequate for front spring removal.
I’ve found you can only grab 4-5 rungs with compressor making it difficult to compress enough to disassemble and put back together.
Below: Using this compressor for rear struts is adequate since you can grab 6-8 rungs.

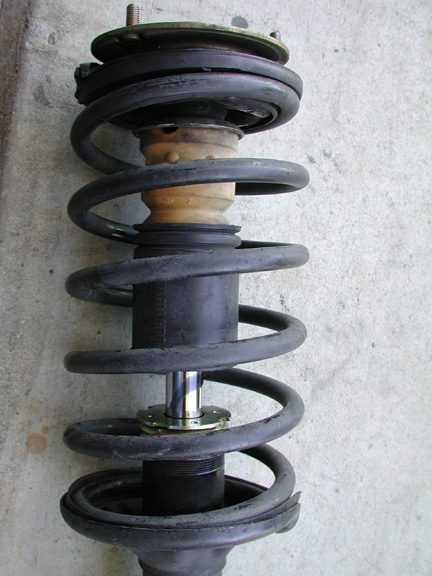
If someone else is reassembling your strut make sure they assemble the bump stop (auxiliary spring) as shown.
The shop that did assembly for me reassembled it incorrectly. I had to return it and make them do it over.
Tighten the control arm bolts to frame only after applying upward force onto the strut and control arm assembly.
You can use a single hydraulic jack or a set of ramps (for both sides done at the same time).
This pre-loading method is extremely important as it forces the control arms to be in the same position they are located when the car is in the normal resting position.
At this point, tighten the control arm bolts where the arm meets the frame.
Failing to pre-load the control arm bushings can lead to premature failure of the bushings.
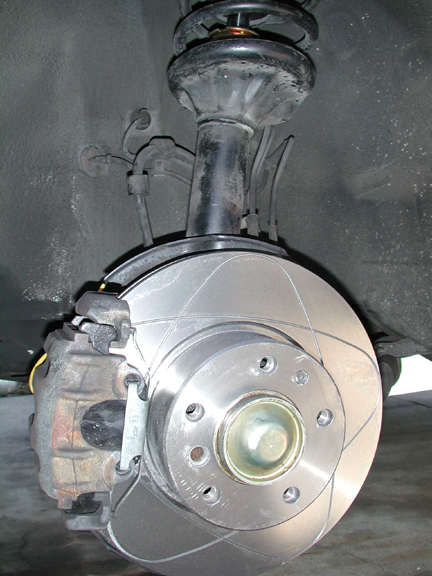
After you’ve installed the reassembled strut and control arm assemblies maybe you’ll want to put on ATE slotted rotors.
Take it for a test drive and you should feel quite a change especially if your bushings were bad.
Happy motoring