Article by: Jack M.
Article applies to: e39 M5 and Z8 (S62B50 engines)
Hello all! I just wanted to share my S62 engine rebuild in my 2000 E39 M5. I have been lurking around your forums for a few years and have learned a lot from it.
Thank-you very much!! In return, I would like to share my experience with some pictures and details of my S62 build in the hopes I can return the favor and help some of you.
I haven’t had my M5 on the road very long, about a week now, but all seems to be perfect so far
I took a lot of pictures on my way to building my car and saving it from the scrap yard. I bought this car a little over a year ago for very little, because of a noise coming from the engine.
The noise seemed like it was too high pitched to be anything with the bottom end of the engine, so we assumed it was something in the head. I was thinking Vanos or lifter.
My brother and I drove all the way from Colorado to Arizona to pick the car up and drive it back home.
When we got there, the car wasn’t like the seller described as far as him pulling parts out of it. It’s nice when someone knows you are going out of your way to get something and they pull stuff off of it.
It seems to happen to me a lot. I bought it anyway as it was a pretty amazing deal. We drove it, with the noise, from AZ to Reno Nevada, and then back to Colorado.
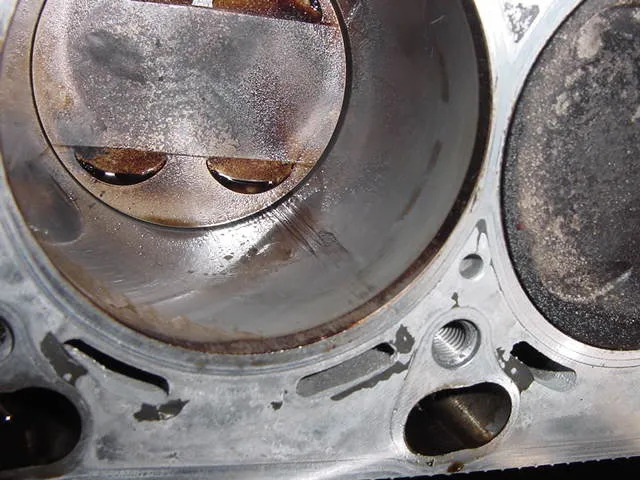
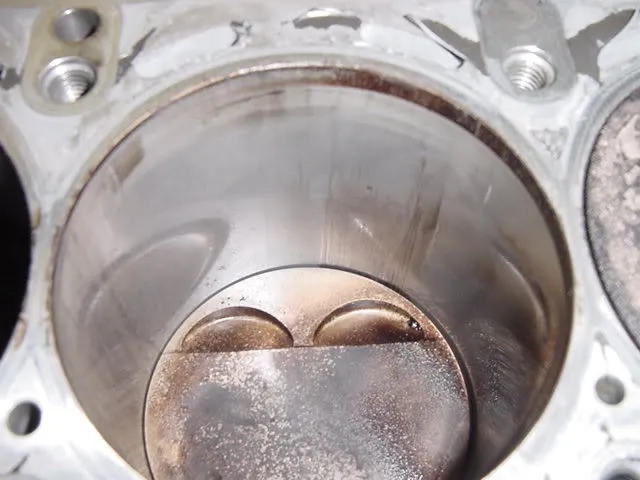
We didn’t realize how insane this trip was to take with that noise, until I finally tore into the car back home. What I found is the noise wasn’t from the head, but from the bottom end.
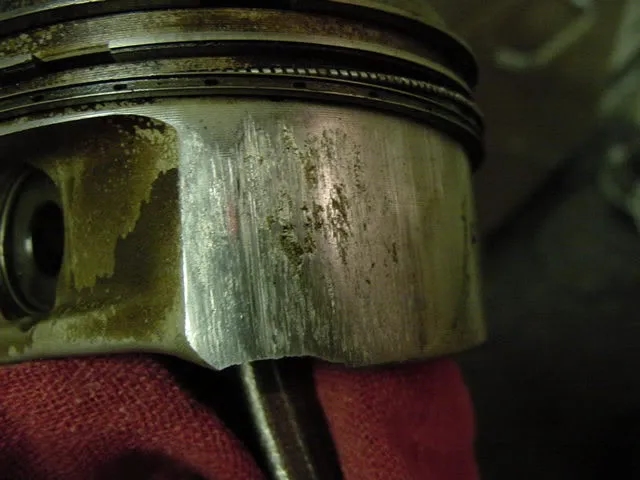
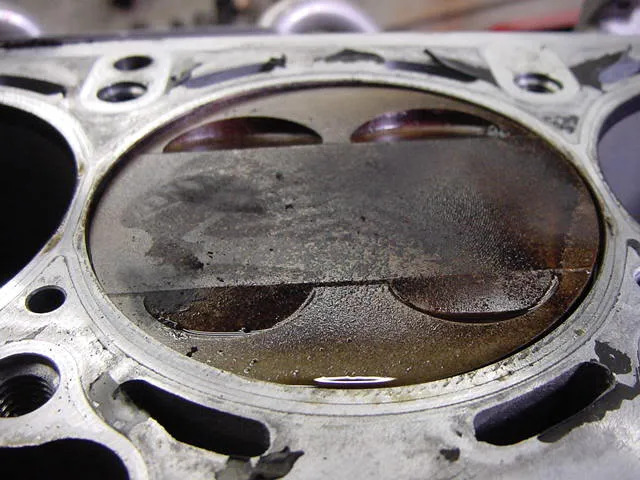
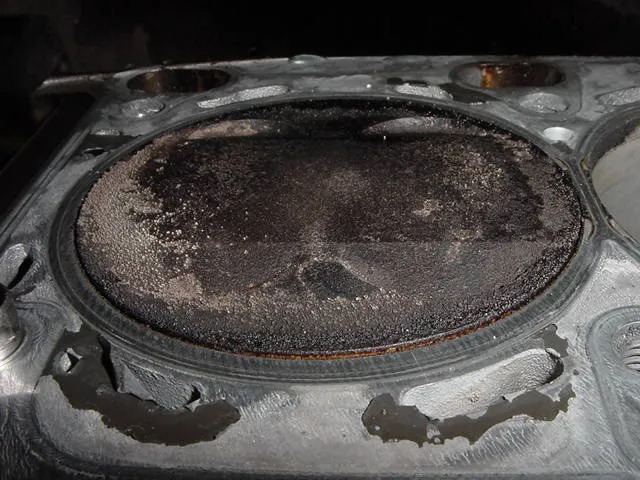
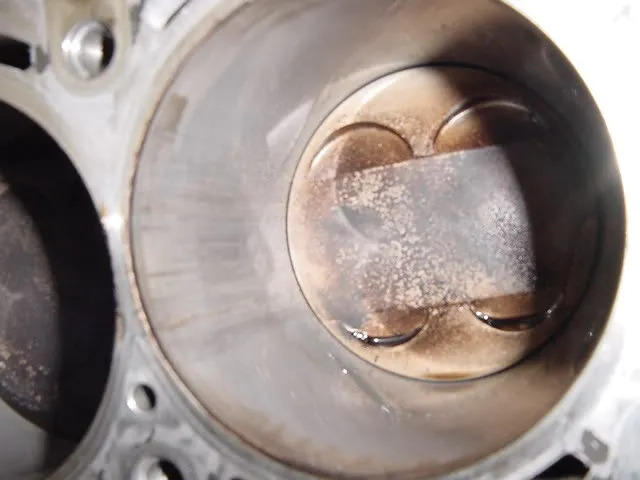
Here are a couple of pictures when we got to Reno:


Turns out what happened is the engine ingested water and hydro-locked two cylinders.
In those two cylinders the rods bent in a way that made the piston sit crooked which destroyed the cylinder and block.
On top of that, with one of them, the pressure from the water must have been so great that it blew the head gasket.
After finding these things, I figured out that the noise was the rod moving back and forth on the piston pin slamming the piston as it was unable to move straight.
How it survived the trip without total failure is pretty amazing. Even the rod bearings still looked perfect!
The lesson here is don’t do what the previous owner did and try to drive the car at WOT through large pools of water!

This created a series of problems for me. The block could be saved, but they have an Alusil coating in the cylinders from the factory which I had to have redone.
In the US, no one has the equipment to do this coating, only Nickasil. After finding the issues BMW ran into over Nickasil coatings in the past, I decided to skip saving this block and find another instead.
I spent several months trying to find a block which was not outrageously overpriced, and I ran into one which was mislabeled on ebay.
Due to this, the block was not going for very much money as the seller couldn’t get rid of it. The ad said it was damaged and the mounting threads for the AC compressor were broken.
I thought this was great, because I am a fairly skilled welder and could easily fix this. I bought it for $1000 and found that it wasn’t as described in the ad.
Not only were engine mount threads damaged, but it was on the other side of the block, and the block was also cracked all the way through.
Here are some pics of the damaged area. I had cut a deep V into it as I decided to try to fix it.
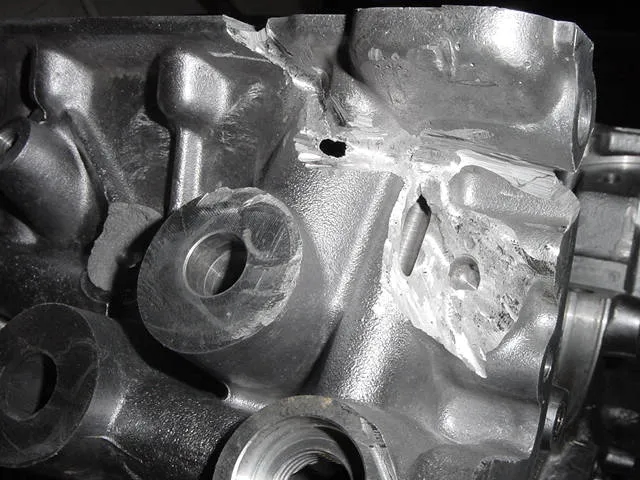
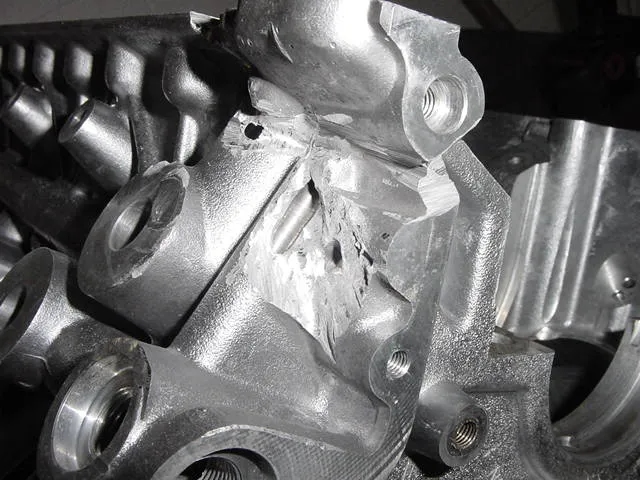
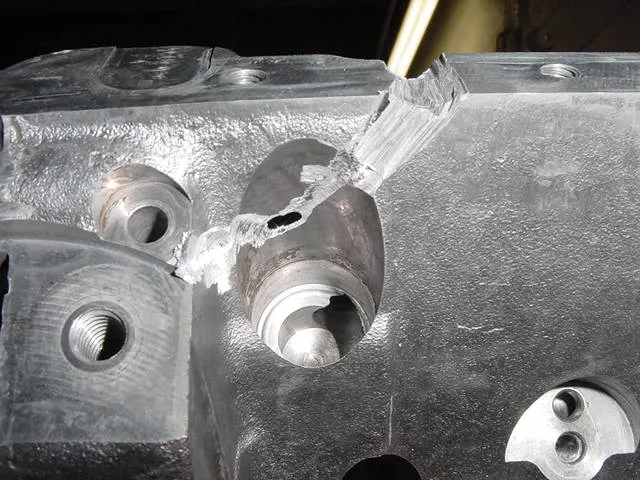

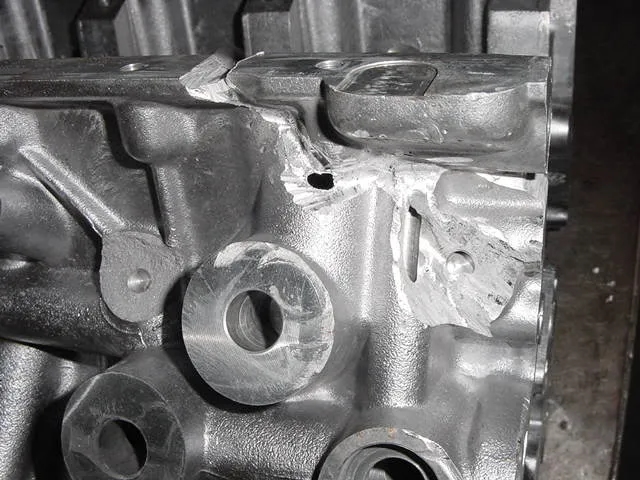

Things looked pretty grim, but I decided to tackle repairing this block as the cylinders were perfect. After spending days on the block, I was pretty satisfied with the job I had done.
What I did was weld the block proper, then added more aluminum and make the whole area 3x thicker than from the factory to ad strength.
I can’t replicate the hardening treatment of the aluminum block at my shop, so I added strength by adding metal instead. I also made the bracket mounting area by slowly building up the aluminum.
I could have made the welds smooth and more attractive, but that would have required more heat and that would risk warping the block.
During the whole welding process, it was a balancing act between getting the welds hot enough, but not too hot as to damage the block.
It took me days of doing this to get the added support in the area that I wanted.
After careful temperature control, welding and drilling, it turned out looking a little strange, but it was solid, sealed, and good to go!


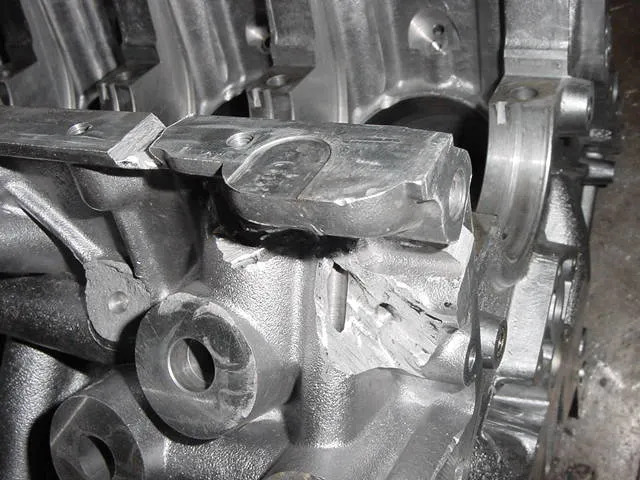
I then had the oil pan and front cover surfaces of the block milled at a machine shop (I had to weld through the sealing surfaces as the crack was there too).
The person which milled it said that he took very little off as the work I did was very well done. I believe it was .006” oil pan, .004” front cover.
I then checked every surface of the block for any distortions due to the welding heat. The deck, mains, and all sealing surfaces were perfectly straight!
I couldn’t believe this! Just shows how well engineered these blocks are as I have never seen a block take so much heat and not move.


Now it was finally time to put it all together. I spent a lot of time measuring parts to try to figure out what I needed to buy and what to do.
I downloaded a service manual online and found the German-to-English translation made the manual very difficult to understand.
It was like the translator knew nothing about mechanics, and just gave the best wording possible for the translation.
For example, the manual said this for one of the Vanos procedures, “No” screws are inserted in inlet sprocket wheel yet. Inlet sprocket wheel must not slip off centering sleeve. Rotate crankshaft from 45° before TDC position in direction of rotation up to TDC firing position.
I had to do a couple of takes on this as in the lines before this they tell you which way to turn the crank by saying CW or CCW.
Now they say ‘in direction of rotation’ which throws me off and has me thinking that they are not referring to crank rotation as they mention moving the crank differently in a different section.
Ugh, because of this, I ended up printing a bunch of exploded views from the dealer parts section. I used the exploded views to help guide me so I was 100% sure everything was going together correctly.
I also reverse engineered everything as I wanted to understand how everything worked, so this helped me understand the ‘why does this have to be here’ questions which the manual was worthless for.
The translation made things a lot harder than it had to be. In many areas, when I figured out what they were trying to say, I would just think to myself that with half the wording it would have been a lot easier.
The translator needs to also be a tech…
I ended up measuring the stretch on all of the bolts which were required to be replaced (old vs. new). I found the following:
Rod cap bolts- found no difference in stretch between old and new bolts.
Main cap bolts- found about 2MM stretch on old bolts vs. new.
Crank pulley bolts- found no difference.
Head bolts- this was interesting.
The head which had the blown head gasket (due to lifting from the water) showed no stretch at all, but the head which was fine and had a perfect head gasket had bolts stretched about 1MM.
I also bought an Elring short block gasket set instead of the dealer set. This gasket set was very cheap and had all of the parts I needed!
It was awesome and had quality parts! Most of them were BMW parts. What would have made it better was if it included the head gaskets, but it didn’t.
I had to order those separately. Some of the things included in the kit were also parts which had nothing to do with the short block, so I felt that I scored on a lot of the extras which came with it and I didn’t have to order individually from the dealer.
The old bearings from the two engines were interesting. My original engine, with the bent rods, had main and rod bearings which looked perfect.
The ebay engine had bearings which had a lot of wear. My original engine had 75k miles and the ebay engine had 100k, which is not enough mileage to make such a huge difference.
From what I could see, my engine had run synthetic and the ebay engine did not. I know there is a lot of debate online about the bearing wear in the S62, and if it’s caused by the type of oil used.
These two blocks would prove that to be a good theory, but I think it’s more than just the oil. After looking at the crank and rods, it looks to me like there is not one thing that will kill the bearings, but a series of things combined.
I believe that oil does play a big factor and I will be using oil with high levels of zinc and phosphorous to keep things happy. I also believe that pump gas 12:1 compression engines suffer greatly from lugging due to the driver.
Combined with cheap fuel, I’m sure the bearings take a beating when you are pinging and lugging the engine along on a hot day.
It is easy to drive these cars at terribly low RPM, but I believe that pounds the bearings out of them, so I am going to practice keeping the RPMs up along with using race type oils with API ratings that are not SM.
I also noticed this crank only has one oil galley hole per rod. Engines I see which do not have these types of bearing issues have two oil holes in the crank journal per rod to help distribute the oil better.
Due to only one lubrication hole per rod bearing, it is critically important to use an oil with high levels of zinc and phosphorous.
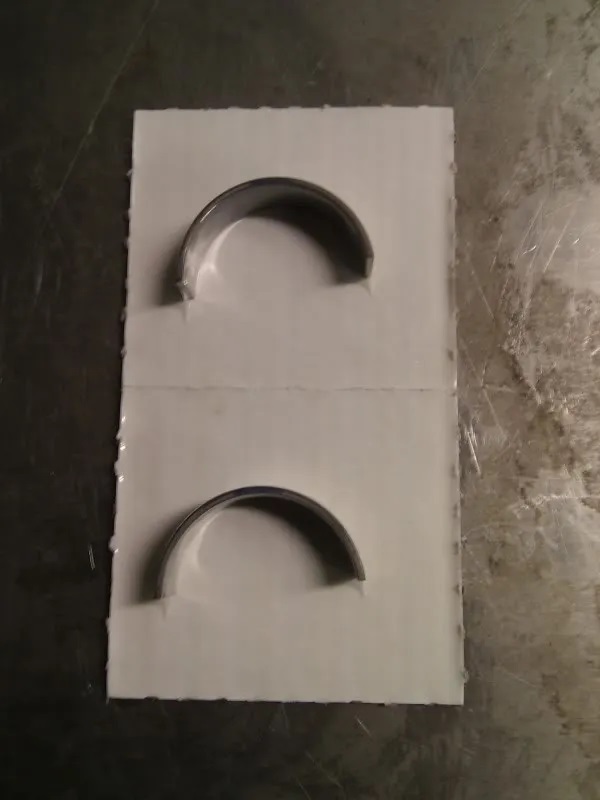
Here are pictures of the main bearings. Original engine in 1st pic, ebay engine in 2nd:

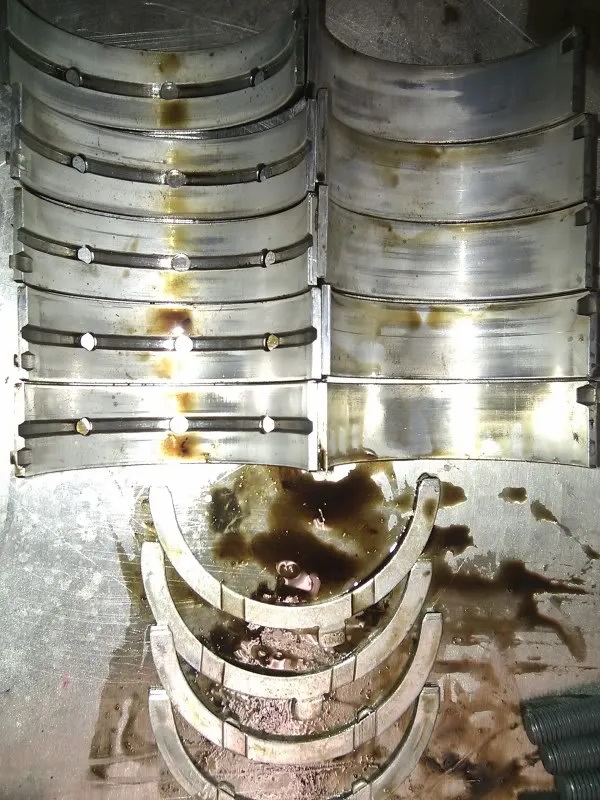
Rod bearings below. Note how the original engine bearings look pretty good and the ebay engine in the 2nd pic are wiped out.
The ebay engine was a good running engine before the car was crashed and engine removed. The camera did a pretty good job of picking up a lot of detail on the bearings.
They didn’t look as bad as they do in the pic in person:


Pic below of a new rod bearing. I was a little pissed that they ship like this from BMW. Looks like an easy way to damage them:
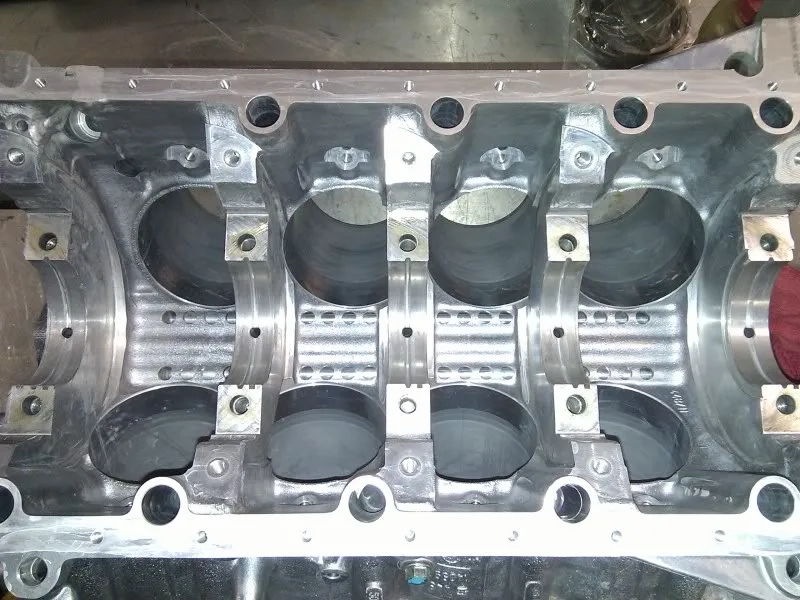
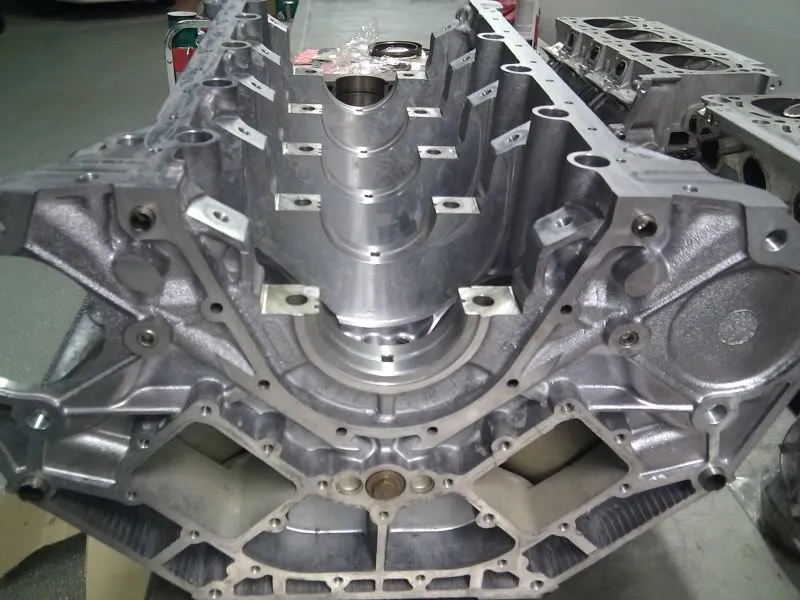
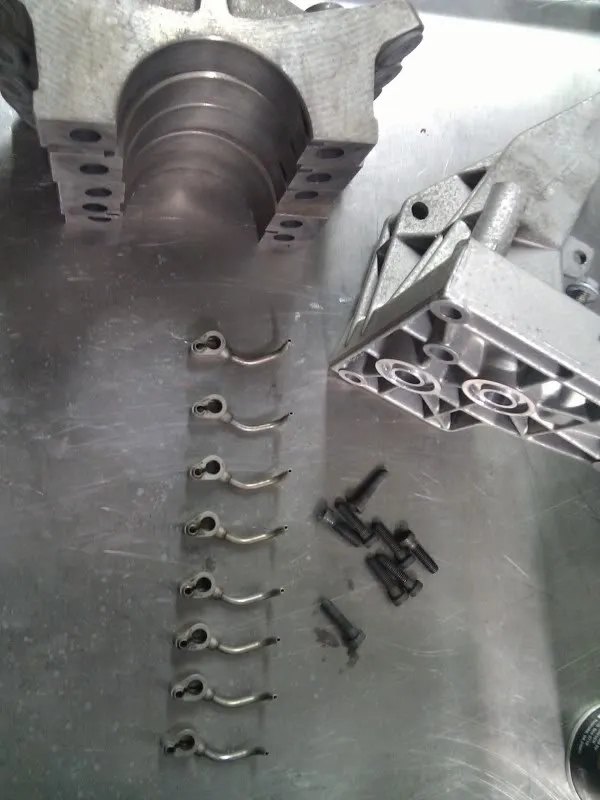
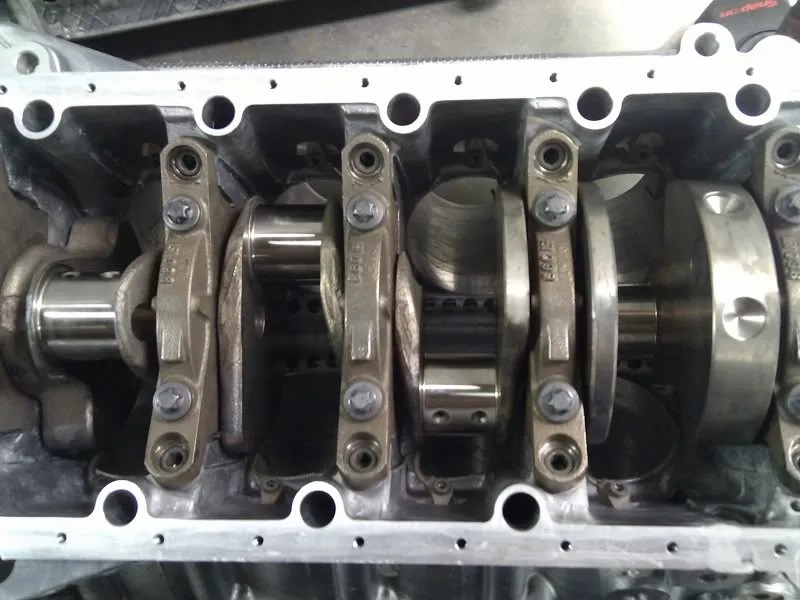
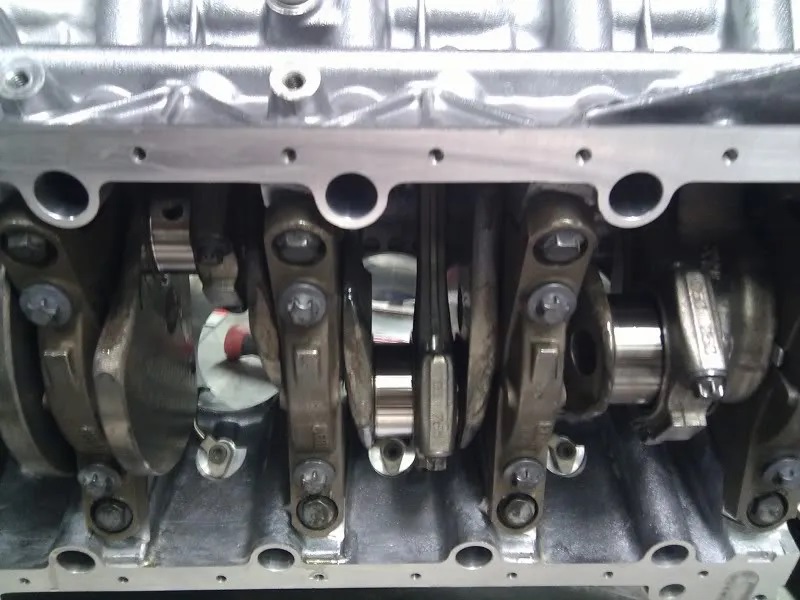
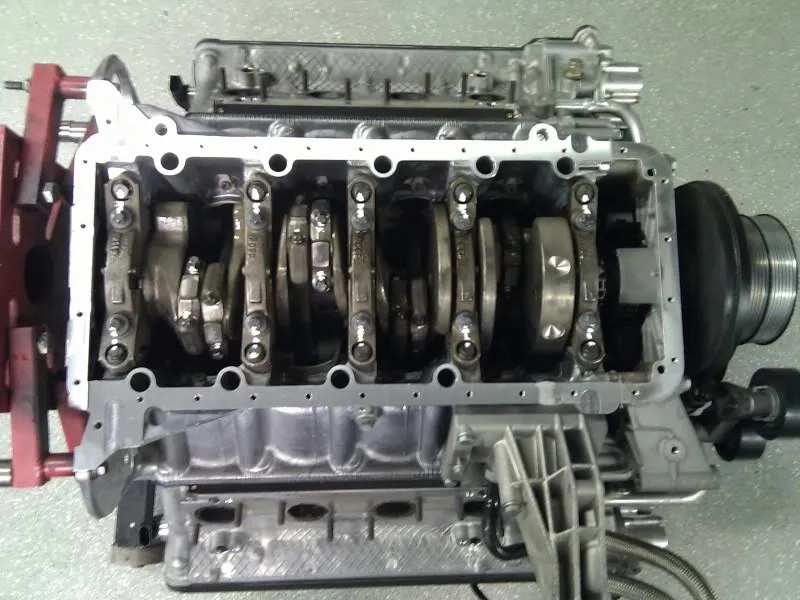
Here is a picture of the bottom end as I was assembling it. Everything was cleaned using my industrial heated parts washer.
With the pistons, I pulled the rings off and cleaned them by hand in a solvent tank to make sure they were perfect.
Took several hours… The crank was polished (I had two to choose from and I decided to use the one from the ebay block).
I also decided to use the ebay rods and found one of them was out or round on the big end.
I ended up finding another rod from my damaged block which was heavier, and straight, and I just took metal off of it until the weight matched from end to end, so that worked out well:


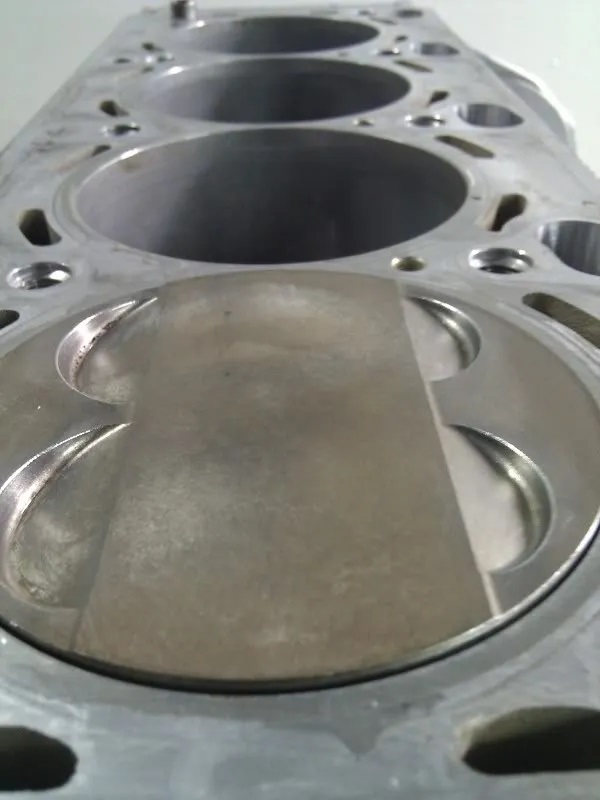
Below is TDC in a factory 12:1 engine.
Looks pretty scary when you see how little room there is between the piston and quench area of the head:

I took the heads apart and checked everything. They were also perfect! This was surprising as one side had the blown head gasket.
I checked it very thoroughly and sure enough it was perfectly smooth and flat.
Most aluminum heads are warped when you remove them and need to be resurfaced as it is, but these were perfect!
I just put them back together and bolted them on the block:
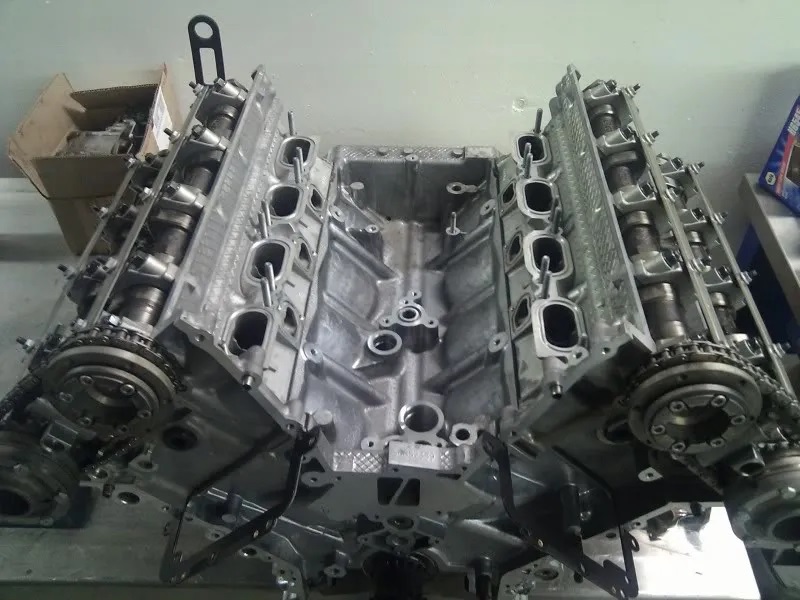
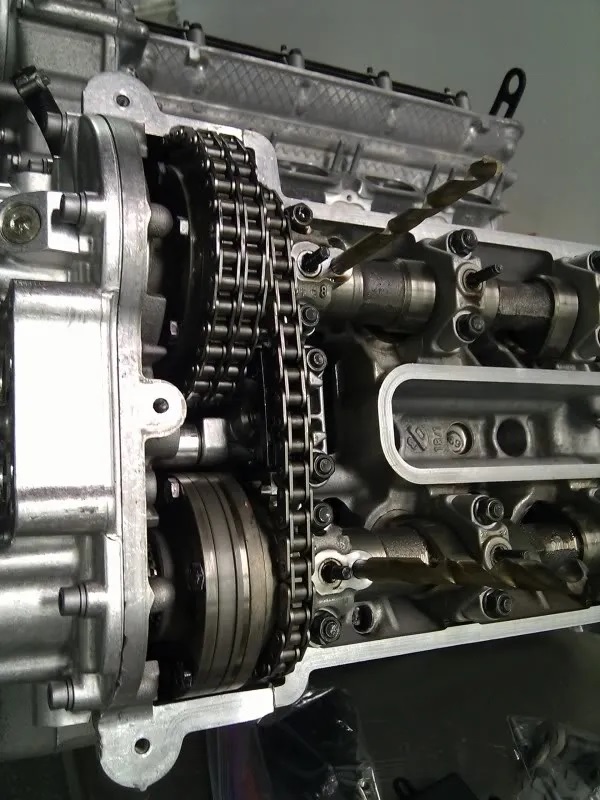
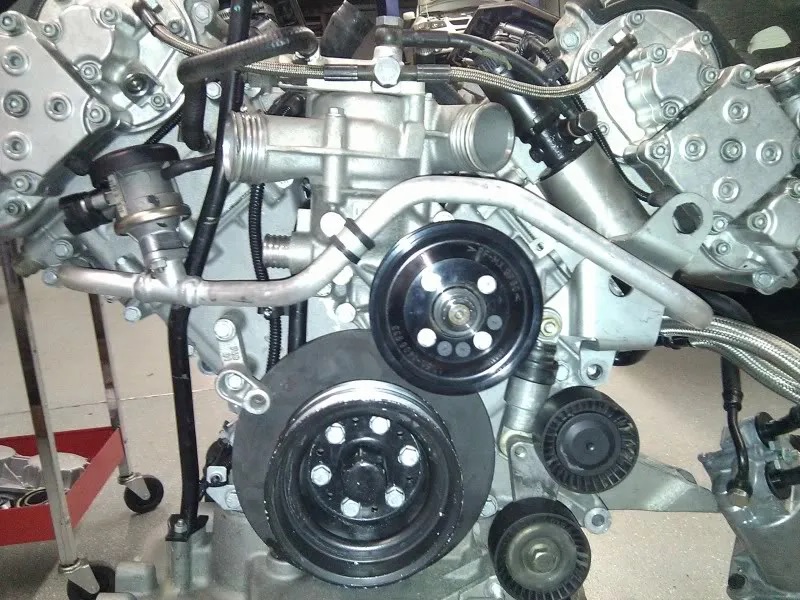
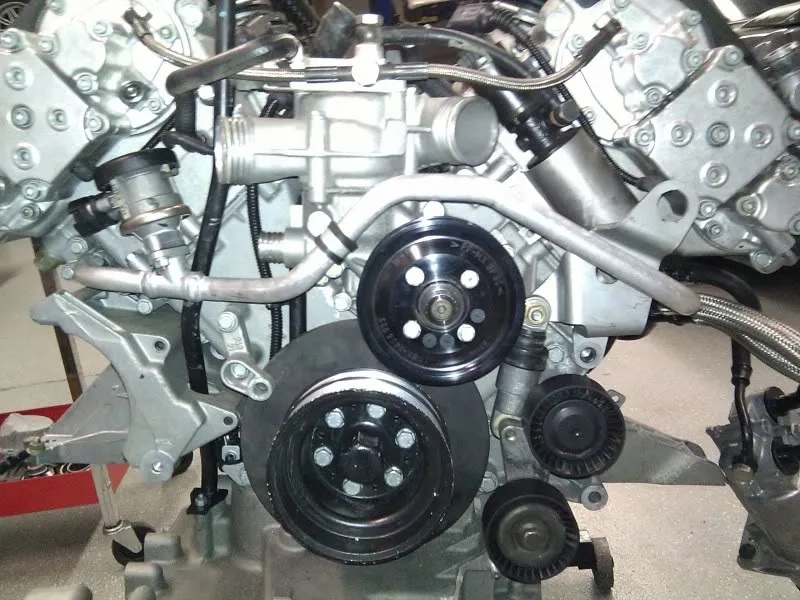
Timing chains installed: Chain on the bottom goes to the oil pump. 1/2″ extension is sitting there to keep tension on the chain while I was installing covers.
I replaced the center U-shaped guide as it didn’t sit straight on the rail. Unfortunately, the dealer only sells the guide and rail as an assembly.
It was only $100 though. Pretty surprised as it looks to be a complex piece.


Water pump and covers installed:

Now it was time for the dreaded Vanos system. After reading the directions on how to install and properly time them, I was a bit nervous, because the manual made it look so complicated.
To help better understand everything, I tore it all apart and reverse engineered it so I knew exactly how it worked. The system looks complex, but is actually very simple.
The system has a gear which is splined into the cam shaft. The gear has a helical cut, so when it is pushed into and away from the cam, the cam changes its timing.
All the Vanos does is move oil pressure to the gear which forces it to move toward or away from the cam, that’s it.
When the timing is correct at TDC, the markings on the cam line up when the Vanos gear is bottomed out all the way to its home position. It’s very easy, but oh my god does the manual make a mess of this simple system!
There are a lot of things that could be forgotten and will kill the engine when it is running. Timing the Vanos was one of them.
The spline hubs work a lot like aftermarket cam gears you find in the import World. When timing the Vanos, you have to keep the splined hubs loose until the timing is on the money.
Once it is right, you can only reach half of the hub bolts to tighten them, then you need to rotate the gears 180 and tighten the rest of them.
If you are distracted, or not paying close attention to what you are doing, you could very easily forget to tighten a few of the bolts and that could be a disaster once the engine is started.
I read about an M5 S62 build which had a failure where the cam timing suddenly slipped and his pistons impacted the valves.
I know exactly what he did… I went through many of the torque sequences twice just to be sure I hit everything. There are so many parts it’s easy to miss a bolt.
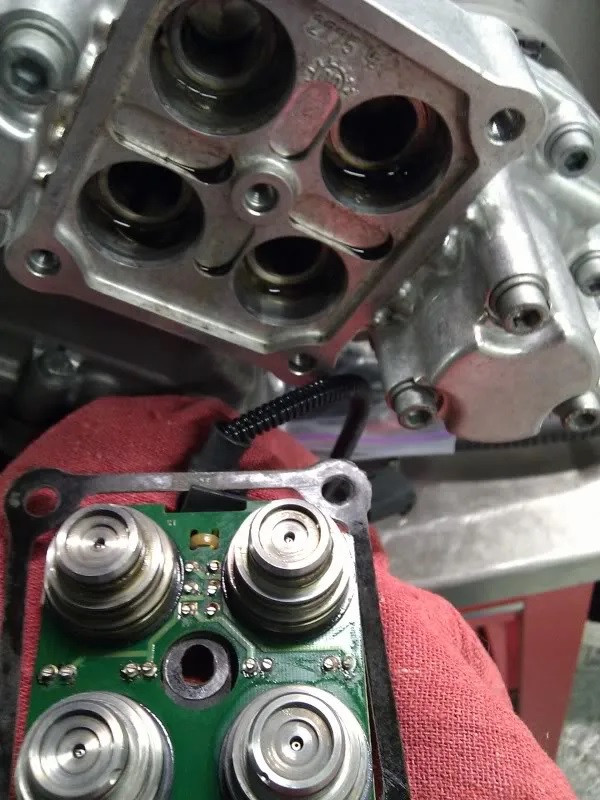
I took the solenoids apart and re-soldered the joints due to the fact people on enthusiast forums claim cold solder joints can develop over time.
I kind of wish I didn’t do it, though, because I reflowed the boards using regular consumer electronics rosin core solder.
This solder is not designed for the heat found in automotive applications, but will work for now.
At a later date, I am going to remove the solder and use a higher temp solder with good nickel content to assure reliability.
Vanos installed and properly timed! Pic of my ‘special alignment tools’ I used to hold the cams into place while installing and timing the Vanos (drill bits):
Bolted the covers on after verifying via testing with compressed air that the Vanos was timed perfectly.
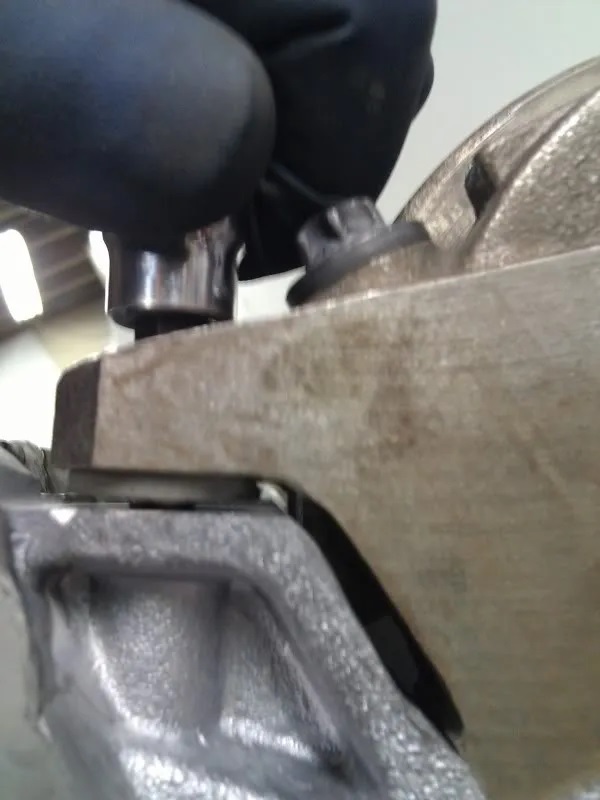
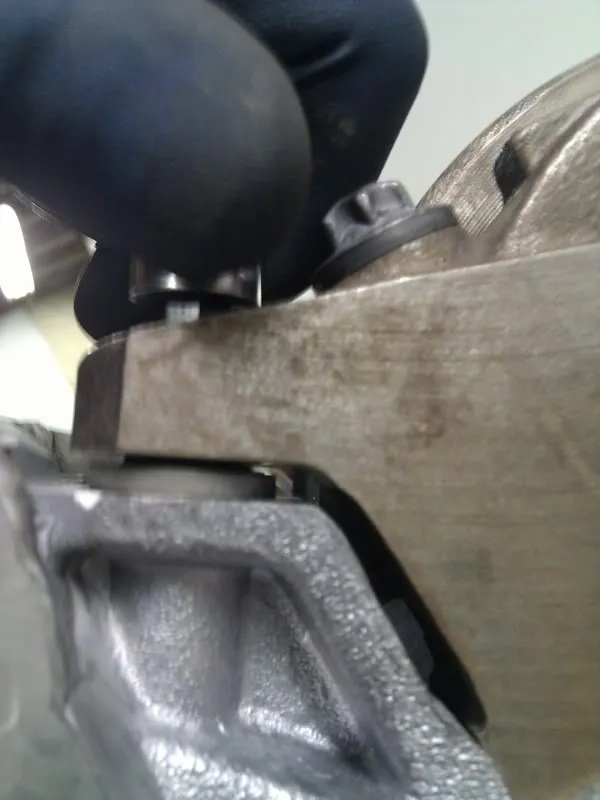
Note, the rubber mallets below the engine are there to help hold the engine in place while I was rotating and assembling it.
I didn’t want to have the block resting in the stainless steel bench as this could damage the sealing surfaces.
Plus, the crank would hit the bench and not allow me to turn it without the mallets in place to hold things up:

Note the pry marks on the Vanos in the pic below. Somebody must have tried servicing it in the past. Luckily, the o-ring surfaces were not damaged:
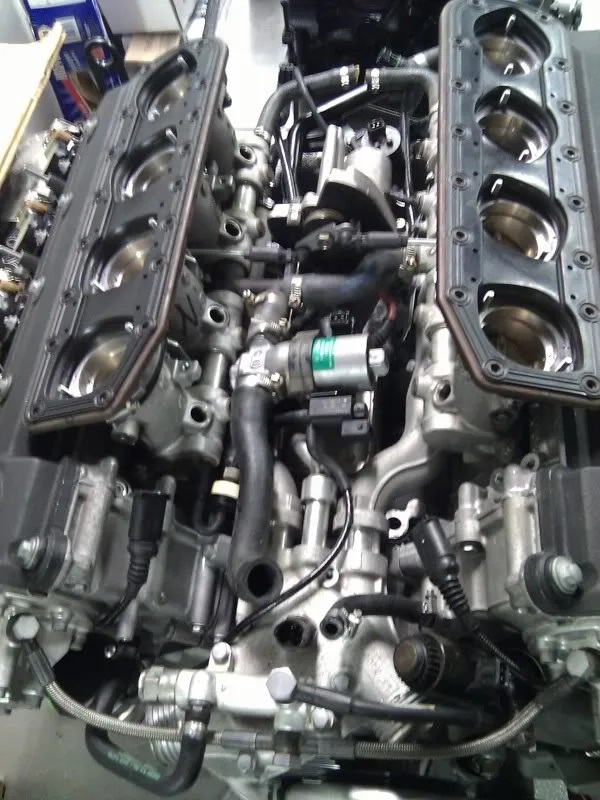
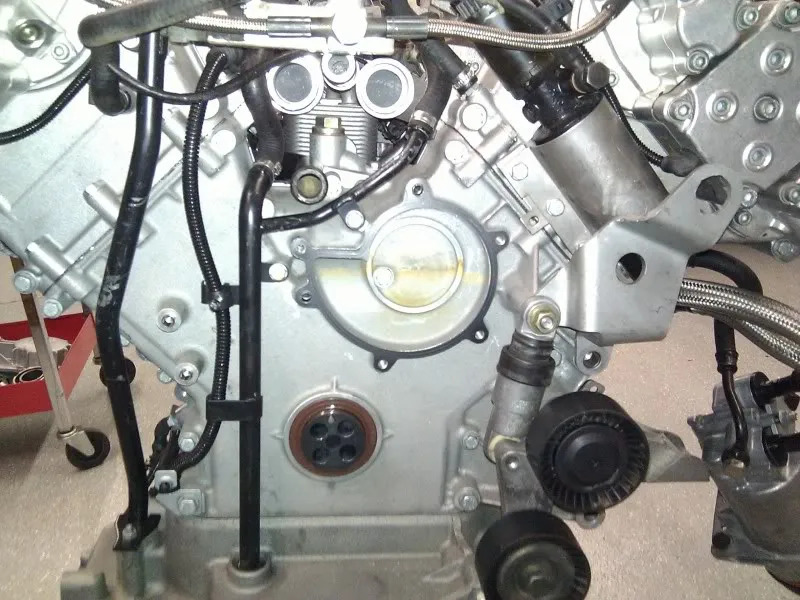
Installed all of the EGR and Vanos parts/lines up front:

Installed t-stat housing and related lines. Also installed the oil cooler. I took the cooler to a friend which flushes radiators and he has the equipment to clean and flush the oil cooler.
I had him do that just to be sure nothing was in there from the original engine failure:
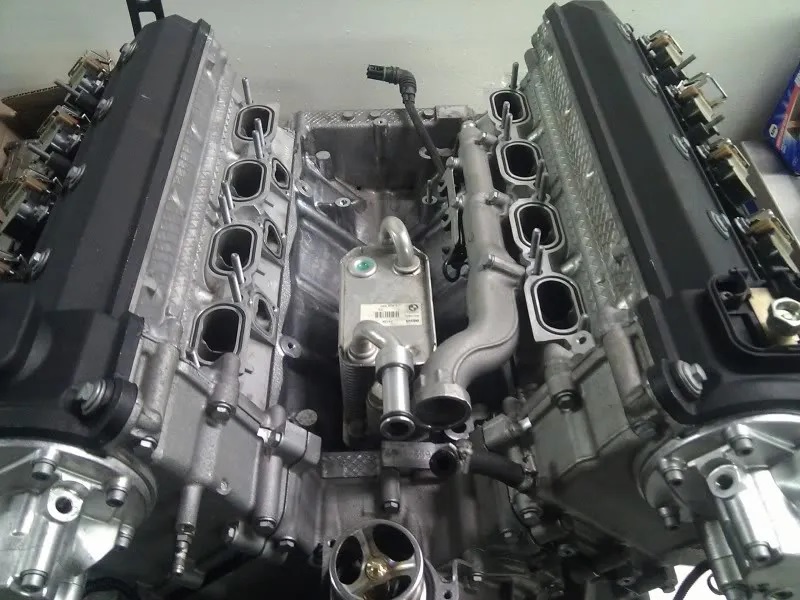
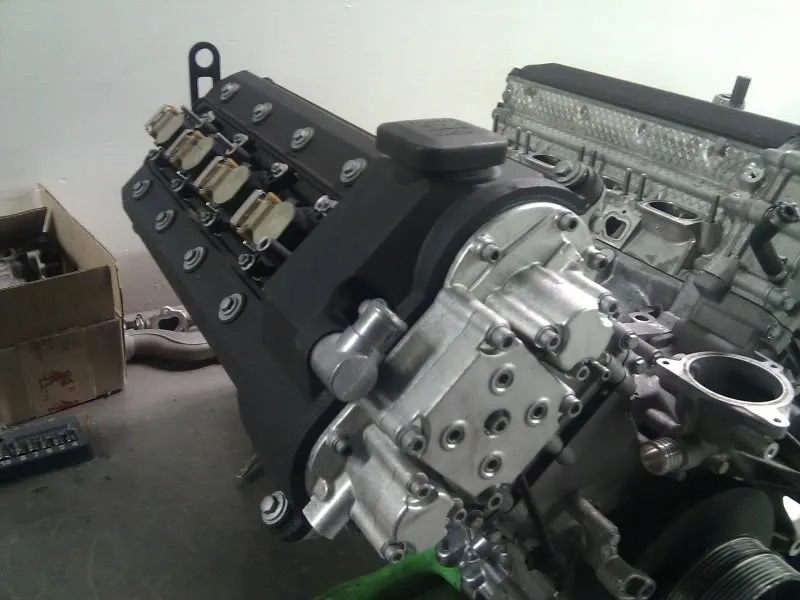
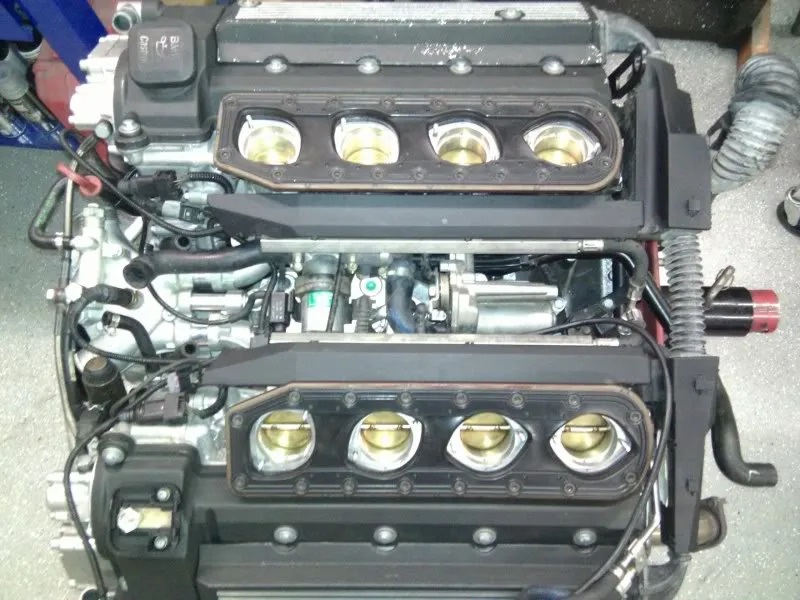
Now things are starting to look complicated. Installed throttle bodies and air bypass valve below.
Even though I did not touch any of the adjustments on the throttle bodies, I worry that they are not balanced.
Once the engine wears in and is sound, I am going to remove the intake and balance the throttle bodies using motorcycle carburetor balancing gauges.
I would like to verify that all of them are allowing the same amount of air to pass and one cylinder isn’t working harder than another:
I was doing all of this on my clean stainless steel work bench. I did not have an engine stand available at the time I was assembling the front, back and top of the engine.
We have been averaging 1 engine build a day at my shop so we were pretty busy and all stands were taken.
I was now at the point that I needed to put the lower engine parts in place and I was able to get a stand.
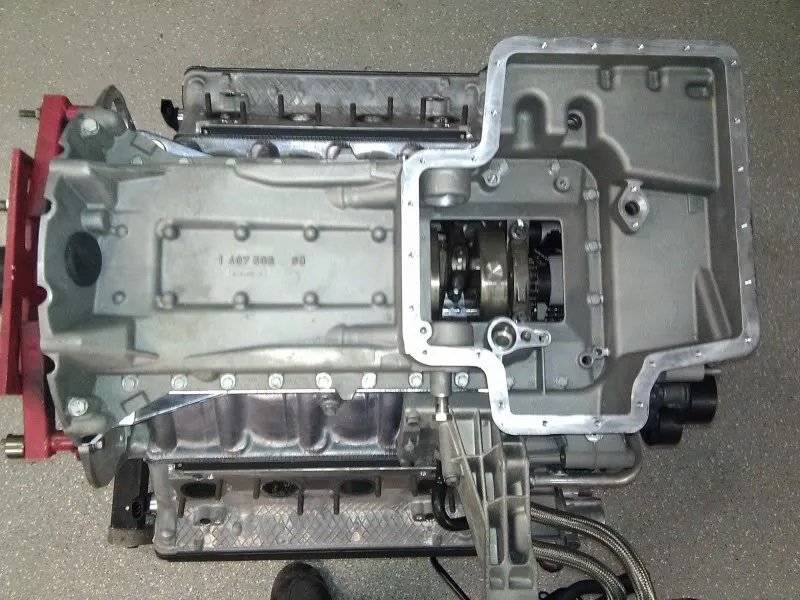
We picked the engine up and set it on a stand. I then turned it over and started to install the upper and lower oil pans:
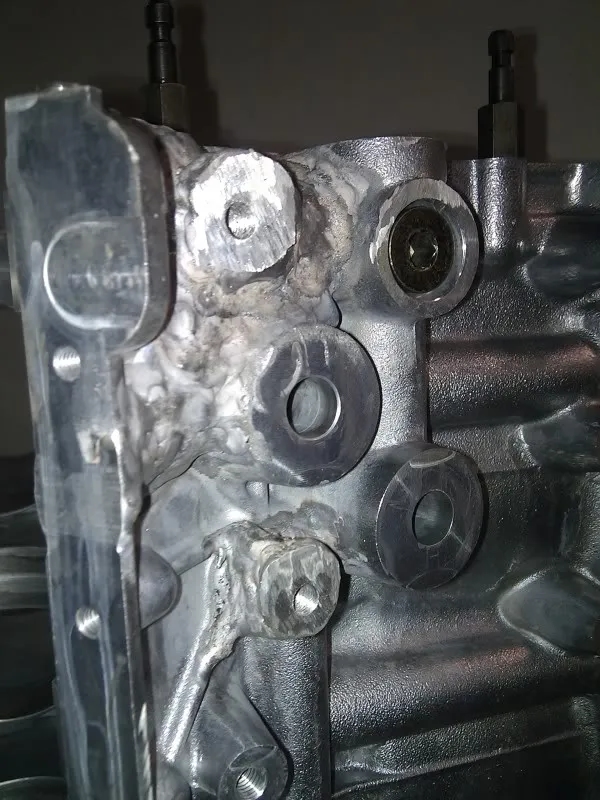
Even though the welding looked a bit weird when the block was bare, now with everything attached you can’t tell the block was ever repaired.
I would be willing to bet even the most seasoned BMW tech would never see it.

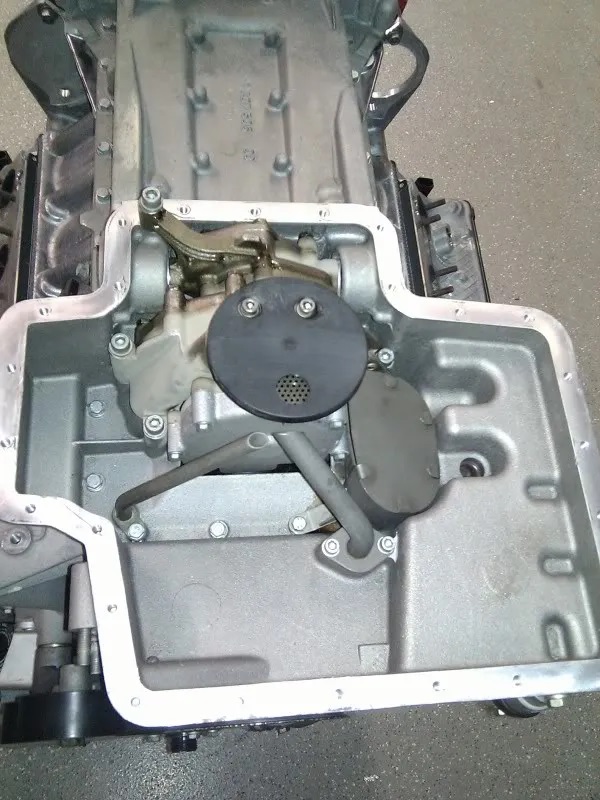
Found this bolt sitting in the pan this way.
I never did this so either someone was servicing this engine in the past and did this, or there are some quality control issues at the factory.
I wouldn’t be surprised if it wasn’t from the same guy that put the screw driver marks on the Vanos:
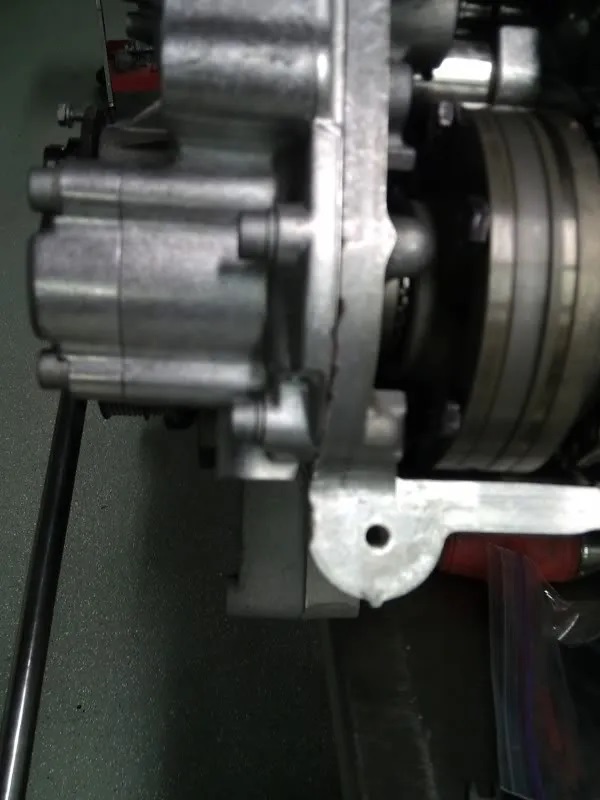
Oil pump:
Cover installed below:

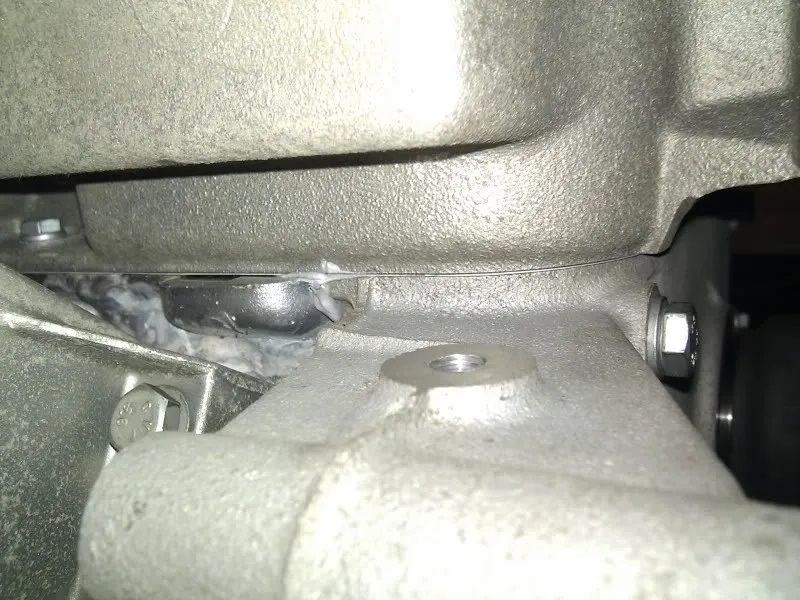
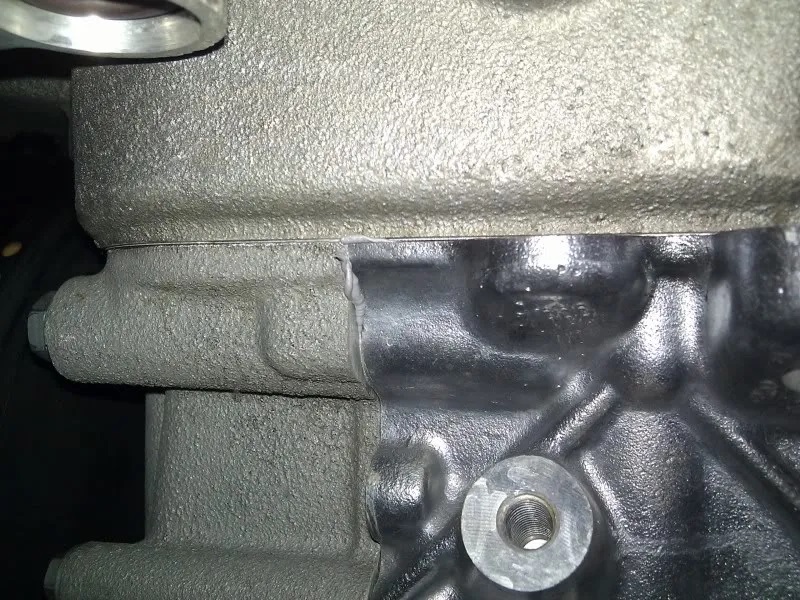
Due to the fact that the sealing surface on the block was milled .006” I was a bit worried that there could be a leak between the block and rear and front engine covers.
I didn’t realize this until I got to this point. If I were to do this over again, I would have milled the rear and front covers .006″ as well so it all matched.
The rear and front covers were not machined, so you could feel a step with your finger.
To make sure the gasket would seal, I put a small amount of sealant in that area (the manual tells you to do this anyway).
In the pic below, you can see the sealant squeeze out from in between the parts, so I was satisfied that it would not leak as it looked to be clamping down just fine:
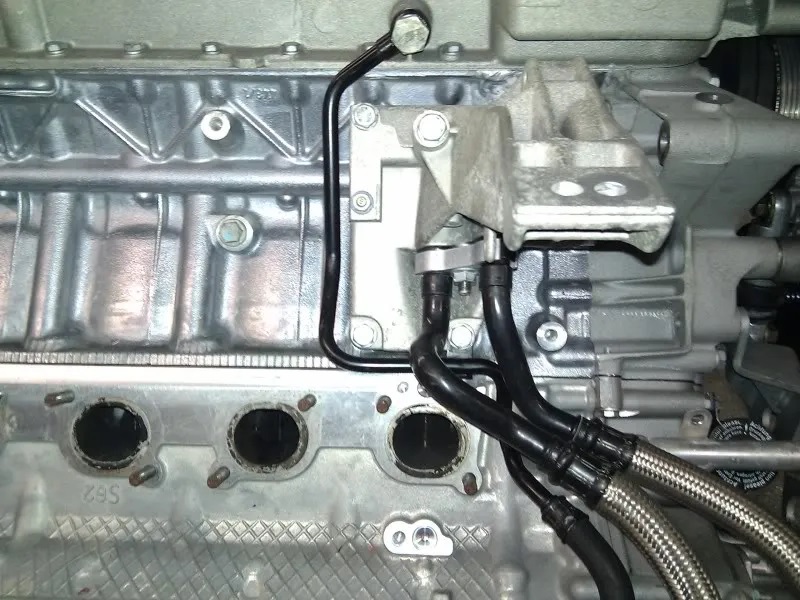
Oil filter housing lines installed:
I had some trouble with this as the manual doesn’t tell you which line goes where and I was afraid I would stick them on backwards, so I took the filter housing apart and verified which way the oil needed to go so I would have the lines mounted correctly.
At that point, I found the lines had directional clips on them so you can’t put them on wrong, lol!
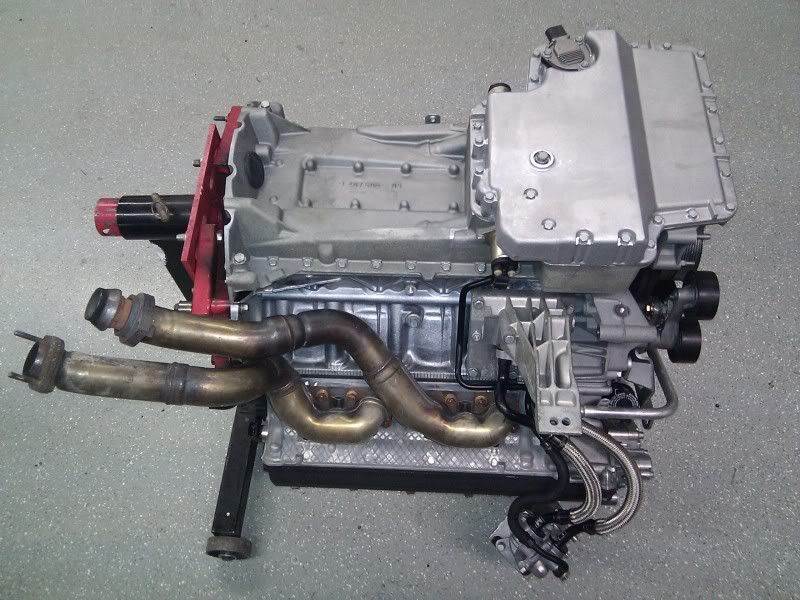
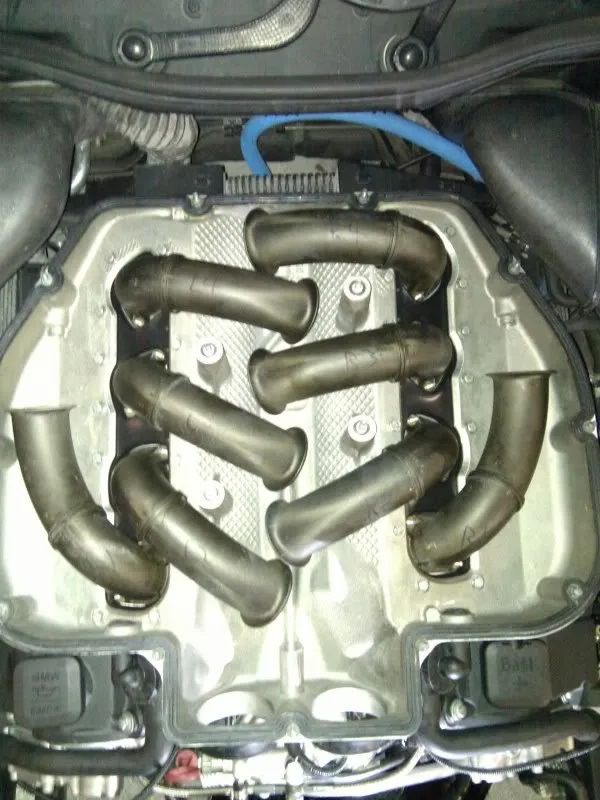
Exhaust manifold installed:
So now I found I made a mistake. I did not install the PCV and dipstick tubes on the front of the engine yet as I had to install the pan first.
I thought there would be enough room to slip them in, but turns out there wasn’t.
Well, the tubes run behind the t-stat housing and water pump, so I had to pull it all back off to install the tubes which pissed me off a bit, but I got it.
But wait there’s more… The dipstick also goes through the engine mount, so I had to pull it all out again and install the mount, then dipstick.
Sucked a bit, but it was easy:
What I learned from that is put the lower end of the engine together first before installing all of the front engine bits…
Wiring harness installed:
I have a terribly expensive, state of the art, smoke machine here at the shop we use to test for leaks. I tested the engine sump for leaks and found one at the drain plug.
Found the plug was damaged so I replaced it with a new one. Also, blocked off and tested the cooling system. No more leaks found anywhere!
I was a bit shocked that I couldn’t find any more leaks, but was very happy to see all was sealed well.
Engine installed into car. Thanks to my brother for staying late after work and helping me shoe horn the damn thing in there! Without him, it would have been an all-night affair.
We got it in and started in just a couple of hours!
Found a lot of coolant and vac lines which were bad, replaced them with industrial hose used in the diesel industry, because it appears the factory hoses kind of suck.
This car only has 75k on it, so they shouldn’t be so bad already.
While everything was out of the way, I also ended up replacing the power steering lines with industrial hose due to the fact that I have never owned an E39 which didn’t have POS factory lines which constantly leaked.
I would rather use industrial line than the garbage BMW uses and not have to ever deal with it again. The industrial line cost just as much as the dealer lines, so why not use the better line.
I started and ran the car through several heat cycles with the intake mani off. The car runs fine that way. The lifters and Vanos were a little pissed off, but after a while it all quieted down and was perfect. No leaks, no noises.
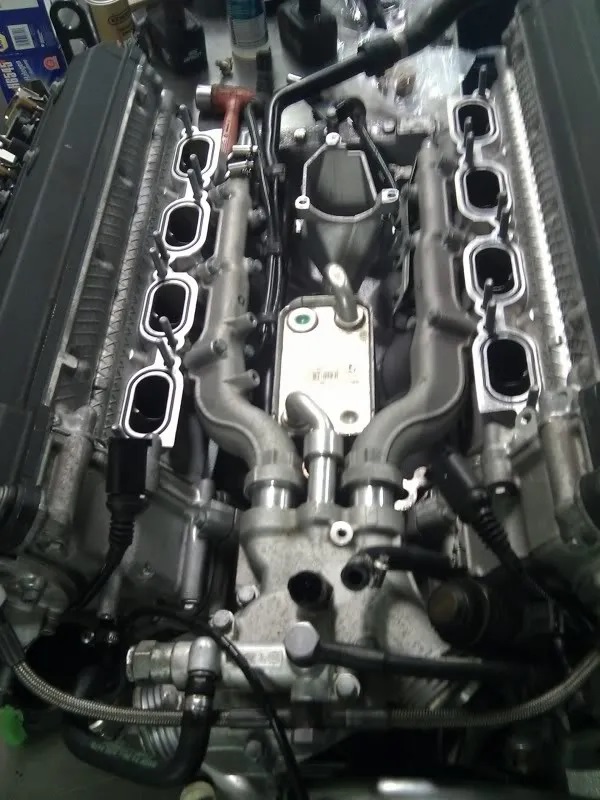
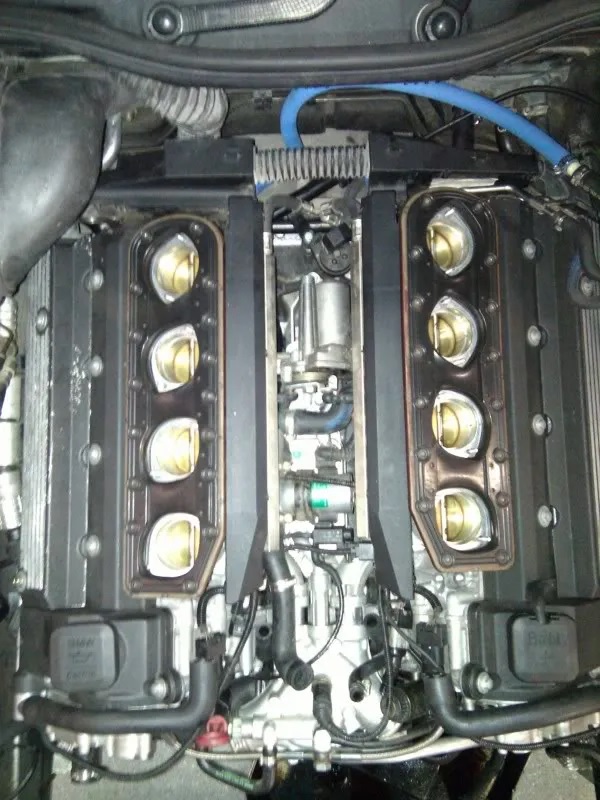
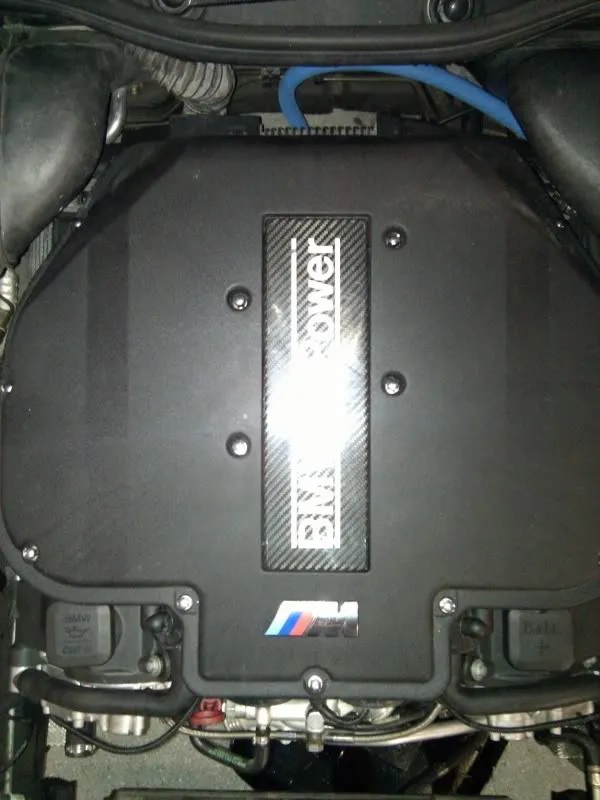
I then installed the rest of the intake manifold and parts:
I changed the oil again (looked very clean and no material in it) and installed Evans 0 pressure coolant in the cooling system after getting the radiator cleaned and re-crimped.
I have Evans coolant in my 280k mile Mitsubishi Galant VR4 and the hoses, water pump, etc seem to live forever with it, so due to the cooling system issues associated with the E39 I decided to use it in my M5.
I predict there will be a much longer water pump and plastics life with this coolant and no pressure in the system. Right now I have pressure in the system to make sure there are no leaks or issues, and so far so good.
Later this week I will convert it to 0 pressure.
I have been driving the car for a couple of days now and it has been flawless. No leaks, no noises and no codes. It’s perfect!
Next week my GF and I are going on a long road trip and we are going to take the M5. I have no doubts that it will be flawless the whole way across the country.
Again, thank-you very much for the informative website! Without you guys I would have had a much harder time getting my M5 to the point it is now.
UPDATE:
Made it back! Car is still perfect and was great to drive the whole trip!
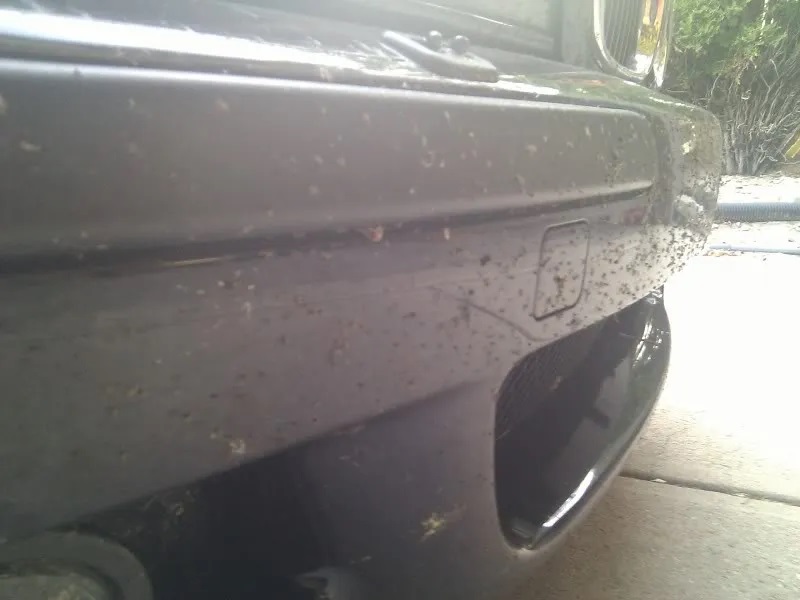
Here’s a pic of the car when we got home.
A lot of bugs:
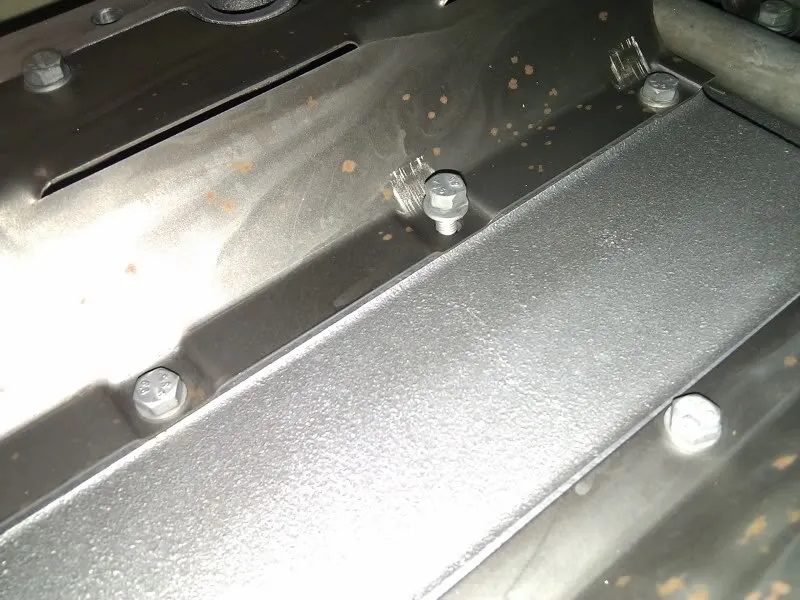
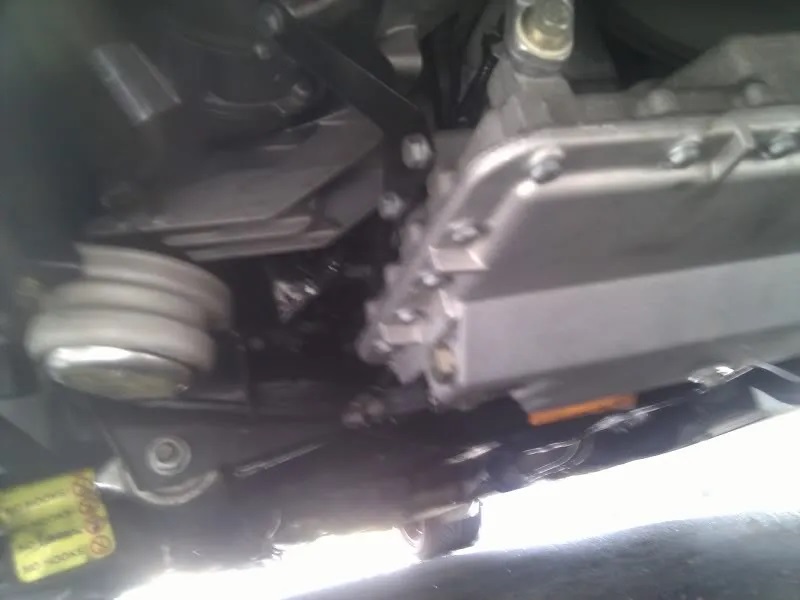
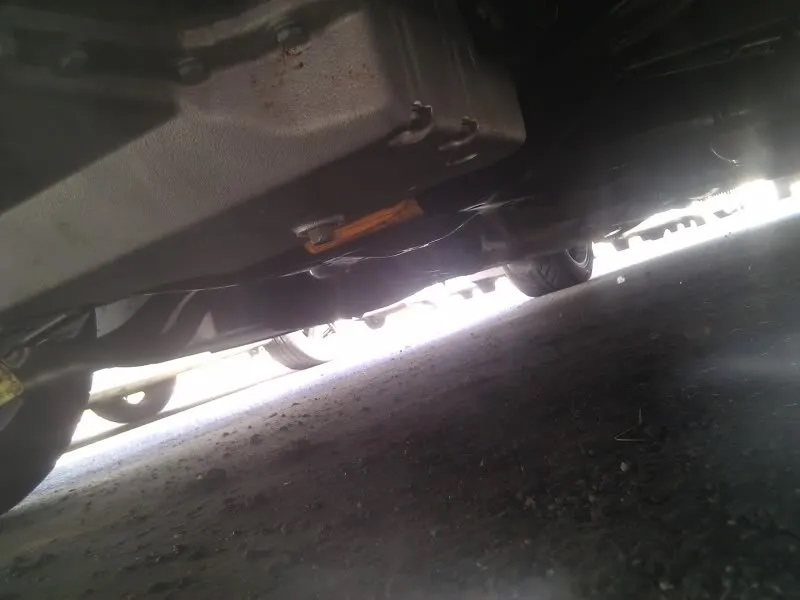
Pic of the underside of the car at the pan while we were at the vacation spot. Was hard to get a good shot, but looks perfect and I will now pop the plastics back on:
I have well over 2k miles on the new engine and no issues. When I pulled the filter and looked through it was totally clean as well!
Glad it all worked out so well considering some of the questionable issues with the block.
Jack