Article by: Vinci
Article applies to: all BMW models with the S52 or M52 engine.
This guide covers the process of replacing the sealing gasket between the oil filter housing assembly and cylinder block of the BMW S52 and M52 engines. This gasket hardens with age and will allow oil to weep though the seal.
It is best to perform this job at the same time as an oil change, as you’ll be draining the oil anyway.
Tools/parts:
This service requires only basic tools. Because of this, I will not list the required tools. The parts list contains all of the parts that I recommend that you have on hand to complete this service. Any optional parts are marked as such.
- 1x Oil filter housing gasket 11421719855
- 2x VANOS oil line banjo fitting crush washer 07119963200
Step 1: Drain the engine oil.
Drain all of the oil from the engine.
Step 2: Disconnect the battery.
Using a 13mm wrench or socket, disconnect the battery in the trunk.
Step 3: Remove the main drive belt.
Remove the dust cap from the main belt drive tensioner pulley.
Using an 8mm “Allen” socket, remove the tension from the main drive belt and pull it off of the alternator pulley. It is not necessary to completely remove the belt or the clutch fan from the engine.
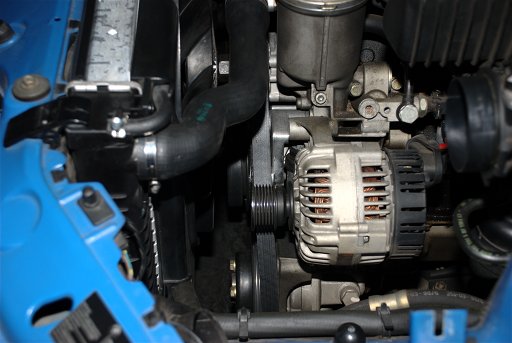
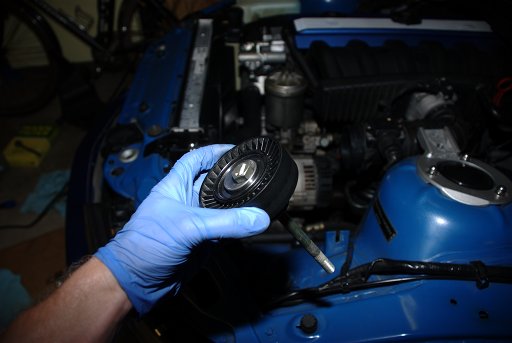
Step 4: Remove the upper idler pulley.
Using a 16mm hex socket, loosen and remove the long bolt that holds the pulley in place. This bolt also serves as the upper fastener for the alternator.
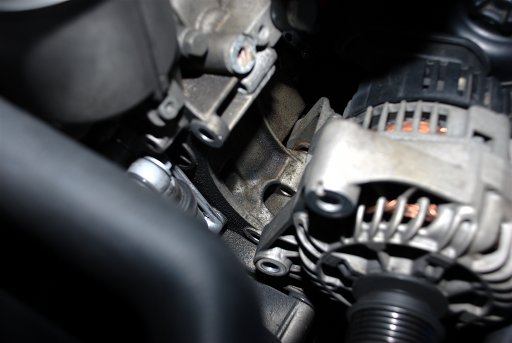
Step 5: Remove the alternator.
Using a 16mm socket, remove the remaining (lower) bolt holding the alternator in place.
The alternator is fitted tightly to the lower mounting and will require some wiggling to come free of it.
Open the sealed housing at the rear of the alternator and disconnect the two power leads from the alternator.
Remove the alternator from the engine bay.

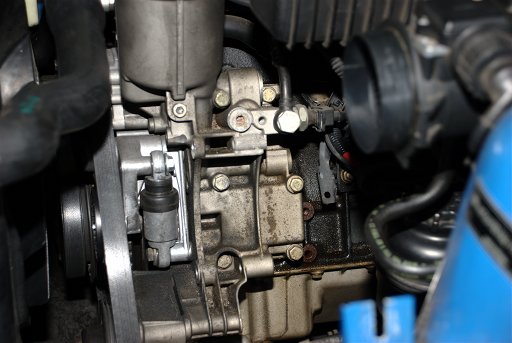
Step 6: Disconnect the VANOS oil line.
Using a 19mm wrench or socket, remove the bolt holding the VANOS oil line banjo fitting in place. There will be a crush washer on each side of the fitting.
Cover the end of the disconnected oil line to prevent dripping.

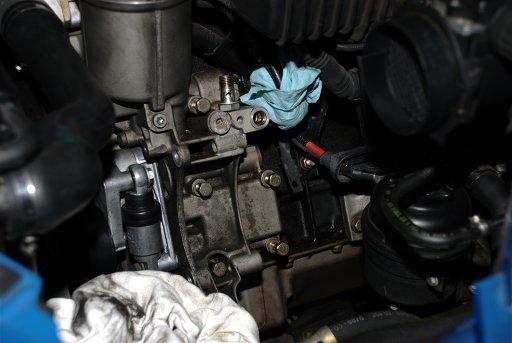
Step 7: Remove the filter housing bolts.
Using a 13mm socket, remove all 7 of the oil filter housing bolts. 6 pass through the housing itself and into the cylinder block. The 7th bolt is located on the power steering pump.
Step 8: Replace the oil filter housing gasket.
Place a catch pan on the ground under the oil filter housing. When you pull the housing away from the cylinder block, some pockets of oil will be released and make a mess.
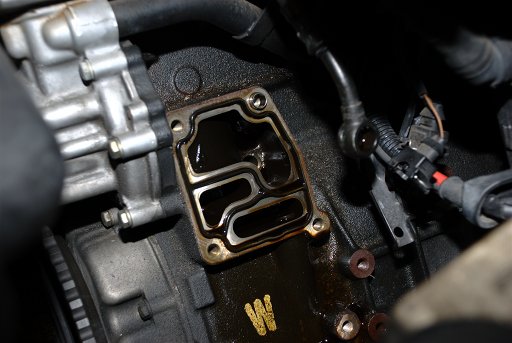
Pull the housing away from the block and tether it to the right to keep it out of the way.
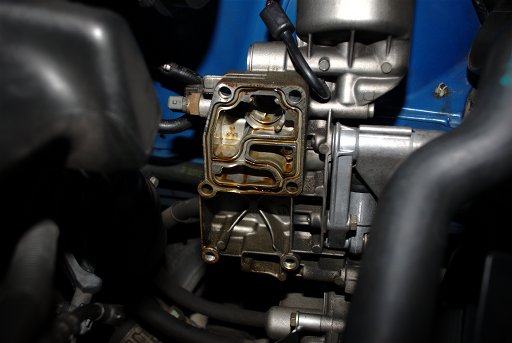
With the filter housing gasket exposed, remove and discard it. If there is any gasket material remaining on the cylinder block, carefully clean it off.
Take a few minutes to clean up any oil that has spilled, including any old oil that has seeped from the old gasket. This will help to determine in the future if the new gasket is still leaking, or if a new leak develops.
Give the new gasket a light film coating of clean oil and install it in the oil filter housing.
Move the filter housing into position against the cylinder block, using the dowels pressed into the block to align it.
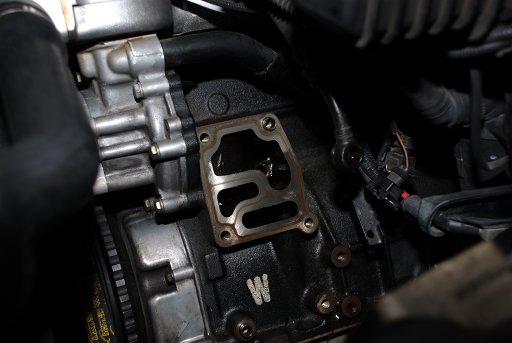
Step 9: Re-install the filter housing bolts.
Insert the 6 filter housing bolts and tighten them evenly in an alternating pattern.
Install and tighten the 7th bolt on the power steering pump.
Step 10: Re-connect the VANOS oil line.
Using new crush washers, reinstall the VANOS oil line banjo fitting.
Step 11: Re-install the alternator.
Re-attach the 2 electrical cables to the back of the alternator and carefully secure the rubber seal around them.
Carefully work the alternator back onto the lower mount. The tolerances here are very tight, and it will take some patience (or luck) to get the alternator back in place.
Leave the lower alternator mounting bolt finger tight for the time being.
Step 12: Re-install the upper idler pulley.
Align the alternator with the top mounting hole and re-install the fixed-position idler pulley.
Tighten both the lower alternator mounting bolt and the idler pulley bolt.
Re-install the fixed-position idler pulley dust cap.
Step 13: Re-install the main drive belt.
Re-install the main drive belt.
Re-install the tensioner pulley dust cover.
Step 14: Re-connect the battery.
Using a 13mm wrench or socket, re-connect the battery in the trunk.
Step 15: Re-fill the engine oil.
Re-fill the engine with oil.