Article by: Winston Fong
Article applies to: all e24 models.
///M fan syndrome or What to do when you have a Kamikaze Fan on the loose What started this was I disassembled the center console for replacement of the bulb to the fan speed dial and A/C switch so I could see the switches at night. After I put it back together the lights work but now the heater fan would only blow at full speed. No matter what the position of the fan speed dial was set at, it was full speed. It doesn’t take long and you get tired of the fan blowing at you full force. I don’t know why but sure seems like I must have done something to cause it. Yet all I did was unplug the switch while the ignition was off. Most likely this failure is coincidental. I found the A/C fan was also affected and ran at full speed. After searching on the Internet I found a lot of information about e24 fans that did not work at the 3 lower speeds but worked at hi-speed. This was due to the heater fan transistor failing in the open position. When working a transistor controls the lower speeds but hi speed bypasses the transistor and runs full speed. Even though my symptoms weren’t the same (fan run full speed all the time) I decided to try replacing the heater transistor. Another cause of loss of lower fan speed can be the transistor in the fan speed dial. I thought may be my moving things around I may have damaged it. I pulled the rotary fan switch out desoldered the transistor, tested it and found it be good. Meaning rotary switch was not my problem.
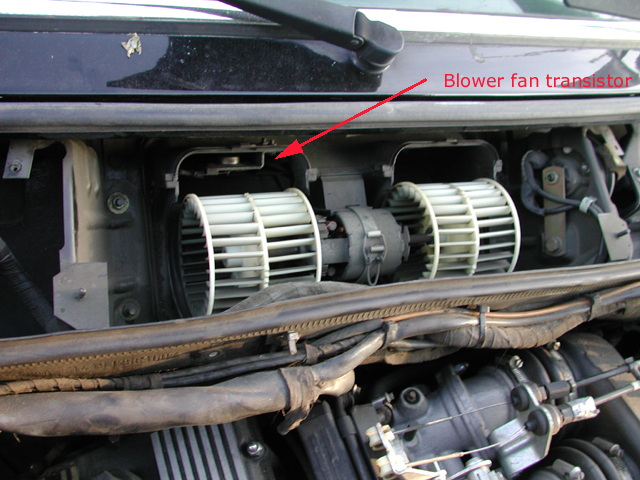
If your fan doesn’t work right when the A/C is in use but does work ok when heat is on. Then it is the A/C fan transistor (different than fan switch transistor) at fault which is located on the right passenger side of the center console. For me it was the heater transistor at fault which is located in the blower housing at the firewall. It had failed in the closed position. To get at the heater transistor under the hood remove the blower covering which is held on by 6 screws. Now remove by prying off the clips holding the upper and lower blower housing together and remove the upper housing covers. Unplug the fan and flip the fan retaining buckle up and remove the fan. Look at the top of the lower passenger side blower housing and you’ll see the transistor. Remove it by undoing the two mounting bolts and unplugging it.

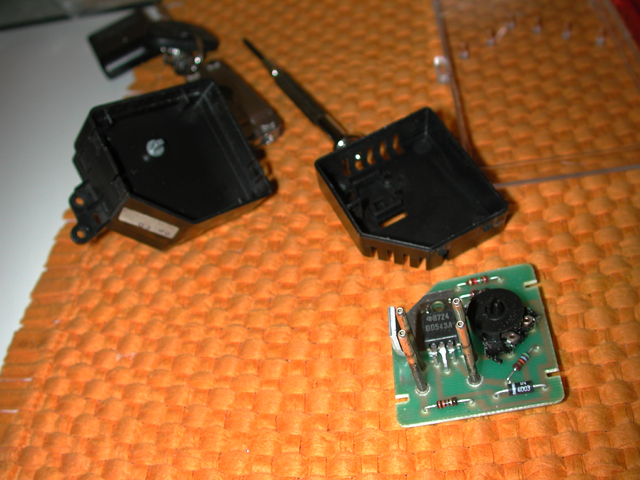
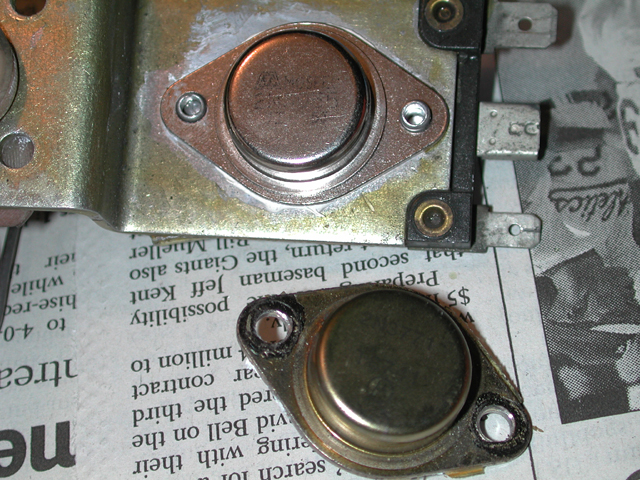
Now you’ll have to drill the rivet heads out. I used a drill bit the same size as the rivet head. Once the rivets are out, desoldered the transistor, capacitor, and resistor using a good soldering iron and soldier sucker. I used a Radio Shack 2n3055 power transistor as a replacement. Supposedly a 2n3772 works, which is a 150-watt vs. 115 watt of Radio Shack. I hunted down some of these 2n3772’s at an electronics store but didn’t install them because after getting them home I found 2 out of three tested bad and the 3rd was questionable. The Radio Shack transistors tested fine so I decided to go with those. I see a few people complain of blowing the new Shack transistor after a short time but I’m also unsure of how they installed it. When installing a transistor use Heat sink grease. To test the transistors in the car you have to pull them out of the board as far as I know. Both the fan speed transistor and the heater blower transistor can be check as NPN transistors. (Two negatives and one positive) Check your new transistors before installing them Mount the new transistor in, resolder all the components, and then cut off the excess on the legs.
Once the board is bolted back in and plugged in you can then place the blower motor back in its original position, plug it in, test for your fan speeds. If it works, you can finish reinstalling the upper fan housing and cover. Mine so far has worked flawlessly since replacement and it has been about 20+ months at this time.
Good luck and happy motoring!