Article by: Winston Fong
Article applies to: E24 M6 Even though this is a M6 all of the E23, E28, etc are very similar.
This article is about replacing a clutch and it’s components in a BMW. Read this entire article before deciding you want to try, since it can be a lot of work. Especially for first timers.
I replaced my E23 (735I) before doing our M6 last year and it was almost the same. (Hey! not all 7’s are automatics)My 735i had 150,000 miles and M6 127,000 miles at replacement. Both of them still had life left in the clutch disc both probably could have gone 200,000 miles before replacement. (I’m not involved in driving school) The only reason I replaced mine was because the release bearing went out. I replaced M6’s because of mileage and my girlfriend was complaining about how hard it was to push the pedal. After I replaced my clutch she drove my car and could not believe how easy it was to push the pedal. It was like pushing on a Honda clutch pedal even though the pressure plate probably has twice the force of a Honda. After replacement I’d say it took 1/5 the energy to push the pedal down. It took me a while to get use to it, I kept slamming the pedal to the floor. On the M6 it wasn’t as big a difference since nothing was really wrong with it but I’d say it was 30-40% easier after replacement.
My release bearing probably had been going out in my 735i for sometime I kept going through clutch master cylinders every 40,000 miles and could not understand why. When M6 has 127,000 mile and she still has the original master cylinder. Its because I had to press very hard to get the clutch to disengage causing a lot of pressure in the hydraulics of the cylinder leading to more wear to the rubber seals. Before I replaced M6 clutch I would drive the M6 and wondered why it was so much easier than my 735i. Finally at 150,000 miles my 735i made this god awful noise. When I removed the release bearing in my car all the bearings were gone it was running metal to metal.
You’ll need a good floor jack, stands or blocks to place the car on, torx sockets for the tranny bolts, torque wrench, pilot bearing removal tool(should you decide to replace it), clutch alignment tool (PEP boys is good I bought it there for $3.00 rather than buying it for $10.00 thru some mail order places), a good assortment of sockets, wrenches, extensions, and other tools.
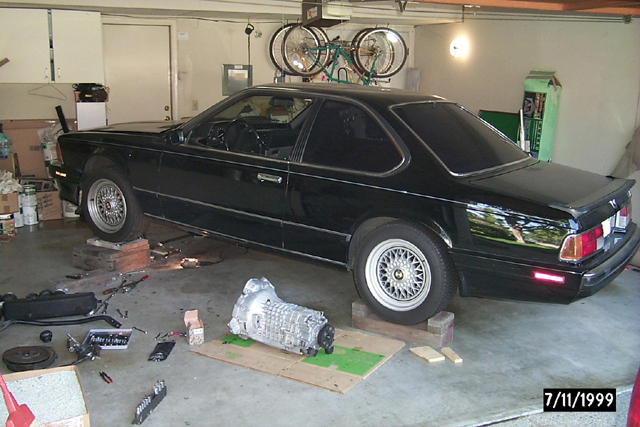
You maybe able to see I didn’t get the car real high up and you may want to get it higher since it will make it easier with more room to work. Don’t forget to tell your honey your taking over the garage for a week.
After getting it up on blocks shake the car hard and make sure its not coming down on your head.
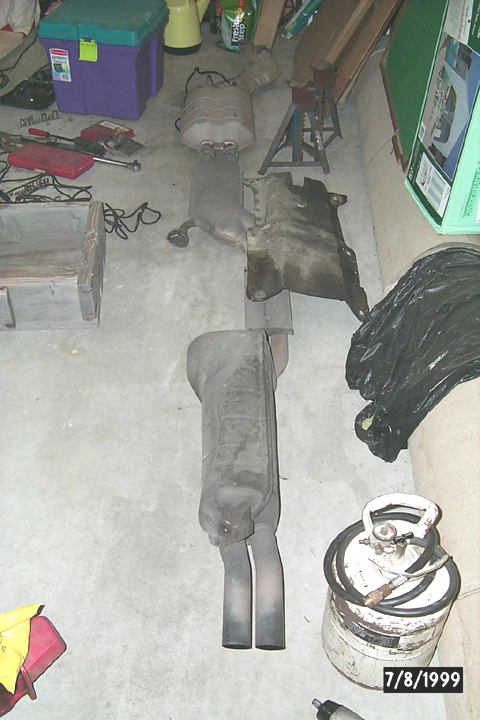
Next remove the oxygen sensor then the exhaust and catalytic converter, especially since the converter is so big on this car, then heat shield.
Next remove the driveshaft and while at it check for excessive play at the centering guide bearing,(located at the front of the drive shaft) u-joints and center bearing before removal. You’ll need your honey for this, have her put the emergency brake on each time after you’ve jack up one wheel and rotate it so you can get to each nut at the differential and guibo. You’ll have to jack up both wheels with a limited slip diff. Make sure to block front wheels. This makes it easier, than you climbing out from under each time (That’s what I had to do). Don’t forget to undo the center bearing. You can now more closely inspect the guibo, u-joints, center bearing for needed replacement.
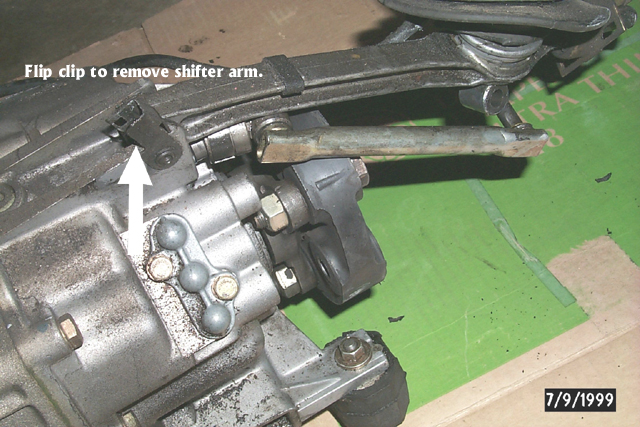
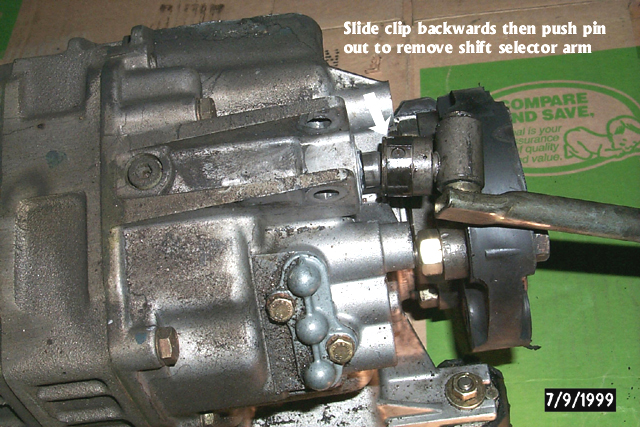
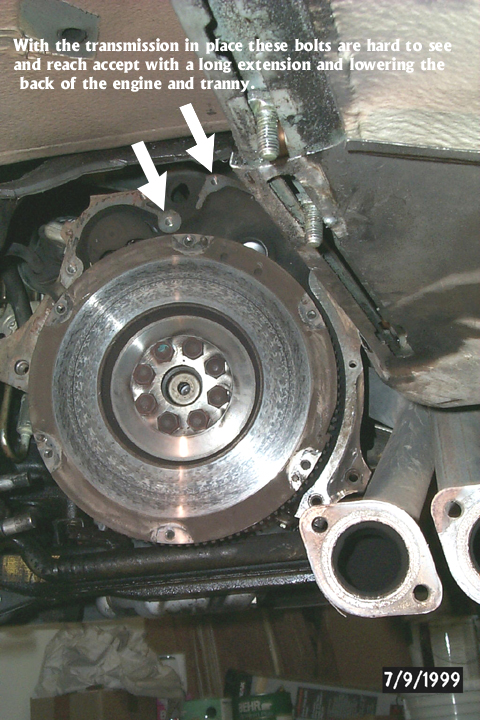
On the M6 you will have to remove the intake plenum, and disconnect the sway bar from the frame in order to have room to lower the engine and tranny. For me it was easier to completely remove the sway bar for more room. You may have to remove the fan if it gets to close to the radiator upon lowering. Disconnect the back up light switch and remove wiring from transmission. Remove the speedo cable and magnetic sensors for flywheel pickup by unbolting the cover and sensors (note hole which each pickup sensor came out of). Disconnect the shift mechanism if you can get to it. My 735 had two bolts holding it to the back of the tranny. On the M6 it uses a clip at the inside middle of the tranny. Both had one bolt holding it to the body. Unfortunately my hand and screwdriver could not fit into middle of the tranny to remove the clip. (You younger guys might be able) There for I had to drop the shifter with the tranny. If someone super glued the shift knob you can wire the shifter to the head rest to hold it in place. That’s what I had to do on my 735i. Luckily, I used silicone on the M6 shift knob which holds well yet when you need to you can still twist it off. Remove the four bolts holding the flywheel cover on the bottom. Then remove the torx bolts holding the tranny to the engine block. Hardened black oxide finish torx sockets made for a impact gun should be used. The torx bolts can be so tight that they can and did split regular torx sockets. You’ll need 3 feet of extension bars in order to reach the upper bolts from the back of the transmission. Word of note: Eta engines and others may have to remove the starter, check before prying apart. Gently pry the tranny and engine apart while having your floor jack or other support under the transmission. Don’t force it, otherwise you’ll crack the housing. check very carefully that you undid all the bolts especially the top bolts which are hard to see. I didn’t use a transmission jack I just used my floor jack to lower and then raise the transmissions back up.
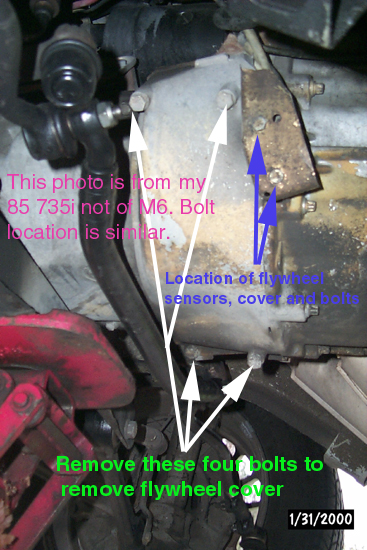
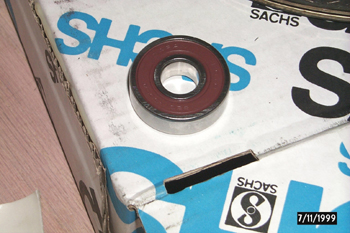
Below: After removal of the shift selector arm check for oil leakage. This seal commonly leaks and needs to be replaced.
Note leakage from output shaft seal and vent on top also.
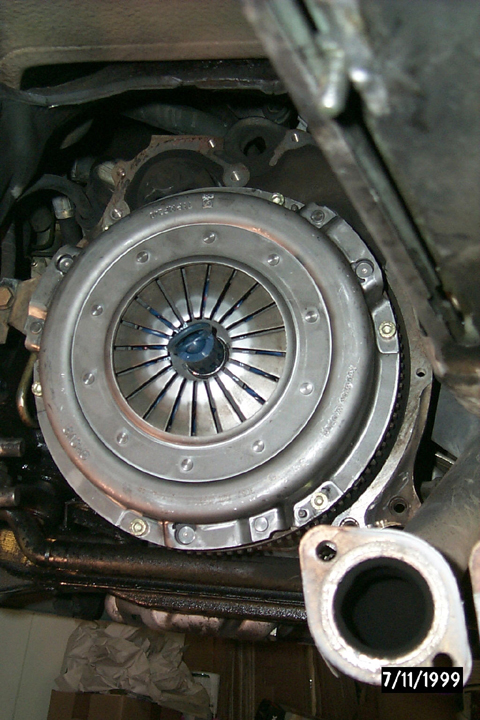
Now that you have the Tranny out you can start unbolting the pressure plate. This can cause some grief because they use hex head bolts which always round out and then you end up using vise grips or other means to remove them. Try to remove the bolts evenly, and make sure you don’t drop the pressure plate on your head it is very heavy. (Let the Hack Mechanic aka Rob Siegel do that.) After removing the pilot and release bearing. Read the articles at these websites and see if you agree before putting them back in.
Apparently greasing the throw out bearing/main shaft causes the dust to build up and jam the sliding action of the throw out bearing. I’m not sure if I agree with the first article because I greased mine and hers with Mobile one synthetic grease and yes it makes it really easy to operate the clutch. So far I’ve driven 65,000 miles on my 7 with no problem accept it is much easier than before. Of course it is a factory bulletin so I maybe wrong and end up pulling the trannys again to clean up the mess in the release bearing. In the second article one user greased his throw out bearing after his wife complained how hard the clutch was, and how both say it was easier after greasing the throw out bearing. I do agree with that. Any way you will have to decide if you want to grease it.
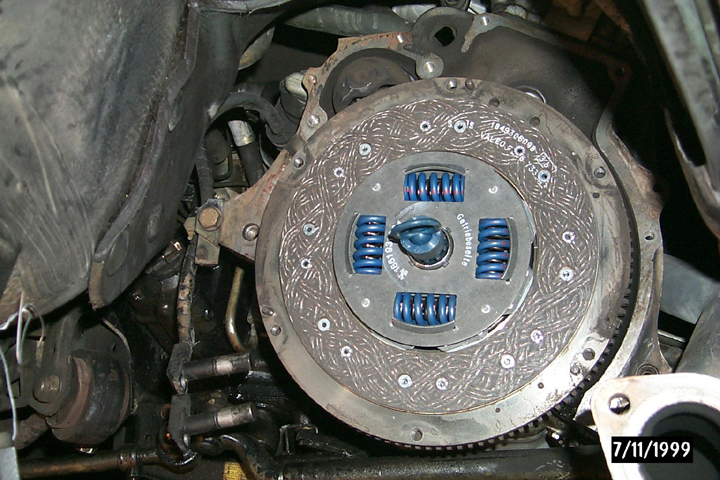
Inspect the flywheel for damage. Both of ours were in good shape as you can see by the photo of the M6. It may look like a grove is worn into it but actually it is quite flat. If it appears damaged or rivets ground into it you’ll probably want to replace it. I don’t know if I would bother to resurface it since I understand BMW heat treats it and you would lose this if milled.
Does anyone know if this is true?
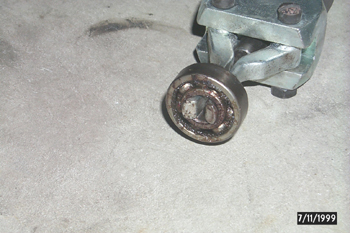
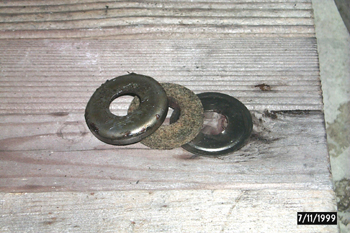
Below left: Pilot bearing after being removed with a removal tool. BMW pilot bearings fit tight and don’t always come out in one piece. Along with it will come the leather seal on the right with covers.
Sealed bearing is suppose to be exclusive to the M6??? That’s not what came out of it.
Use the clutch alignment tool while installing the disc and pressure plate so everything lines up. If the fingers look uneven, distorted, or off center loosen and try tightening again.
With the pressure plate properly tighten down, you can now put the transmission back in. Raise it up so that the input shaft is even with the splines in the clutch plate and push it in. You may have to shake or twist the tranny some. If it doesn’t go in you may have to try aligning the clutch plate again. Make sure you support the weight of the transmission, if you don’t it’s possible too bend the clutch plate. Once the tranny is all the way in you can bolt it up to the engine. Start putting everything back in the reverse order.
When you’re done be easy on the clutch for at least a couple hundred miles till it’s broken in.
Have fun and enjoy your new clutch!