Article by: Gerry at PhoenixMotorsport
Article applies to: all e31 models
As promised, here is another “How To” on the overhaul of the ashtray with the possibility of a repair, and how to remove and install the dash fascia, center console, MID/Radio/Heater control fascia and coin tray in the rear.
Starting at the rear and working forward, to remove the small coin tray, using a small trim tool, or carefully with a thin screwdriver, pry the edge up of the insert . . .

and when one side clips out, the tray can be lifted away.

revealing a single self tapping screw that holds the back side of the surround down.

The rear of the surround can be lifted up and forwards and the tray surround removed to reveal another 2 screws . . .

Which when removed, allow the complete removal of the forward facing tray.

To refit is simply a reversal of the procedure. It should be noted that to refit the surround, you need to locate the 2 lower tabs (position indicated) . . .

under the trim and gently guide the forward facing tray into the recess in the surround. The coin tray then just presses in position after the rear screw has been refitted.
Moving forward, we get to the handbrake lever and trim. To remove the gaiter, again use our trusty trim tool under the rear of the surround where shown . . .
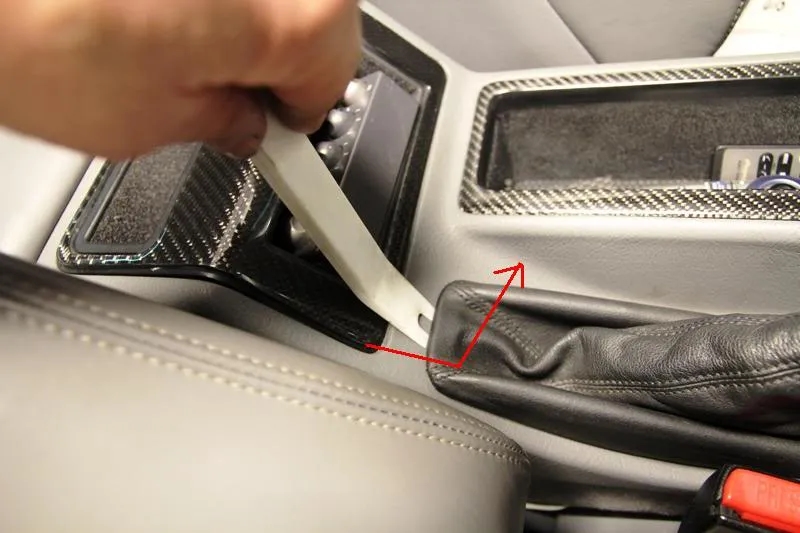
and swing the gaiter up and then slide the front back.

The small trim piece ahead of it then slides backwards and then lifts at the rear.

Here you can see the tabs that hold it in position at the front.

Next we get to the center console and ashtray assembly which also incorporates the hazard warning light switch.

Firstly, it will be noted that there are no visible fixings . . .

however, hidden beneath a small section of soft trim which just lifts out, there are 2 small blanking plugs covering 2 screws . . .

We now need to remove the ashtray. So, with the lid open, slide back the lever as shown to eject the inner tray . . .
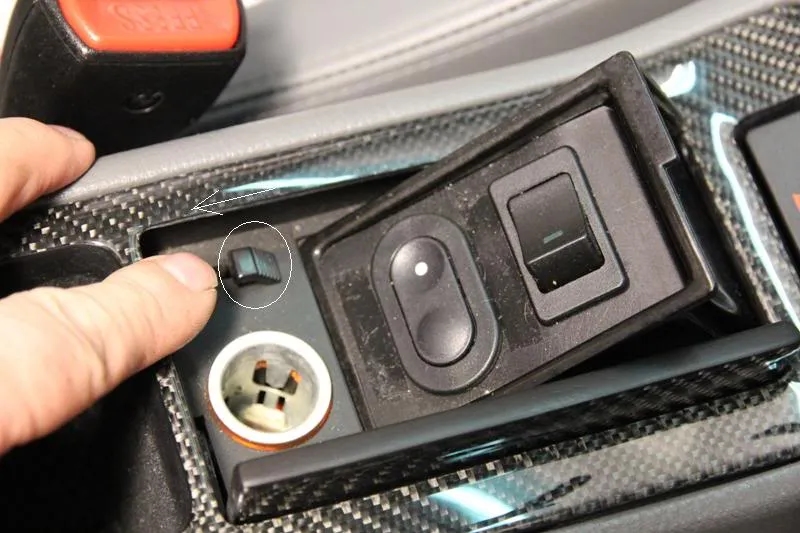
lifting it away to reveal a secret fixing screw.(removed as shown)


We can now lift the rear of the tray . . .

sufficiently to be able to unplug the hazard warning switch and the connectors to the lighter element and tray lighting.

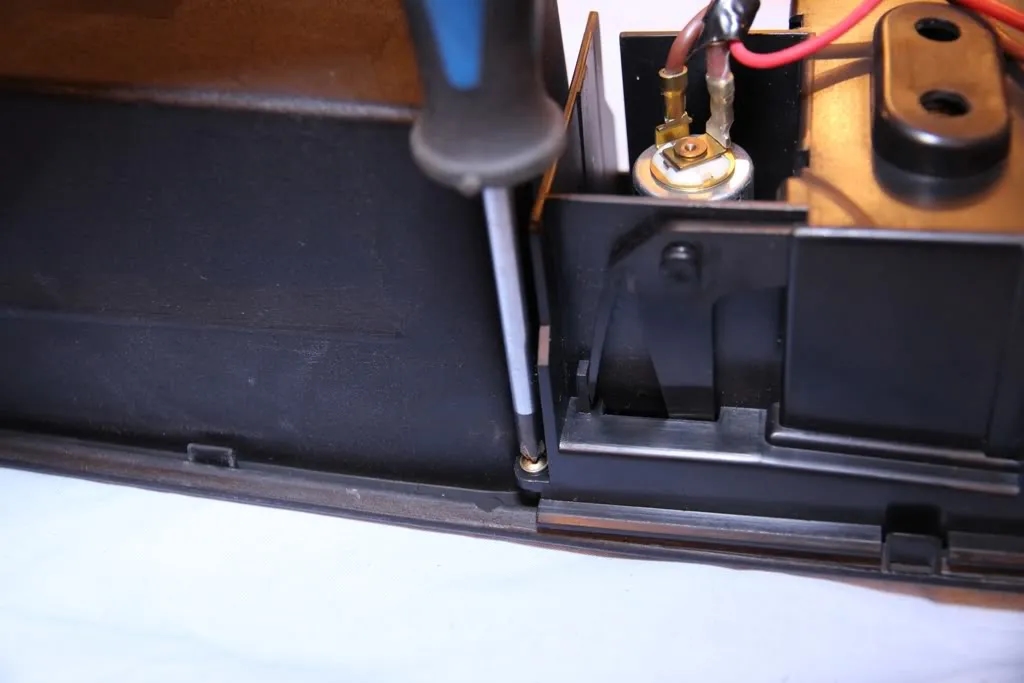
If we are now going to overhaul the ashtray lid mechanism, we now need to remove the ashtray from the console by removing the 4 screws retaining it.

2 at the front followed by 2 at the rear.
So now jumping ahead a bit, with everything stripped, if you are going to get an operational lid, these are the parts you should have . . .

Here you can see a mark on the inside of the plastic tray where the spring fits . . .
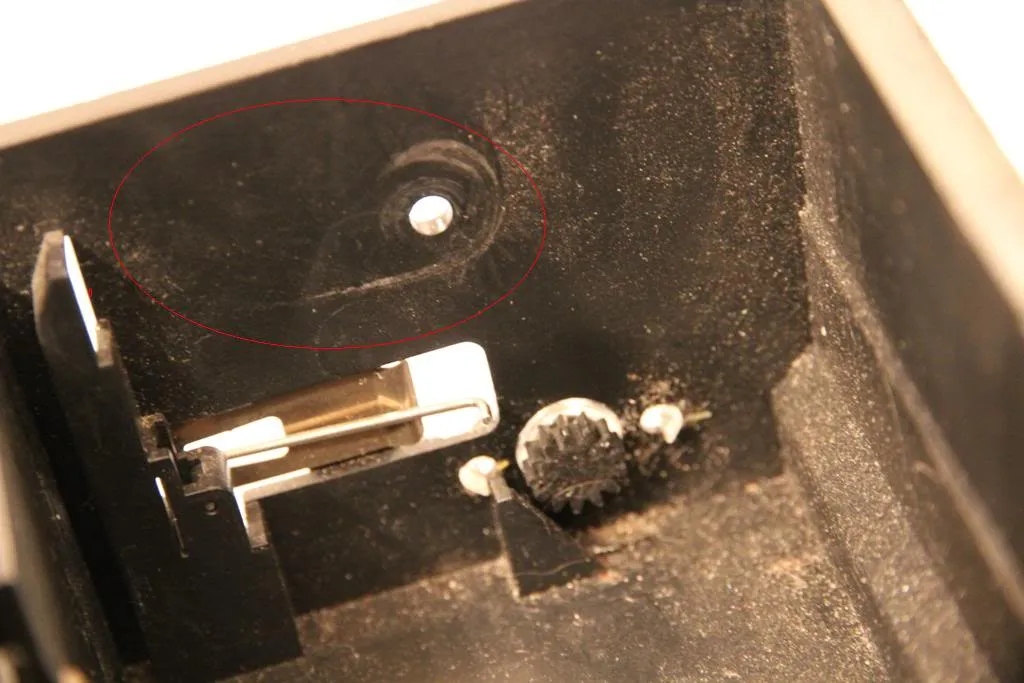
Here you can see the guide pin and leaf spring from the other side . . .

The torsion spring locates in this hole in the side of the tray lid . . .

like this……with the coil around the pivot bushing . . .

You can then do a preliminary (and deliberately incorrect) refit of the lid, hooking the spring in the wrong place as shown on the left, and loosely refitting the plastic pivot where shown on the right . . .

Here is a better pic of where you need to incorrectly refit the spring.

Here you can see the plastic hinge pivot previously mentioned, just partially refitted.

Refitting as shown, allows a lot of movement to jiggle the lid around and align it without stressing any of the undoubtedly fragile plastic parts.
Here you can see the pivot hole for the other end and the guide pin.

As a side note, the small circuler part on the lower left is a rotary damper and the teeth of this as seen earlier, mesh with the teeth on the lid so it does not fly open uncontrollably.
Carrying on, we now need to take advantage of the sloppiness in the lid and using a small implement, I am using a small pick here . . .

We need to lever the pin into the guide channel in the side of the lid door. THIS IS WHERE YOU WILL BREAK SOMETHING IF YOU GET HEAVY HANDED!!