Article by: Gerry at PhoenixMotorsport
Article applies to: BMW E31 models.
With the extreme cost of a replacement wiper linkage pivot section, £800.00+ or $1300.00+, I decided to see what the general cause of failure was and if there could be some repair carried-out.
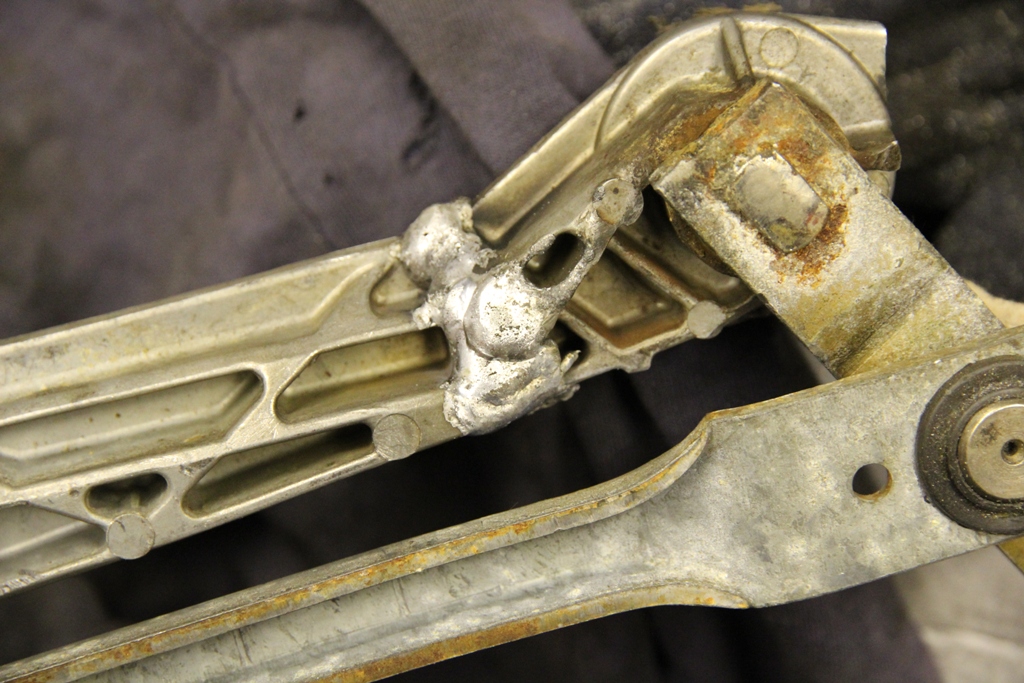
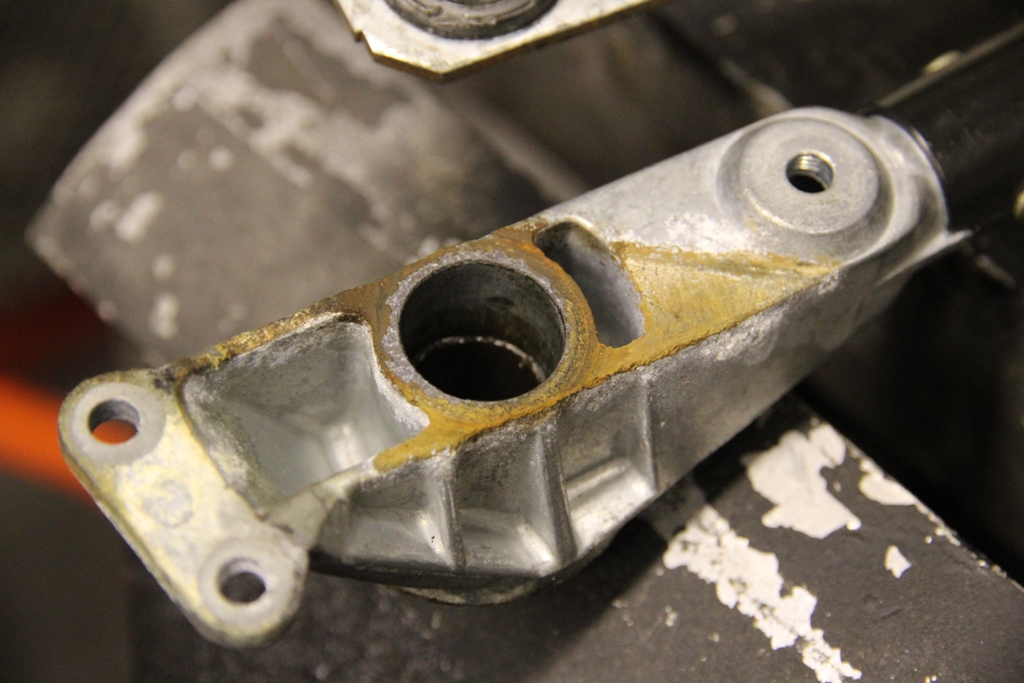
I started out with 2 faulty linkages, both with different faults, one a seized linkage and the other, a broken alloy frame.
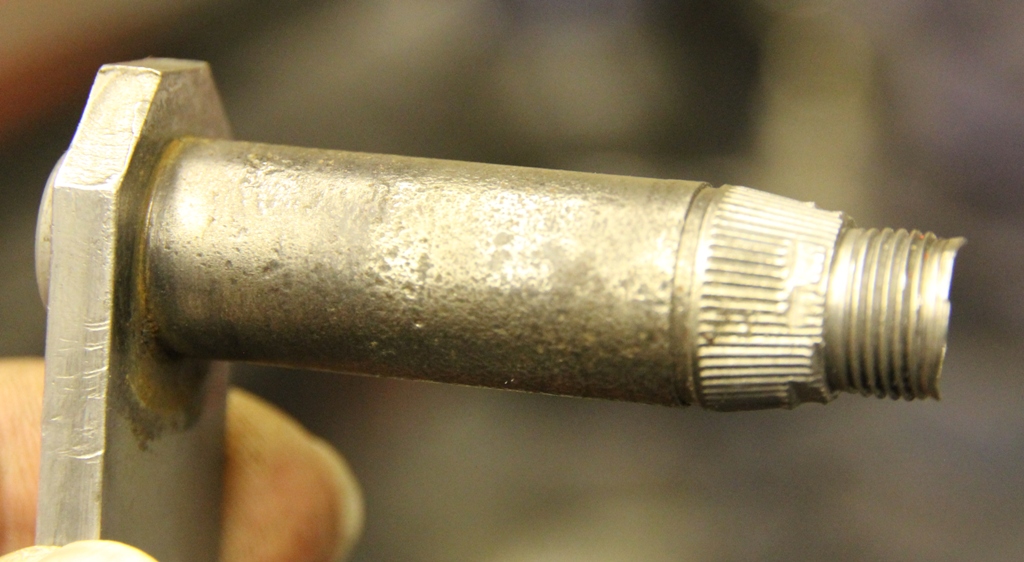
Linkage one was seized, starting off getting slower and slower until it no longer worked at all, and the second one was perfect, until I broke it in the removal attempt. The cause of that was severe corrosion around the large 30mm nut holding the linkage to the scuttle panel.
In hindsight, using all sorts of anti-seize sprays etc, to free it off and then using a substantial ½” drive wrench was not the answer as it twisted the entire boss until the alloy member broke. The way to do this is give up trying to undo it early on, and CUT the nut off rather than persevere with the 30mm socket.
Anyway, I’ll not go into detail on how to remove the linkage, but once off, if you have a broken frame section, with a good welder and the correct welding material, it can be repaired.
However, assuming YOU did not cause the breakage, the most likely culprit will be a seized pivot.
To attempt the removal of the pivot, seized or otherwise, the first job is to remove the wiper pressure actuator by removing the 3 small Torx bolts.
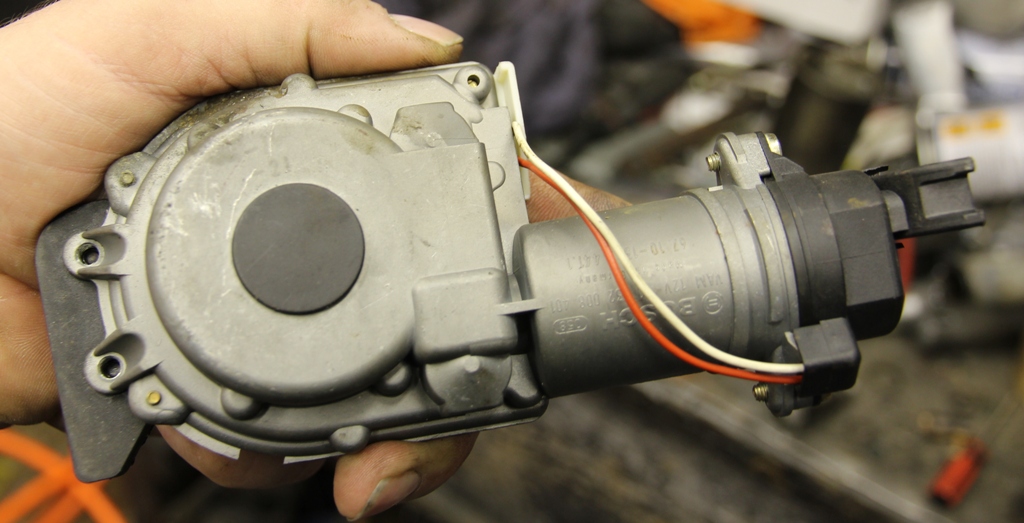
When it comes away, make sure you do not lose the small brass bush shown.
This is what applies pressure to the drivers’ wiper arm as road speed increases to prevent the wiper “floating” off the screen.

Next, pop off the linkage arm from the plastic ball-and-socket connections.
Next, remove the circlip and then the shim from the pivot.
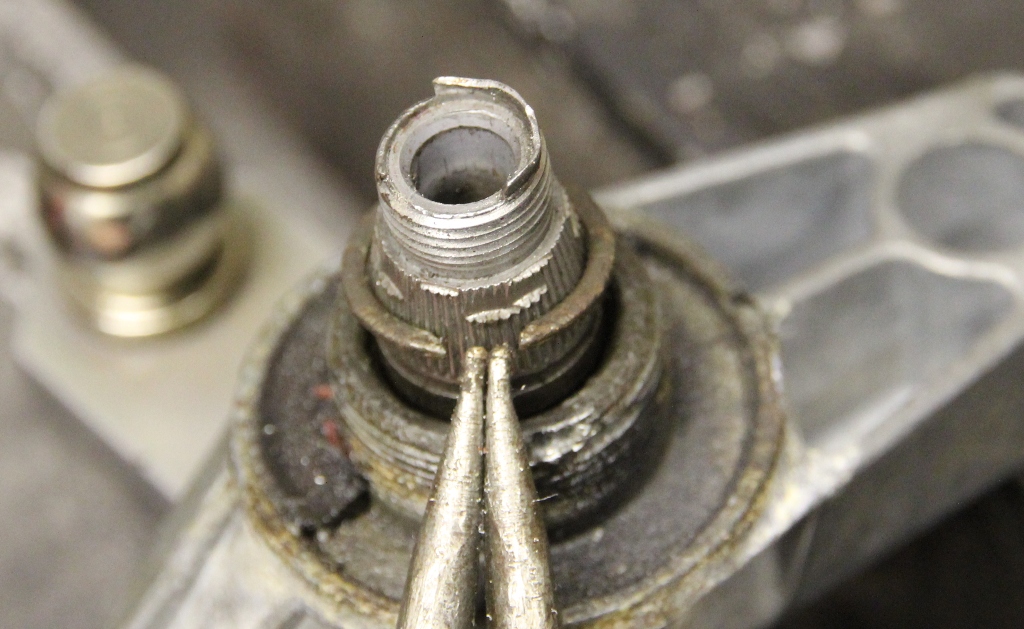
Now it gets very tricky.
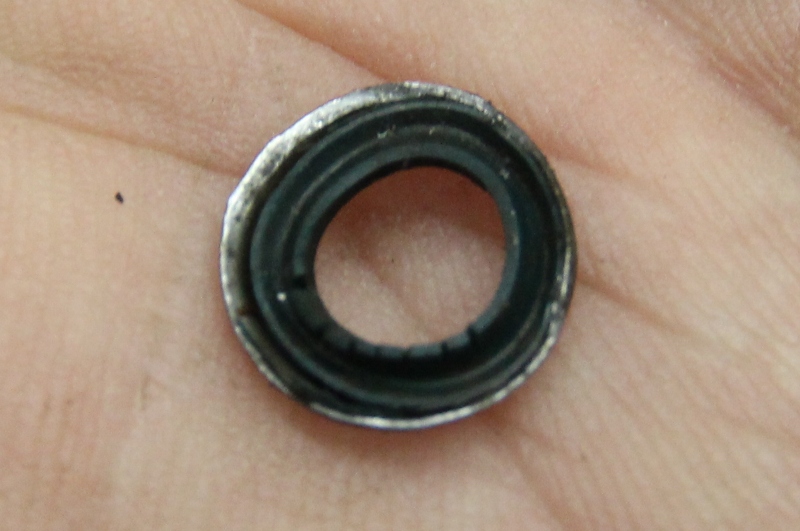
The end of the pivot on the pressure actuator side is VERY thin wall, and contains the “O” ring seal shown, This “O” ring seals the pin that locates through the center of the pivot, pressing on the underside of the wiper arm.
and trying to press it out will probably result in damage like this.
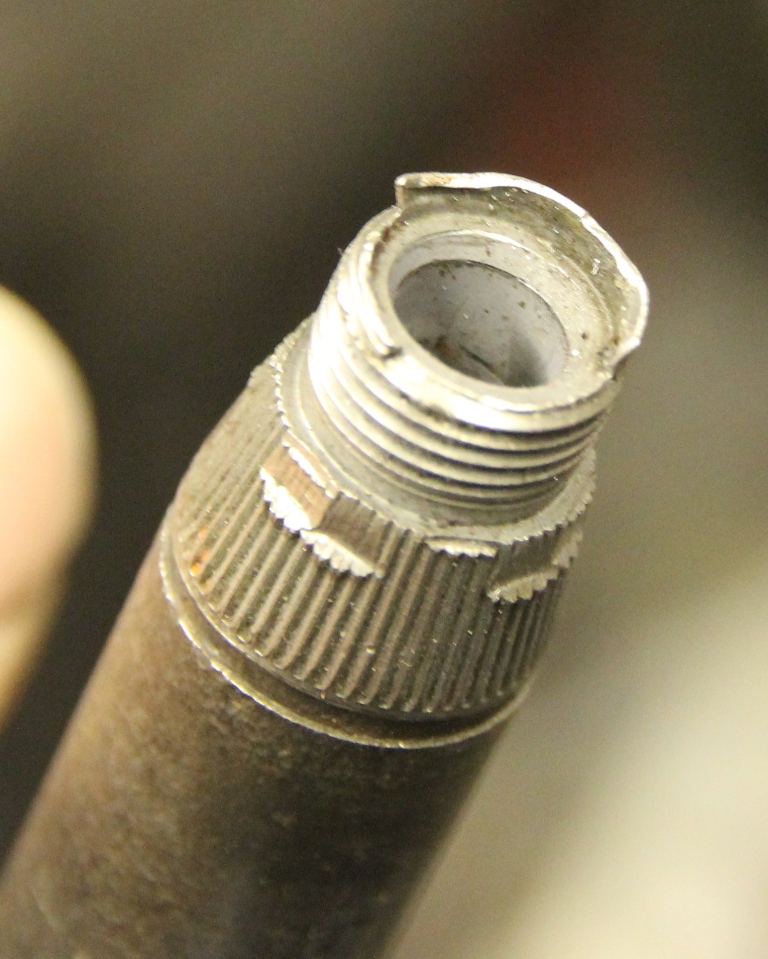
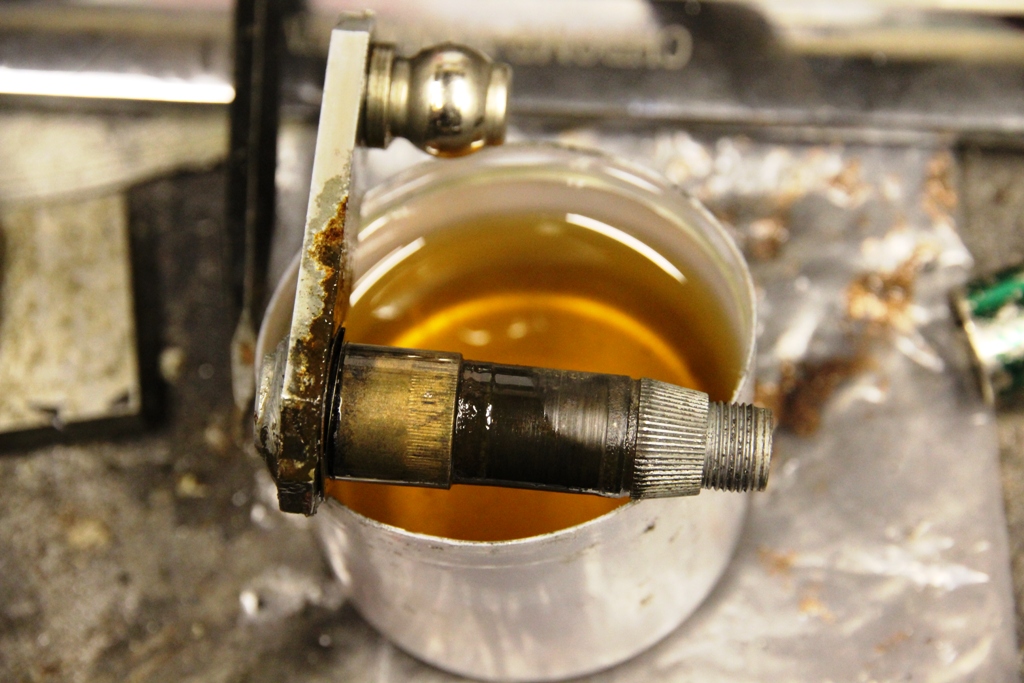
You need to soak the end in penetrating spray and then drift out the pivot from the linkage side. This can be very tight and may be where your repair all ends in tears.
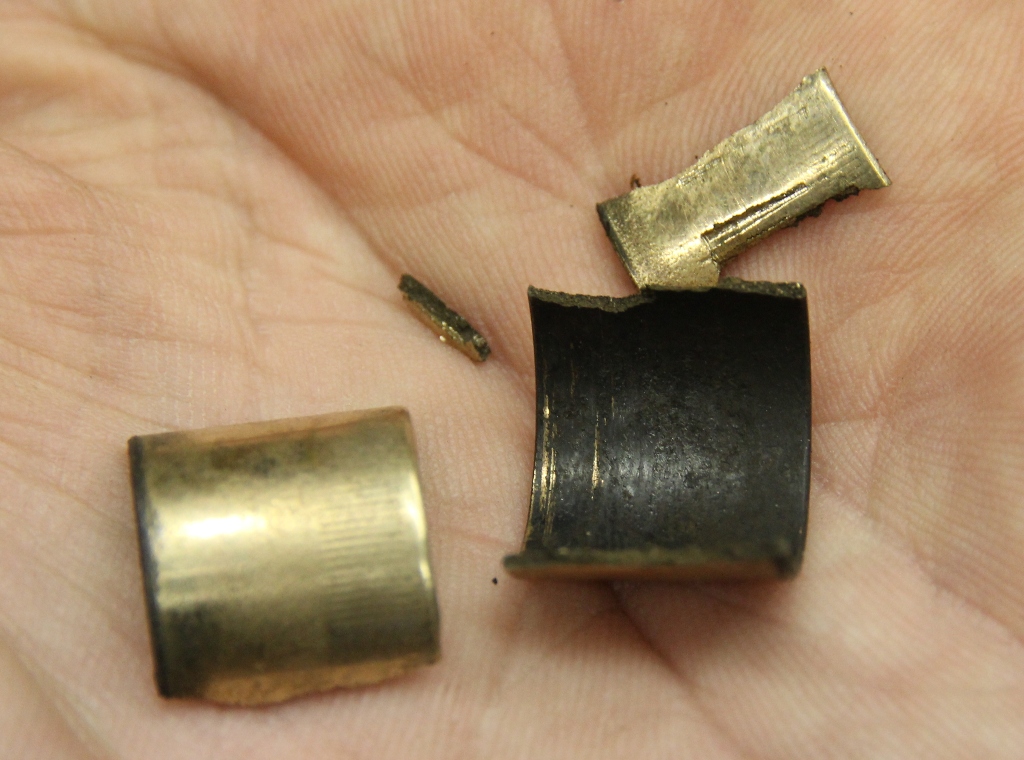
The problem is . . . there are 2 copper bushes pressed into the alloy housing which act as plain bearings, however, the “O” ring seal lets dirt and water in, the steel pivot rusts and bites/binds into the copper, so that instead of the pivot rotating in the bush, the bush starts rotating in the housing.
Therefore, when you try to remove it, instead of sliding the pivot out of the bush, you are forcing the captive bush out of the housing.
If you get the pivot assembly out without damage, then you need to remove the seized bush from the pivot.
Here I am soaking the whole assembly in penetrating oil overnight as the first attempt just shattered the now brittle copper bush.
This was successful at the second attempt after 48 hours and the bush came off without further damage.

I now decided that to rebuild would require new bushes so I turned down some bronze bar, the same as the headlamp pivots I recently made, to press into the housing, with a nice sliding clearance for the thoroughly cleaned pivot.
The poor surface finish of the pivot, whilst not abrasive, is heavily pitted from rust and will hopefully retain the assembly grease I am using.
Firstly, fit the shims to the pivot in the order shown, then slide the greased pivot into the housing containing the new bush.
I expected the shims to be factory selected to obtain a specific end-float but both linkages came with exactly the same thickness shims. Coincidence maybe?

The first to go on is the medium thickness 0.4mm shim, followed by the razor thin 0.15mm shim, insert the pivot and then refit the outer shim, the thickest at 1.15mm thick, followed by the circlip.
Assembly is shown here with the old badly worn copper bush.
You can now pop-on the old link arm and check for smooth and free movement.
Refit the pressure actuator, not forgetting the brass bush and you are ready to refit your good-as-new linkage, happy in the knowledge it should last another 20 years.