Article by: Gerry at PhoenixMotorsport
Article applies to: BMW E31 models.
Ok, so a few weeks ago I stripped down my 14 year old charcoal canister filter so see what was in it. I pretty much expected it to be destruction testing but it was actually pretty straightforward.
With my car having just 40k miles and having been garaged all it’s life, I was surprised to see surface rust along the lowest edge of the canister and with it being full of petrol fumes, about 6″ away from the exhaust manifold.
I would recommend anyone to check the structural integrity of theirs at periodic intervals. (Maybe Bi-Annually?)
So, with mine being pretty sound, I investigated the possibility of rebuilding it.
Now as you all know, I am not a purist when it comes to my car  and my personal philosophy is, that if I can make something better than it was, then the cost is secondary.
If I can make something of equal or better quality for the same price, then fine, but I will not entertain saving money on an inferior product.
In this case, I believe we can rebuild the canister for about 10% of its replacement cost, plus an hours labor, at the same quality.
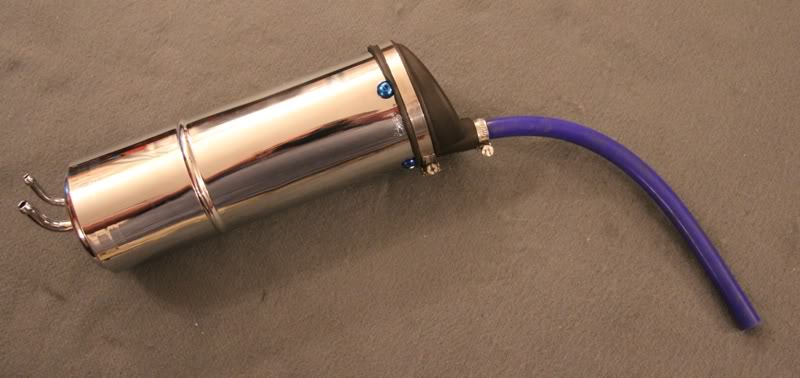
So this is what we start with . . .
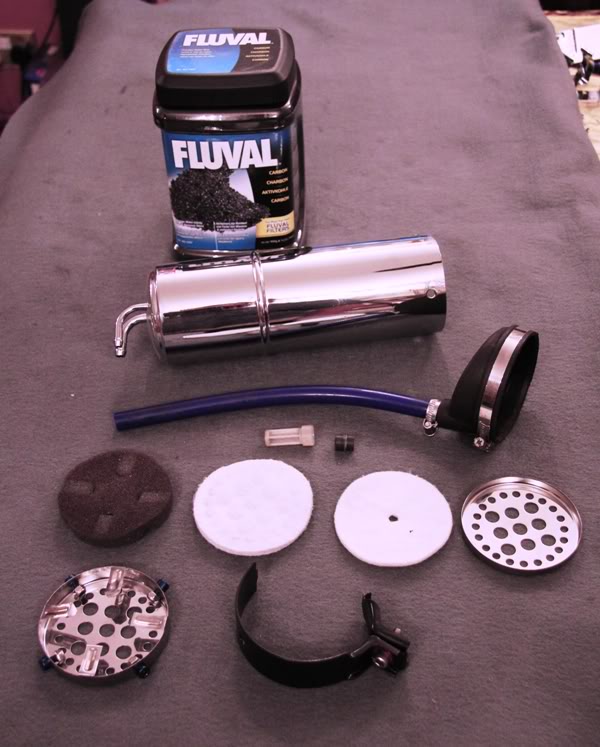
Now if your canister has more than surface rust then forget the whole thing and buy a new one.
If corrosion is just surface, then the empty canister can be blasted and powder coated.
I have polished and chromed mine to reflect the radiant heat from the exhaust manifold.
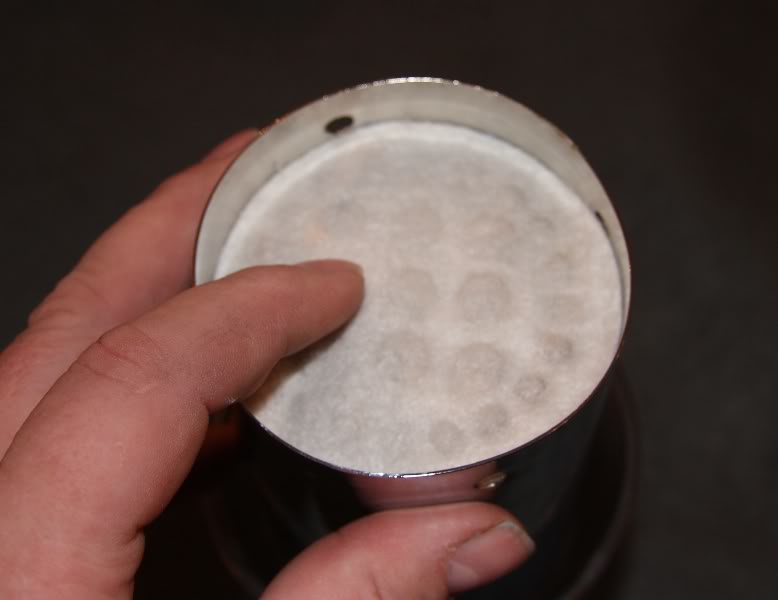
I found that a 60 deg short wash with a 1200 spin speed nicely cleaned the 2 fiber and single foam filters. 
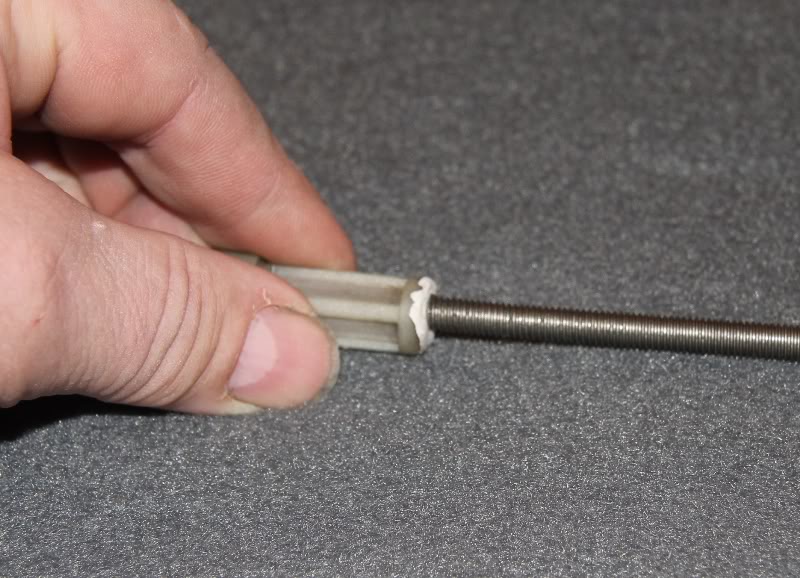
To re-assemble, I used a length of 6mm rod to guide the parts onto the inner spout.
Starting with the first steel mesh . . .
Followed by the slightly smaller fiber filter . . .
and then separating the short rubber tube from the nylon filter . . .
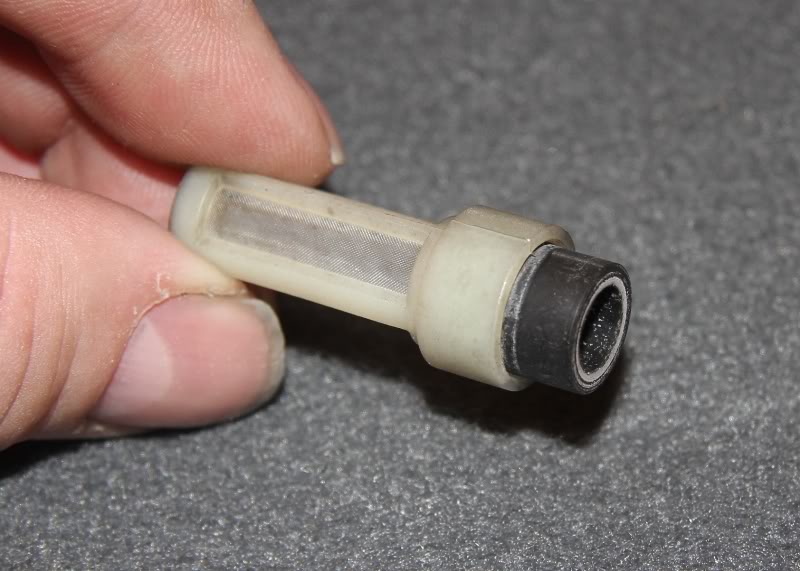
Fitted the rubber by sliding it down the stud.
Then, using a putty adhesive (Blu-Tac) on the end of the stud . . .
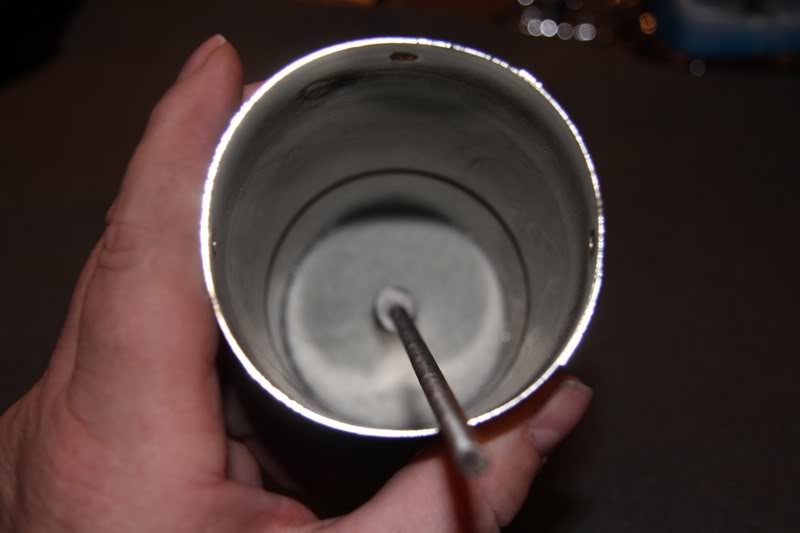
Fitted the filter back onto the seal inside the canister.
Next, using half a jar of aquarium activated carbon filter media, or about £6.00 worth, refill the canister.
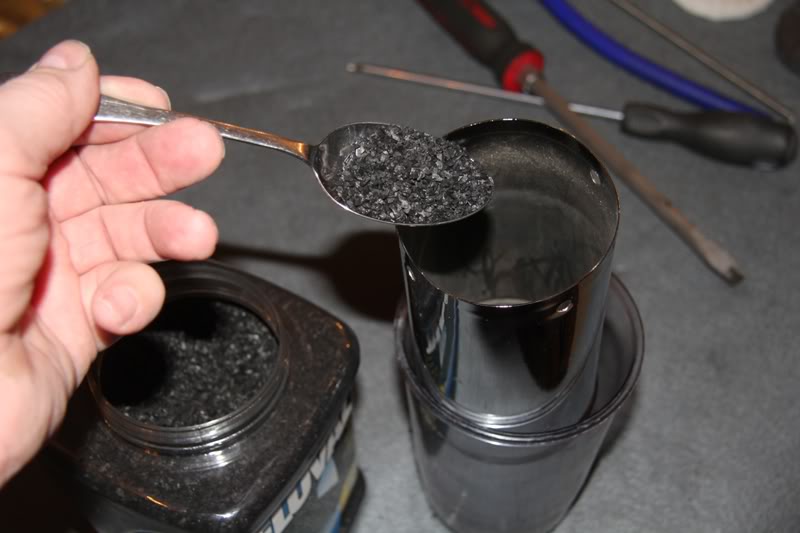
Shaking the canister gently as you go to settle the carbon.
Continue this until the canister is very slightly fuller than before.
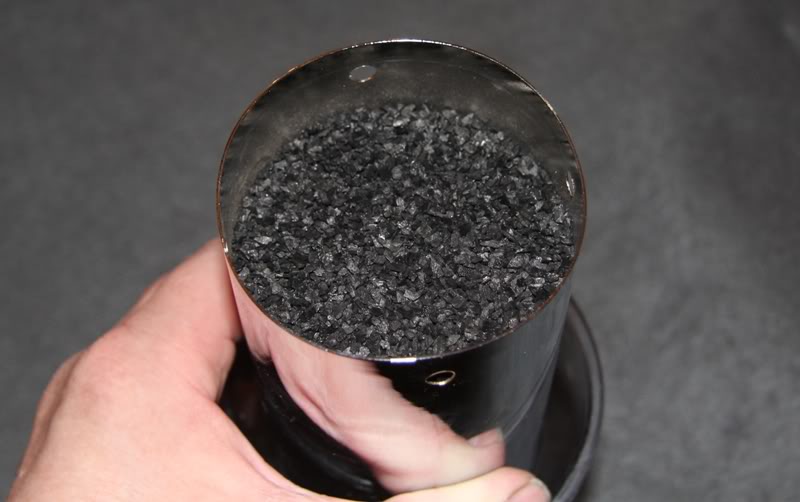
Then refit the second fiber filter pad.
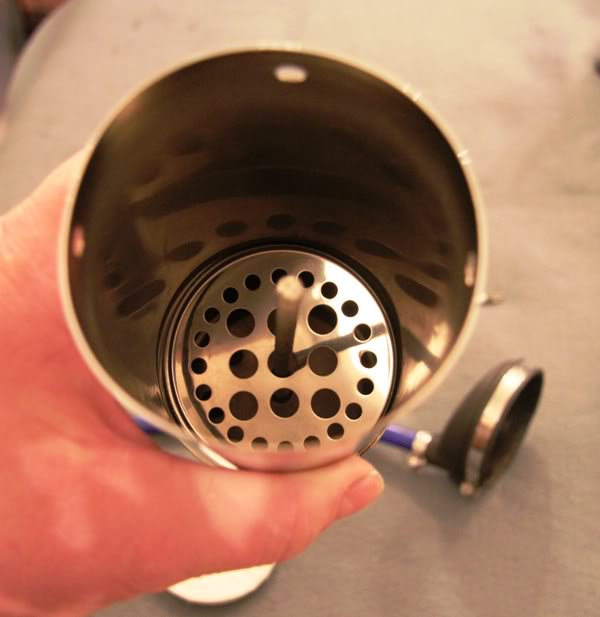
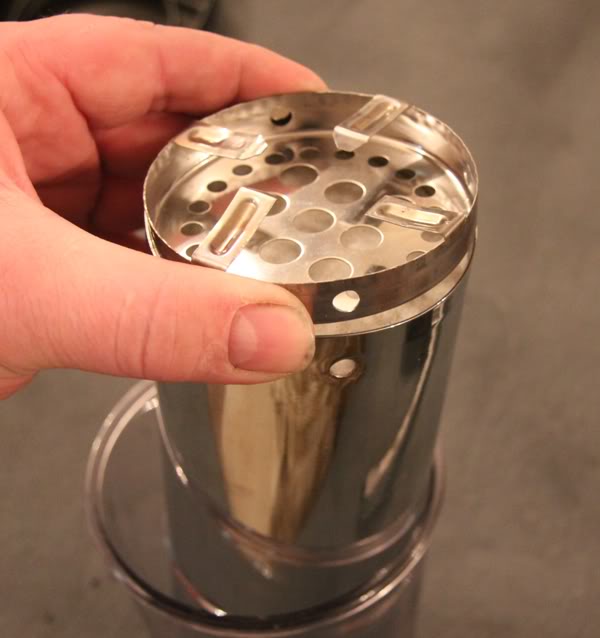
Now offer up the outer metal mesh and gently tap/vibrate the canister to aid in the re-alignment of the fixing holes.
The vibration further settles the carbon, compacting it to allow this.
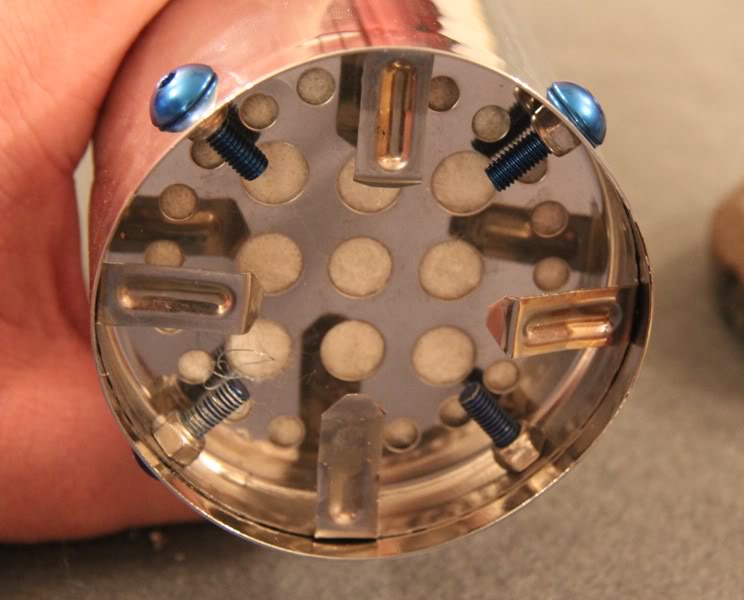
Using bolts and stainless lock nuts, secure the end mesh filter . . . (I used M5 mushroom headed socket bolts)
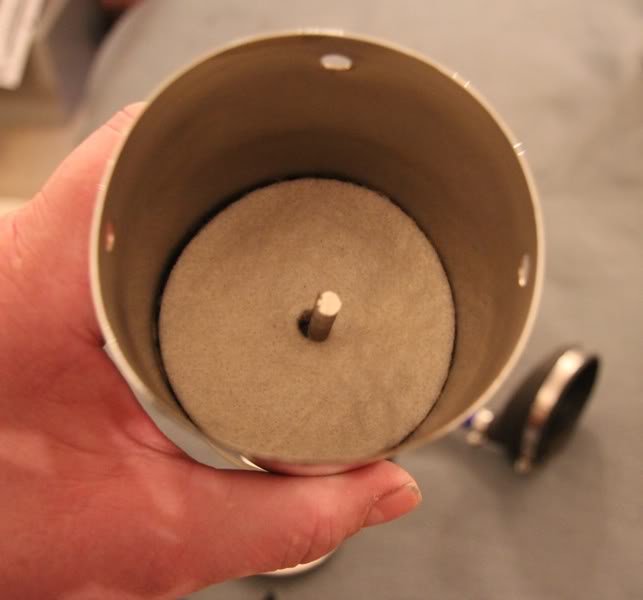
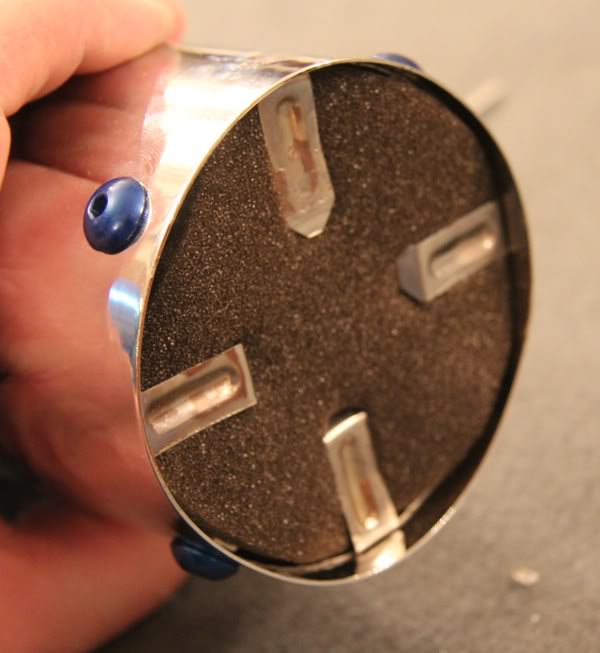
and then refit the foam filter element.
Finally, refit the end rubber boot and breather hose and the rebuild is complete.
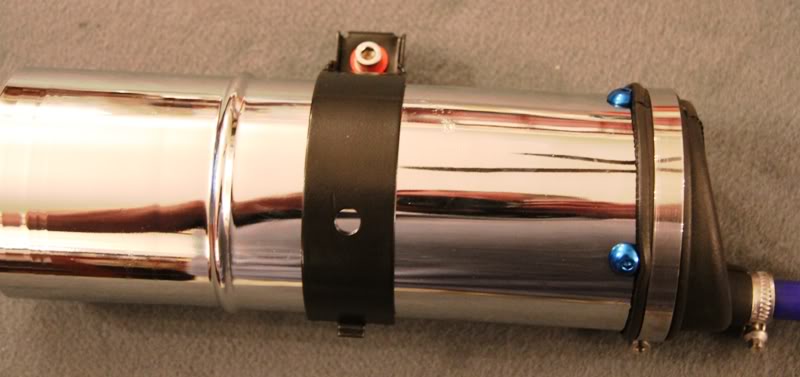
It’s then just a matter of refitting the canister to the car, here seen with newly powder coated bracket and stainless cap head bolt.
And so, for less than £15.00 for all the parts and services, you have an as new carbon filter.