Article by: Sp33dy
Article applies to: all models with the m20 and m30 engines (Motronic only – not L-Jetronic).
This guide serves to provide owners of BMW M20 or M30 outfitted cars as an alternative to the standard Air Flow Meter (AFM) air metering device found on these engines.
The series flap-type air metering device is prone to wearing out due to its inherently mechanical design.
The reason for this is that the AFM uses a variable resistor track which inevitably wears out over time.
In addition, the body of the AFM is restrictive and stroked M20’s in particular benefit tremendously from more air flow. And as we are primarily interested in going faster, this is a worthy upgrade.
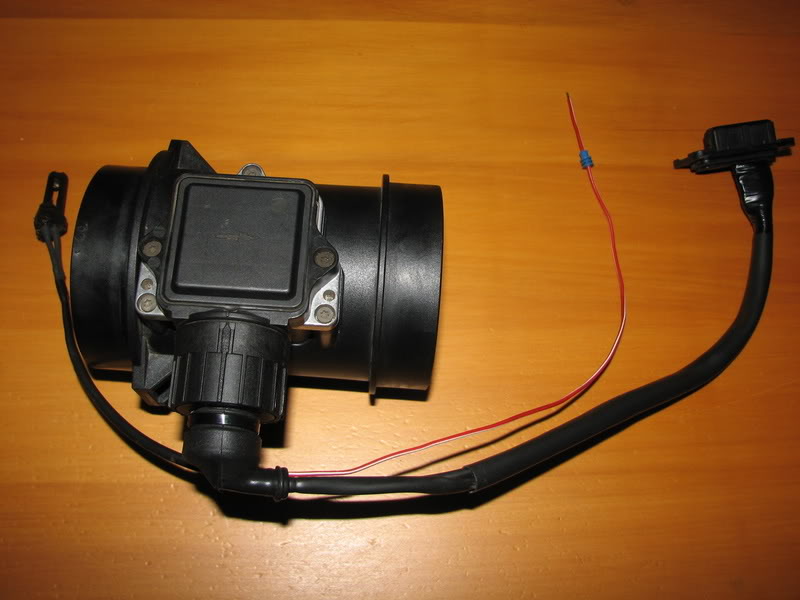
Here is a comparison between the bores of AFM and MAF. In the picture the AFM is off the M30 535i which is already a lot bigger than an M20 325i AFM.
So one can see how much potential there is for better airflow.

The following list of parts is required:
- Siemens Mass Airflow Meter (MAF) (p/n 1 703 275) out of an E36 328i
- Siemens MAF to ECU connecting plug
- M20/M30 air temperature sensor from AFM
- M20/M30 4 pin male plug off M20/M30 AFM
- PerfectPower SMT6 piggyback ECU (or newer)
A pre-condition for attempting this conversion would be that you’d need to have a Piggy-back ECU installed on the car.
The one I personally recommend is the Perfect Power unit. Any model from the SMT6 onwards will do the trick.
Reasons for this are as follows:
1. The airflow characteristics change dramatically when swapping to the MAF, and substantial tweaking of the fueling is required to re-tune the engine.
2. The voltage range put out by the MAF at full engine revs is higher than the tolerances programmed into the Motronic ECU.
The piggy-back ECU is therefore used to limit the peak voltage sent to the ECU by the MAF. Any voltage reading over 4.7 volts causes the Motronic ECU to cut the ignition to the engine.
3. Perfect Power allows the user to download their control software to a laptop.
The user can then access the piggy-back from the laptop and make any changes on the management map directly. Other piggy-back manufacturers (read Unichip here) don’t provide this functionality to the end user.
This is either designed to protect their dealers, or simply that they think we are idiots.
Either way I found that to be totally unacceptable, and therefore supported Perfect Power.
Click here for a detailed write-up on how to install a PerfectPower SMT6 piggyback ECU
Two tips I can offer regarding the acquisition of the parts would be:
1. When buying the MAF ask them to give you the MAF connecting plug with it. Usually the scrapyard fetcher has no problem cutting off that part of the wiring loom. I buy all my spare MAF’s this way.
2. Ask the scrap yard to look for a broken AFM. They have no use for them and all that is needed is the temperature sensor and the 4 pin plug, the rest is thrown away. Chances are they’ll give you the scrap AFM for free when you buy the MAF.
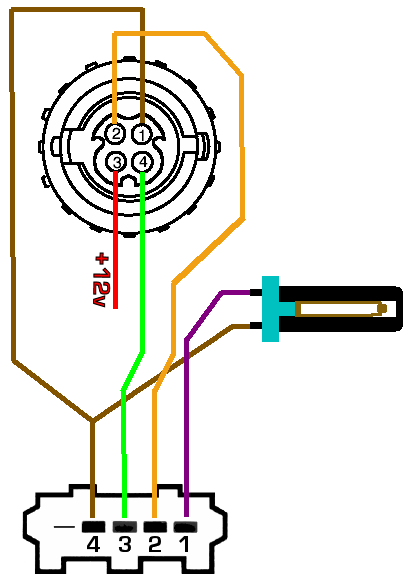
The next step would be to manufacture a conversion wiring harness to connect the MAF to the Motronic AFM harness.
The following picture shows the schematic wiring diagram:
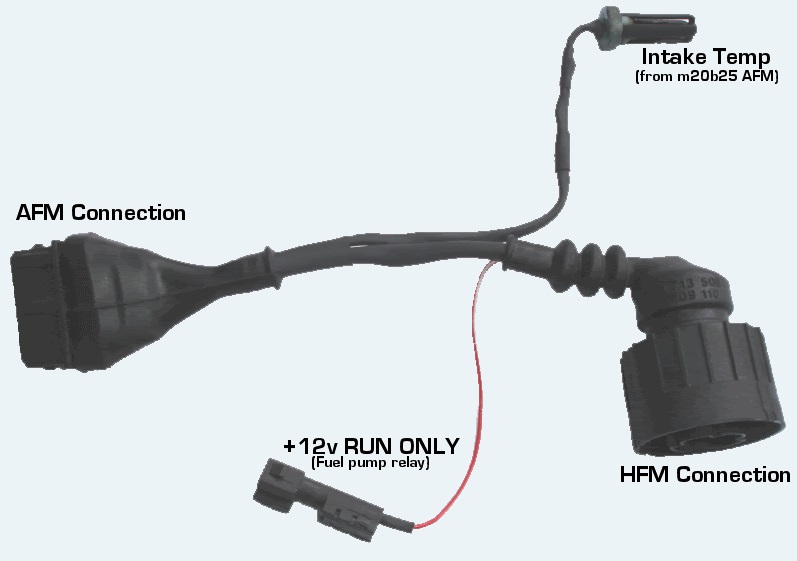
This is an example of a completed wiring harness.
The main advantage of going this route is that one is able to swap back to the standard AFM by just unplugging the conversion harness without the need to cut and join wires.
This picture shows the actual wiring harness I manufactured for my conversion:
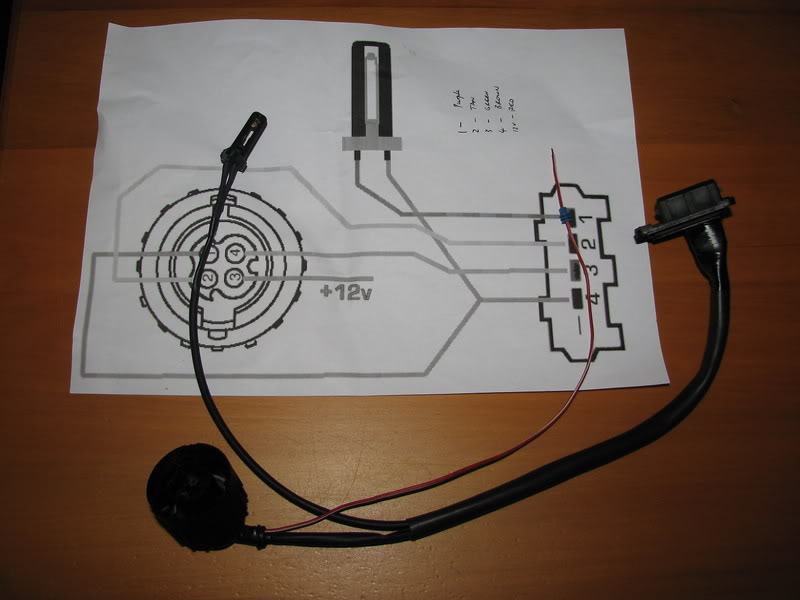
MAF and wiring harness together:
Installation
Installation of the MAF is very straight forward and involves removing the AFM and air box (if you still have one) and swapping in the MAF.
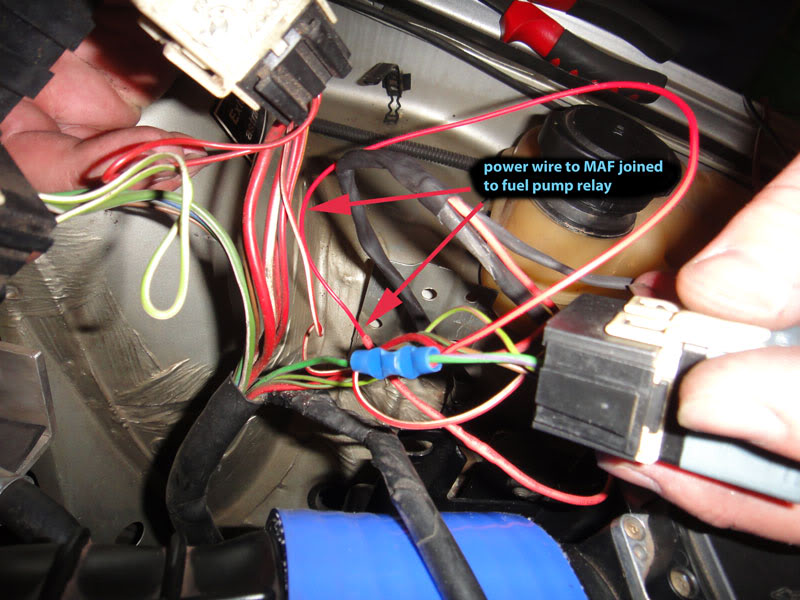
The red wire in the loom (the one marked 12 volt in the wiring diagram) must be inserted under the relay cluster which houses the fuel pump relay.
Join this wire to the thick red wire of the fuel relay.
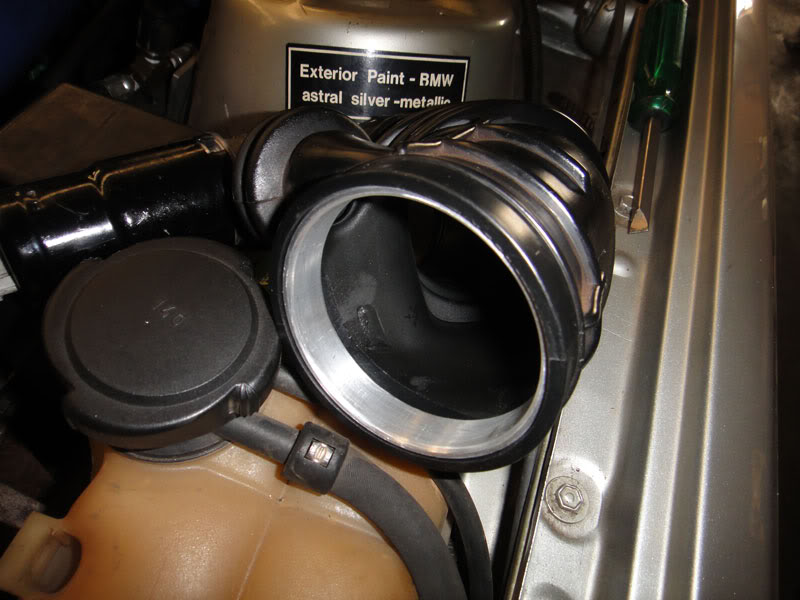
If this isn’t still on the car, then use an available 12 volt live terminal. The only other potential challenge could be to stretch the rubber air intake elbow over the MAF.
This is entirely possible, and don’t give up if at first it seems that it’s not.
The MAF is directional and has an arrow on the top of the plug housing to indicate which direction the airflow travels.
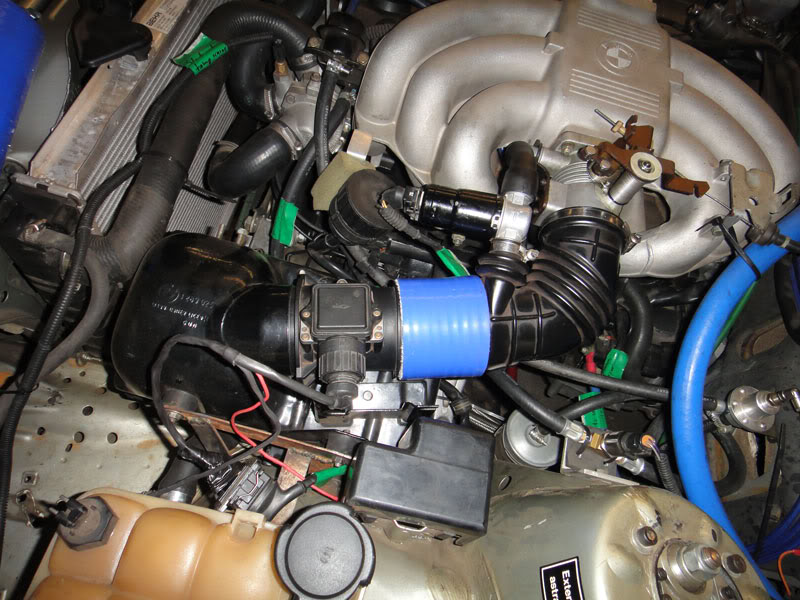
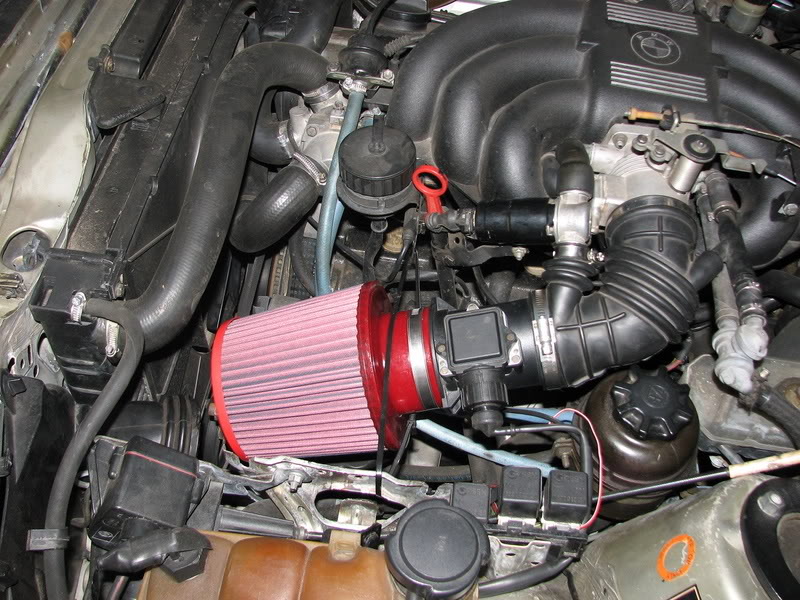
The picture below shows the MAF installed on my M20 engine. The airbox has been removed and I’m using an 80mm BMC cone filter.
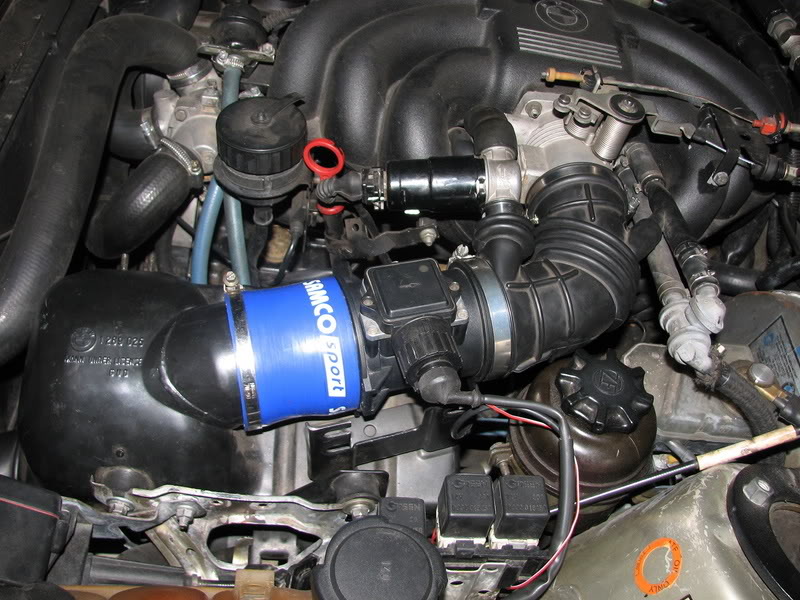
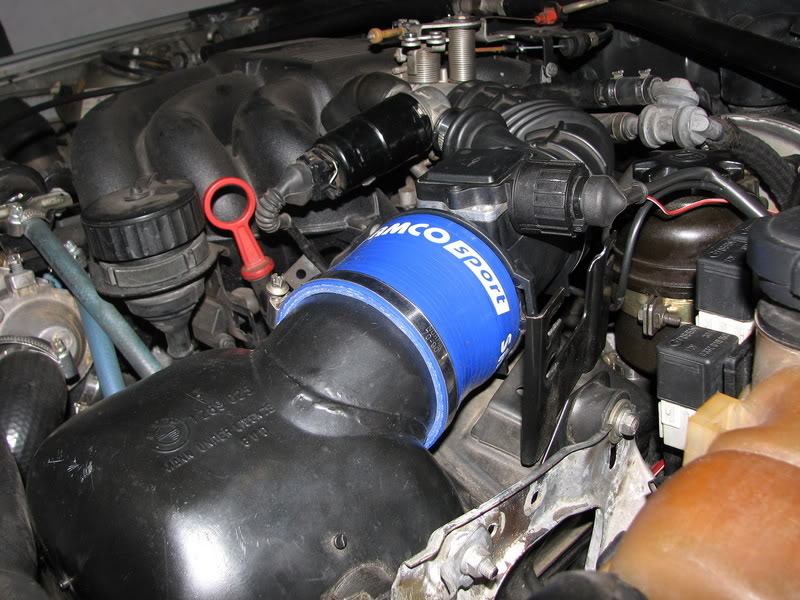
The next two pictures show the MAF installed with the standard air box. A short piece of 80mm adapter is required between the MAF and the air box.
The rubber spacing ring on the air box is removed to make way for the adapter piece. The adapter is the blue silicon Samco hose in the pictures.
One thing to bear in mind when using the standard air box is to modify the air intake at the bottom front section of the air box.
The standard hole and pipe are too restrictive and if left as they are would just negate the extra airflow afforded by the MAF.
Setup of Control Software
The Perfect Power control software has global settings which need to be specifically set up to fool the Motronic ECU into thinking that it’s getting its signals from a standard AFM.
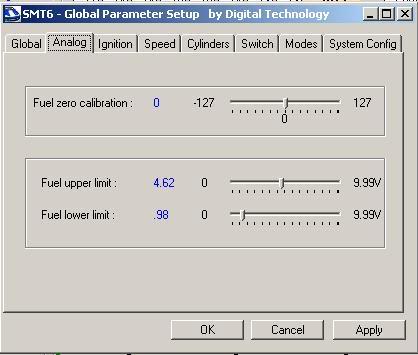
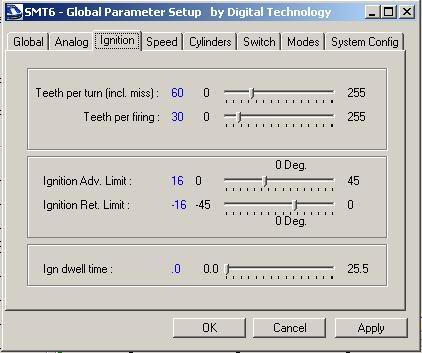
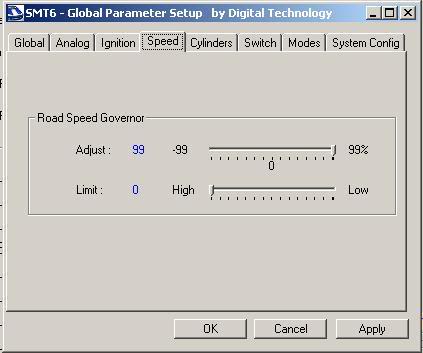
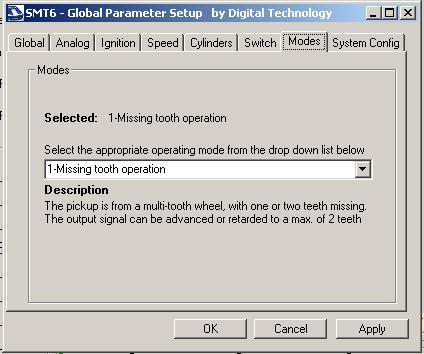
Below are the screenshots of the actual settings used in the Perfect Power “Global Settings” window:
From left to right… Look carefully at the “Analog” settings I’ve used. This shows a maximum analog output signal from the MAF to the ECU as 4.62 volts.
This is where you limit the voltage. The minimum voltage is also important for a smooth throttle transition from zero deflection.
If you set that to 0, the engine will lurch when the injectors open as you apply throttle.
ANALOG:
Pay particular attention to the “Ignition” screen. Take care to limit the timing to 16 degrees of additional advance.
If the ECU receives a signal greater than that limit, it will shut the engine down.
IGNITION
Clearly you wouldn’t bother to touch the “Speed” tab, as extra speed is what this conversion is all about. ![]()
SPEED
MODES
SYSTEM CONFIG

The screen I haven’t included is the “Cylinders” which for some reason works better for me when set to “4” instead of “6”. I haven’t been able to establish what this setting does exactly…
The other screen I’ve left out is “Switch” which effectively allows you to trigger a swap over of maps on a range of different settings e.g., at a given throttle deflection you can activate map B which has a nitrous oxide injector pulse.
Remember that these global settings will apply to the Bosch Motronic engine management on a post ’88 M20 with electronic ignition.
What you still would need to do is set up the timing and fueling on a dyno using a wide-band exhaust gas analyzer.
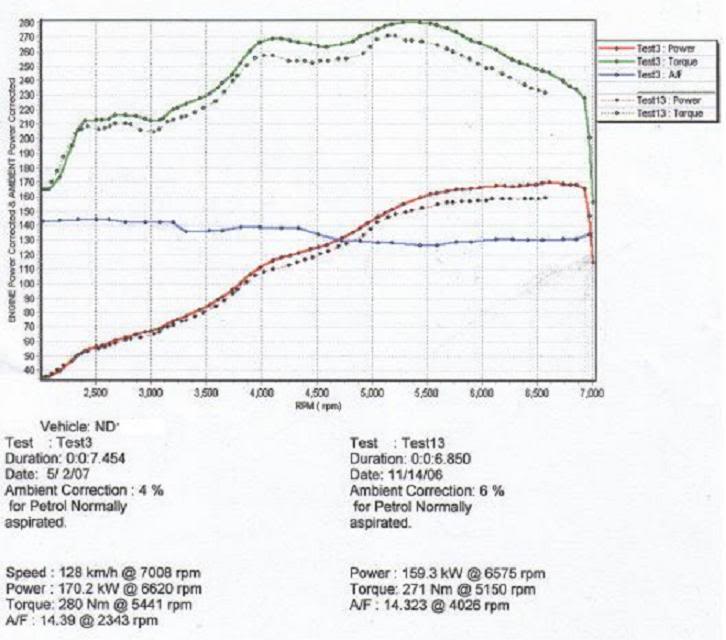
As can be observed from the two plots, there was an approximate gain of up to 11 kilowatts across the rev-range, with no sacrifice anywhere.
An entirely satisfactory result and one which was well worth the effort.
Please feel free to ask any question you may have regarding this conversion and I will do my best to try to assist.
– Reply from Andreas –
OK, so here begins my feedback. Sp33dy built and donated a complete plug-in kit for me a while ago.
I finally installed it this week with the aim of testing it at next week’s Zwartkops SuperTrax event.
I machined an aluminum ring to support the rubber elbow from collapsing.
The hose that I managed to buy fit nicely over the OEM rubber elbow, so I wanted to just push it over and tighten it with a hose clamp.
As per instructions in Sp33dy’s post, power was sourced from the fuel pump relay power wire.
The other side of the MAF fits sweetly into the M20’s standard air box.