Article by: Eric Crawshaw
Article applies to: all BMWs with a Getrag 260/6 manual (5-speed) transmission
Part 2: Gear Train
In my BMW E30 Getrag 260 transmission, only the 3rd gear was grinding, so the plan going in was only to replace the 3rd gear synchro. Upon inspection, I found that the second gear synchro also needed replacement even though it wasn’t grinding yet. For part 2, I’ll be replacing the synchronizers.
Tools Required:
- Snap ring pliers
- 3 jaw puller
- Feeler gauge
- Hammer
Parts needed:
- New circlips
- New Synchros
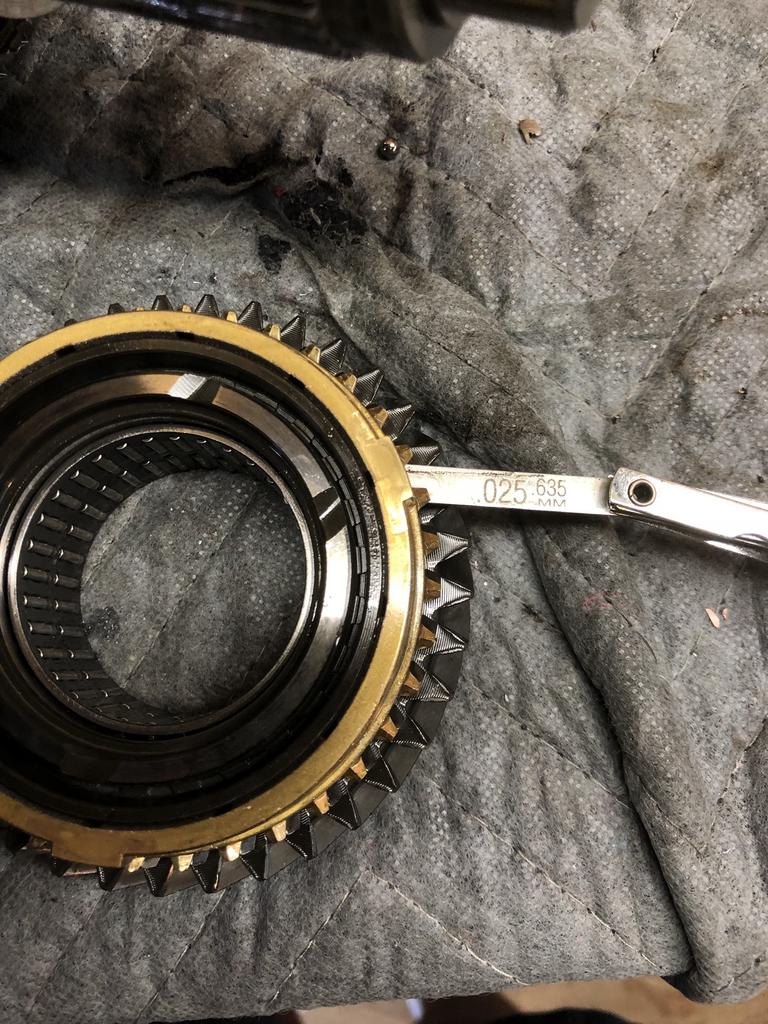
Now that you’ve got the gear train out of your Getrag 260, you’ll need to take that apart to replace the 2nd and 3rd gear synchro. To know if your synchro is worn, use a feeler gauge between the synchro and gear to determine the space between the two. If it’s less than .8mm, it’s worn and needs to be replaced. While the gear train was still assembled, I measured my synchros and found that the 2nd and 3rd gears would bind on the feeler gauge at .635mm, indicating that they were worn.
Getrag 260 Synchro Replacement: Gear Train Disassembly
1. As you’re pulling the gear train apart, take pictures for later reference. It’s just easiest that way, trust me you’ll use it.
2. Pull off the input shaft (it comes right off) and integrated 4th gear.
3. Remove the 4th gear synchro and roller bearing.
4. Use your snap ring pliers to remove the circlip on the front of the shaft.
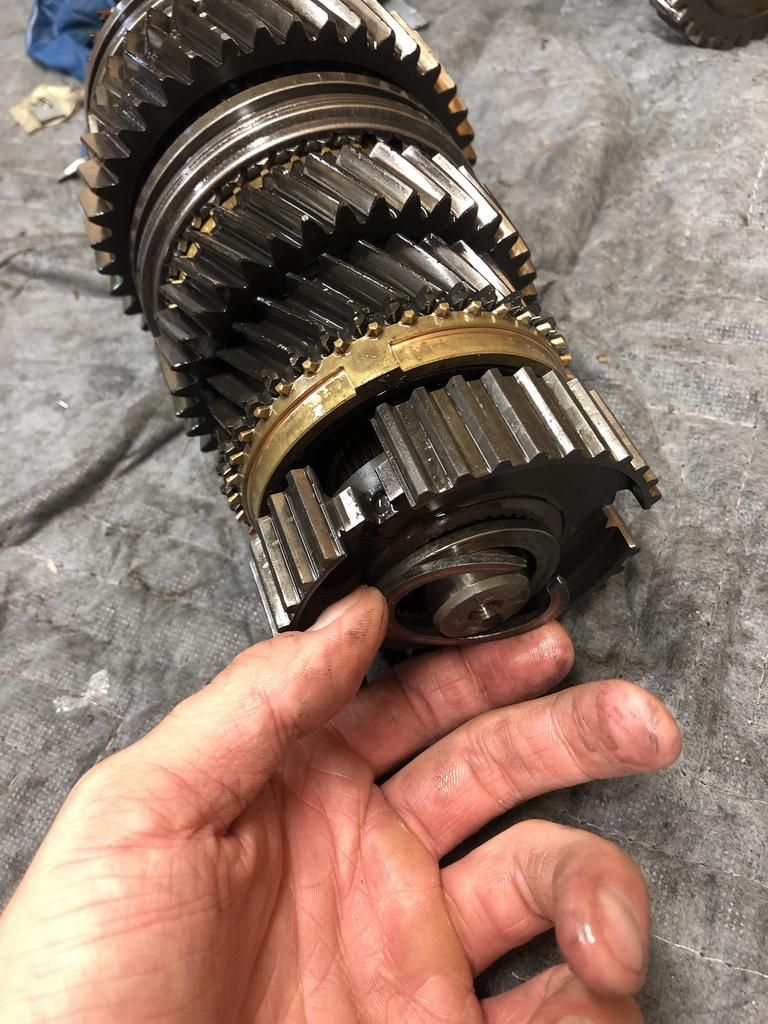
5. CAREFULLY Remove the 3/4th gear operating sleeve. The Getrag 260 has 3 spring loaded ball bearings that will shoot out, don’t lose these.
6. Use your puller to remove the 3rd/4th gear and bearing sleeve, this will take a bit of force.
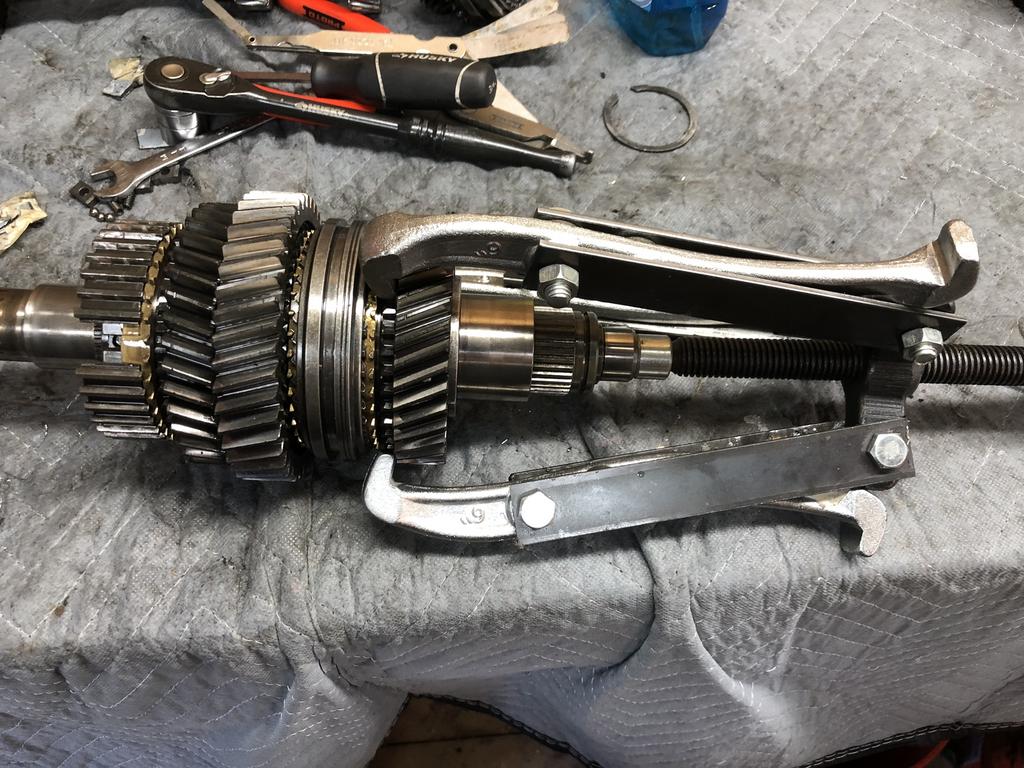
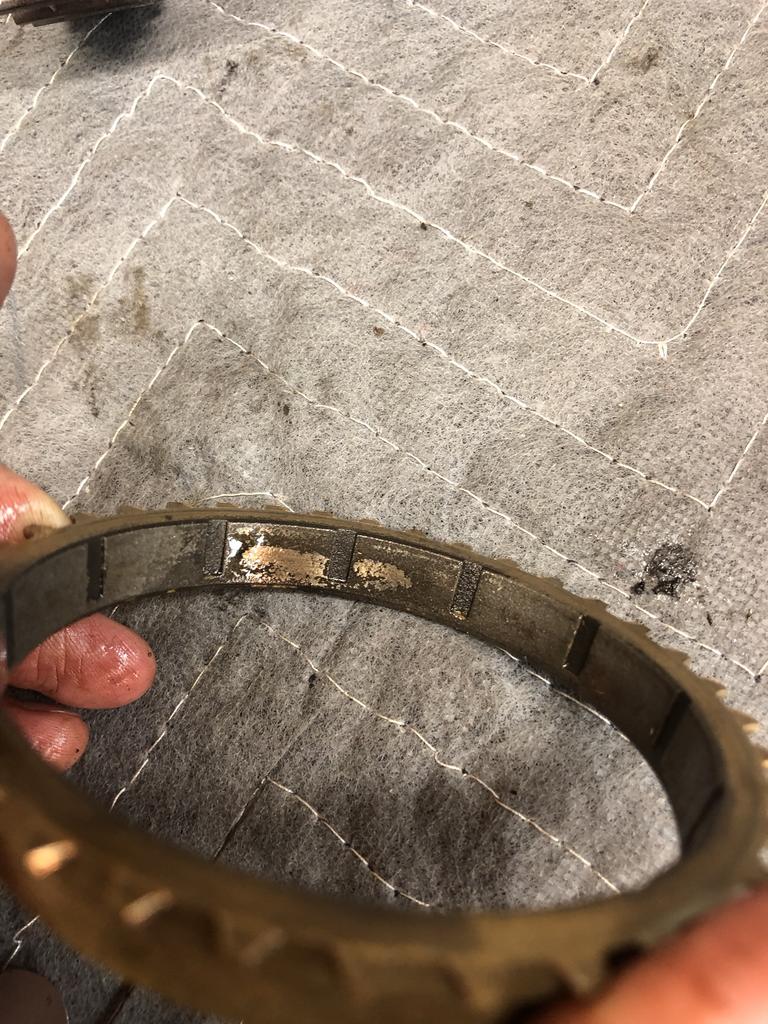
7. Here’s what a bad synchro looks like on the inside.
8. There’s a tiny ball bearing that will fall out of thrust washer, this prevents the thrust washer from spinning on the shaft, make sure you don’t lose it.
9. Slide the operating sleeve over to engage first gear so you won’t have to replace the spring loaded ball bearings.
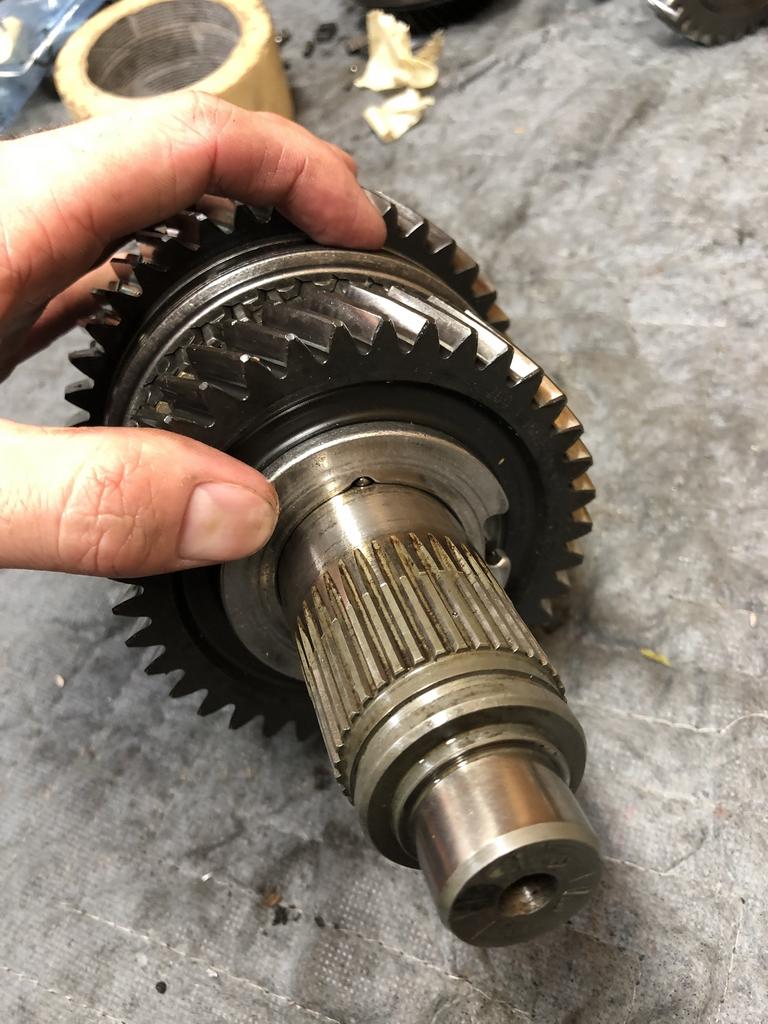
10. Remove the second gear synchro.
11. This next step is totally a guess on my part. I could have ruined my synchro, so if you know of the correct way to do this, please leave a comment!
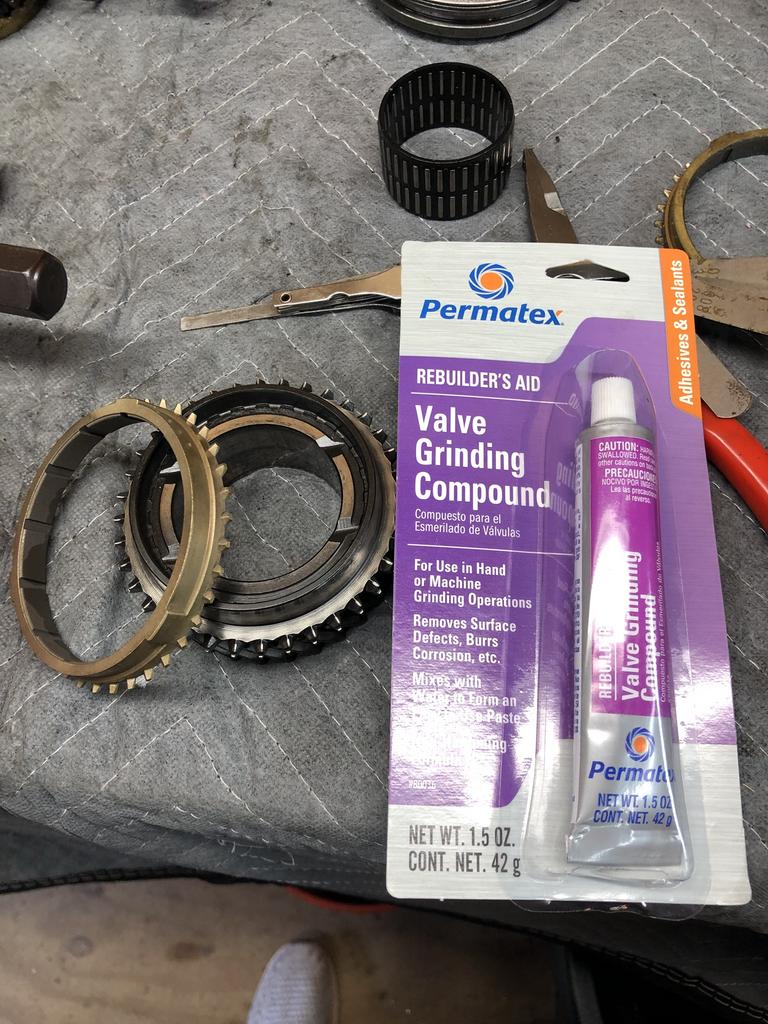
12. Synchros are like brake discs and brake pads in that they must be bedded in to operate properly. Generally this is done with a few hundred miles of easy driving. Since this is a race car, it’s pretty much going straight into race conditions, so in order to quicken the bedding process, I used some diluted valve lapping compound to help match the new synchros to their gears. I did this very lightly. Time will tell if this was the right call.
13. Reinstall the new second gear and synchro.
14. Reinstall the thrust washer and ball bearing on the shaft.
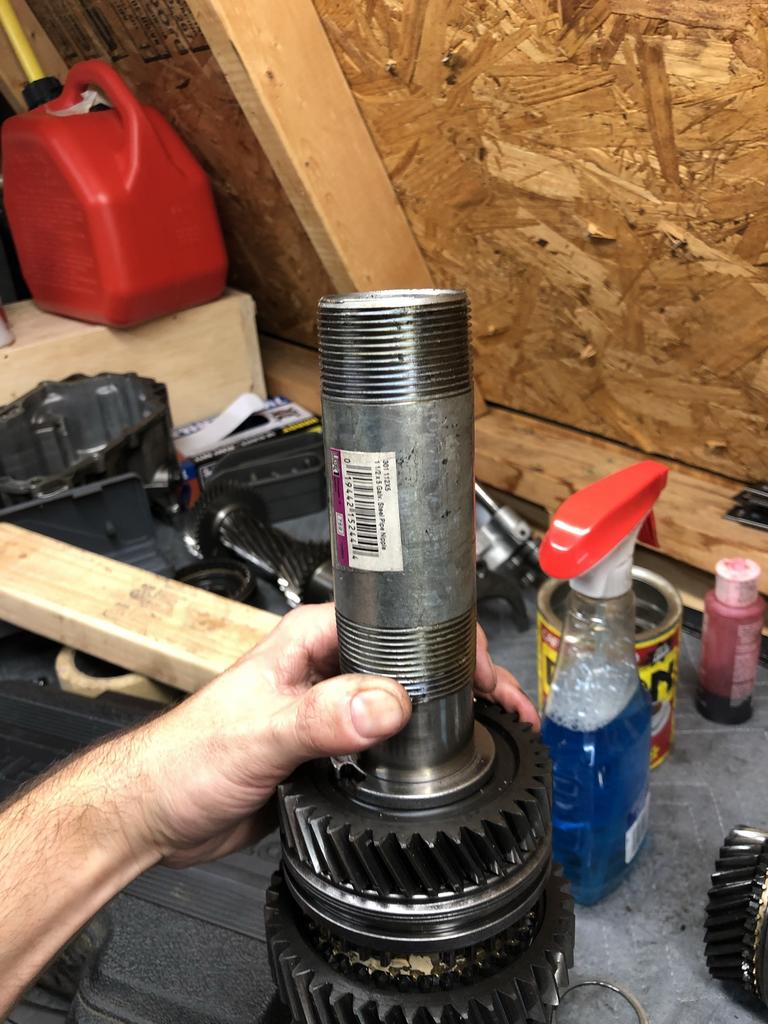
15. Reinstall the spacer sleeve using the 1.5in pipe you used to remove the front end of the transmission case. Use a hammer, it should go back on without the need for a press with short easy taps.
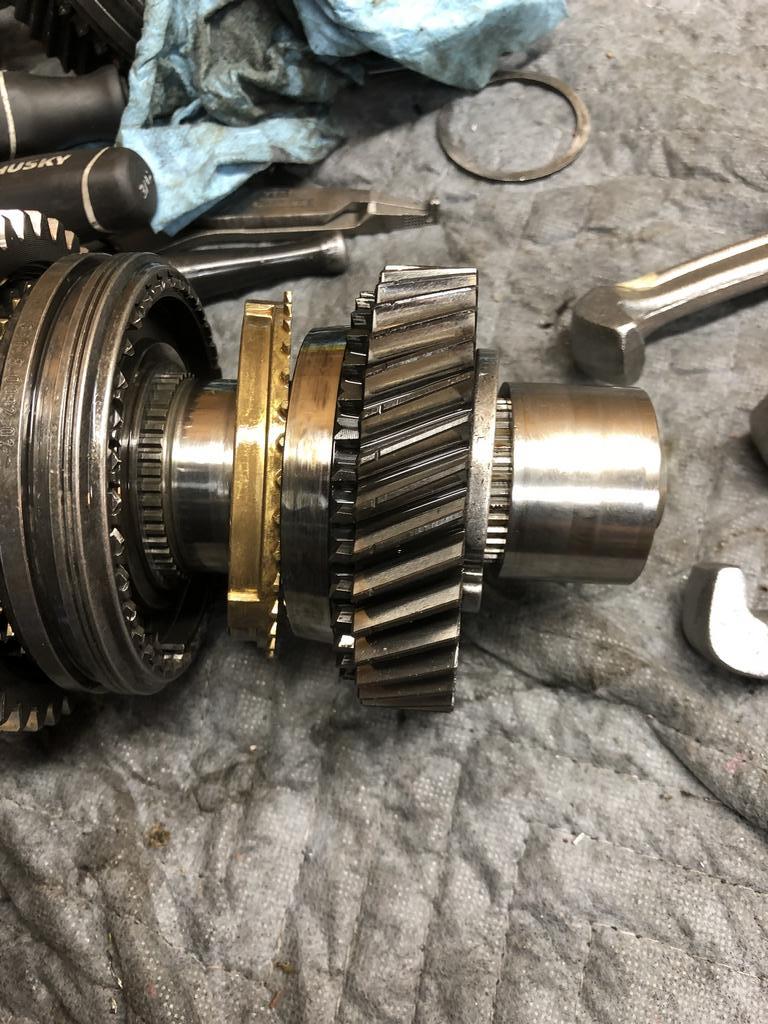
16. Reinstall the 3rd gear and synchro.
17. Reinstall the guide sleeve.
18. To reinstall the spring loaded ball bearings, make sure you put the rectangular pieces beveled edge out. Getting these back in is a bit of a balancing act, but once you get the process down it’s pretty easy. (I’m right handed) I used my left index finger and thumb to hold the ball bearing against the spring. I used my right thumb on the 3rd ball bearing and my right hand to press the operating sleeve down onto the guide sleeve. Make sure you’ve installed the operating sleeves with the ringed side facing the input shaft (there are some grooves that run around the outside). To get the operating sleeve onto the guide sleeve, you’ll need to press in all three ball bearings at once while putting pressure on the operating sleeve. After you get it once, it’s much easier the second time.
19. Reinstall the circlip.
20. Reinstall the roller bearing, 4th gear synchro, 4th gear/input shaft.