Article by:Jblindy
Article applies to: all models with the M60/M62/S62 V8 engine.
Symptoms were a diesel-like rattle on start up after sitting for a few hours.
Tools needed:

Part needed:
To begin, you will need to remove the air box. Un-clip the 4 clips and loosen the hose clamp to remove the lid of the air box. Is this step needed? Probably not, but I did it anyway.
Using your 3/8 ratchet with a 10mm socket, go ahead and remove the bolt.
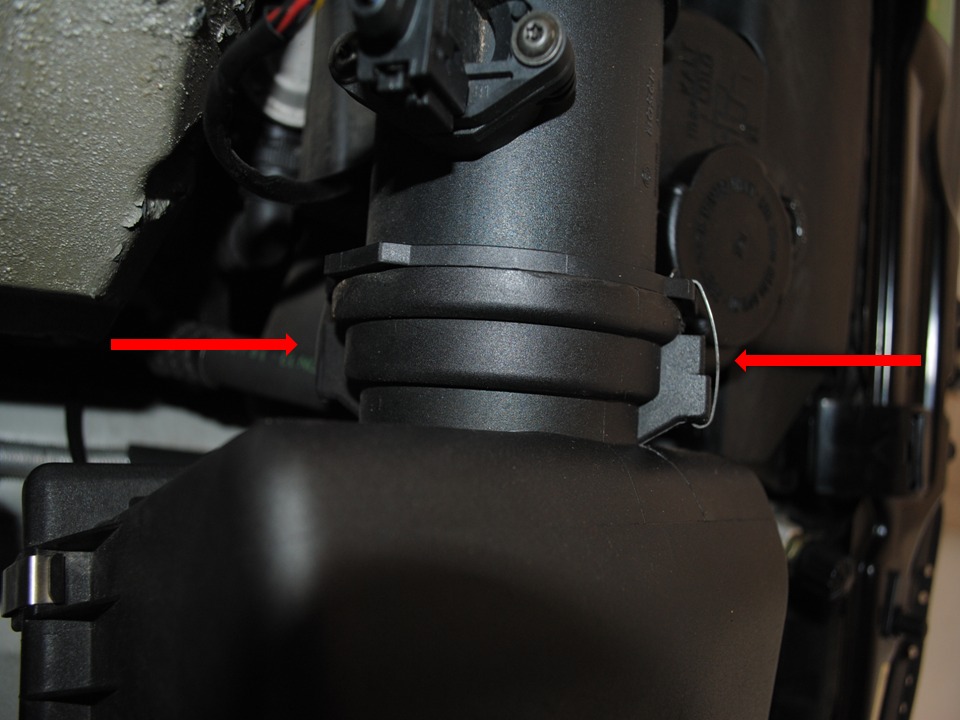
Next you will need to loosen the hose clamp to the top hose going into the box.
There is no need to loosen the bottom hose (can’t be seen in the pictures, but it is directly below the top hose), as that hose will simply pull out with the box.
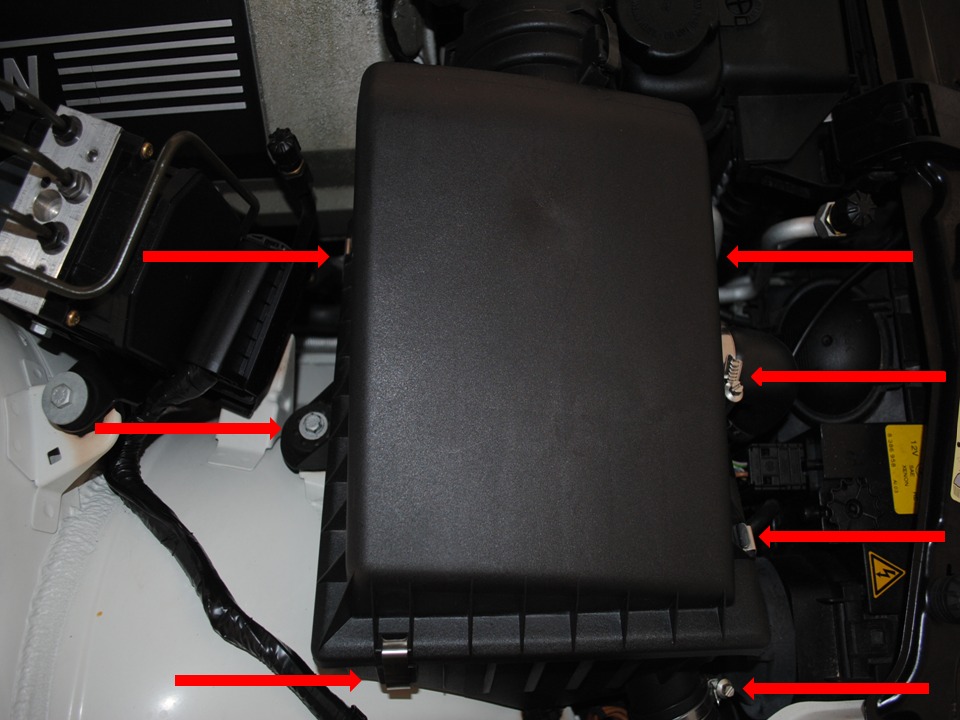
Now you will need to disconnect the MAF from the box.
Using your screwdriver, you simply pry the two clamps loose. Now you can pull the air box completely out to give a little more working room.
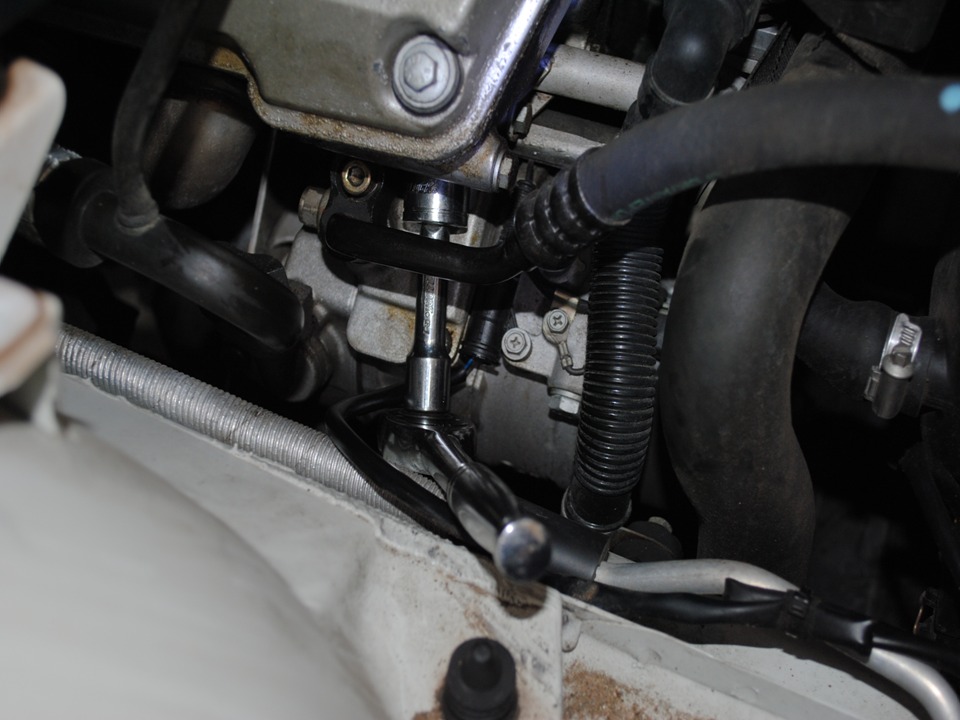
Once the air box is out of the way you will be able to see the tensioner bolt. It is kinda tucked up and out of site, but you will be able to see it directly below and behind the coolant line.
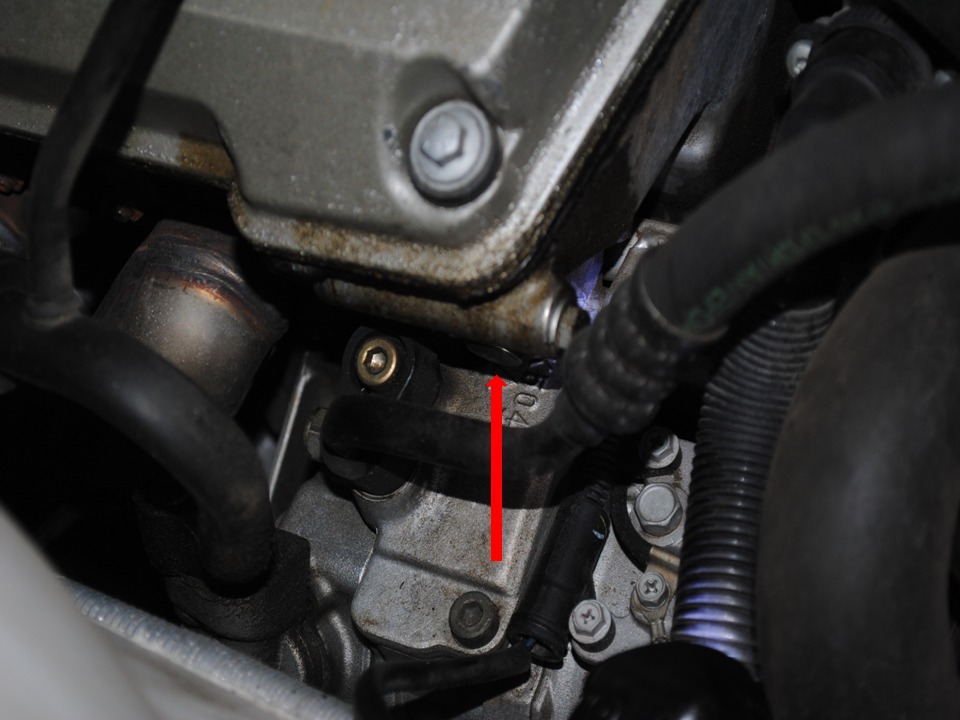
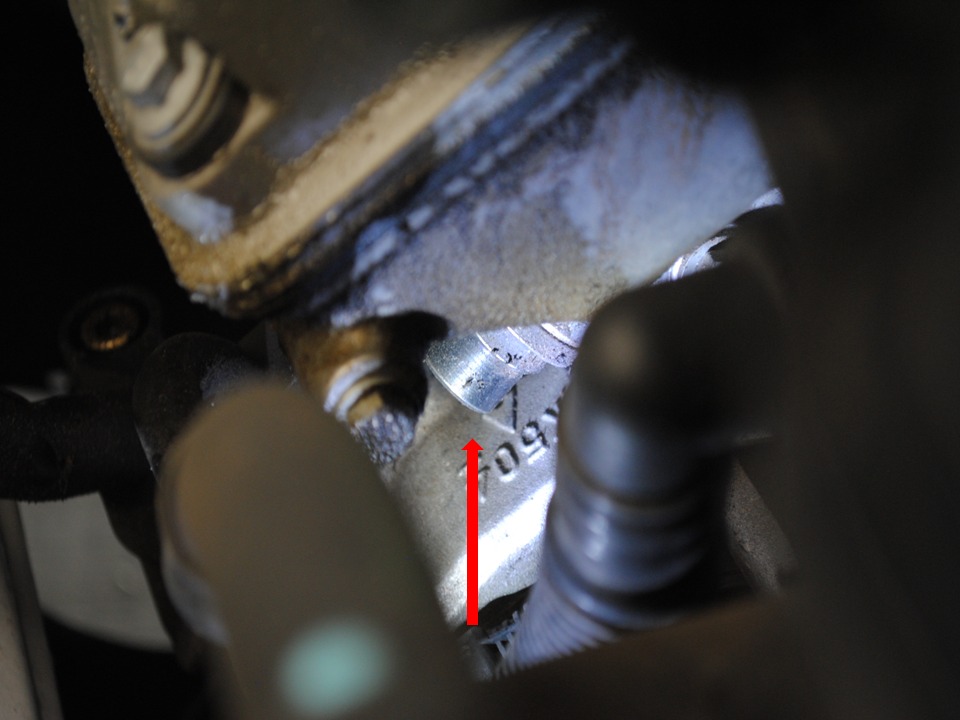
Using your 3/8″ ratchet with the 3″ extension and 19mm socket remove the bolt that holds the tensioner in place.
Once you remove the tensioner, a little oil will drain out. Not a lot, maybe a teaspoon full, just clean up with a rag.
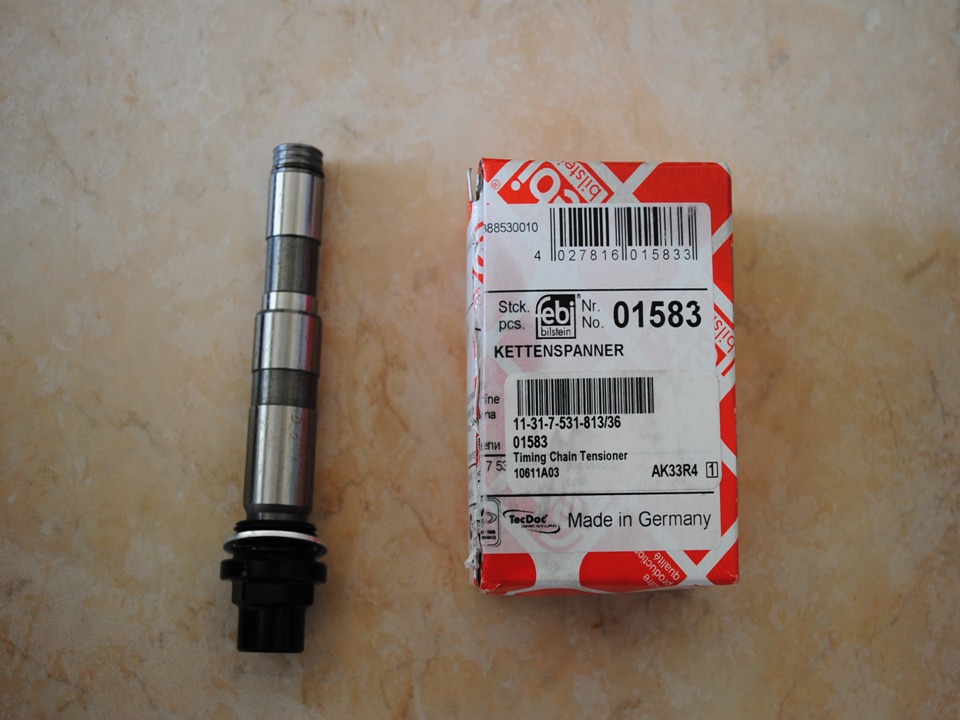
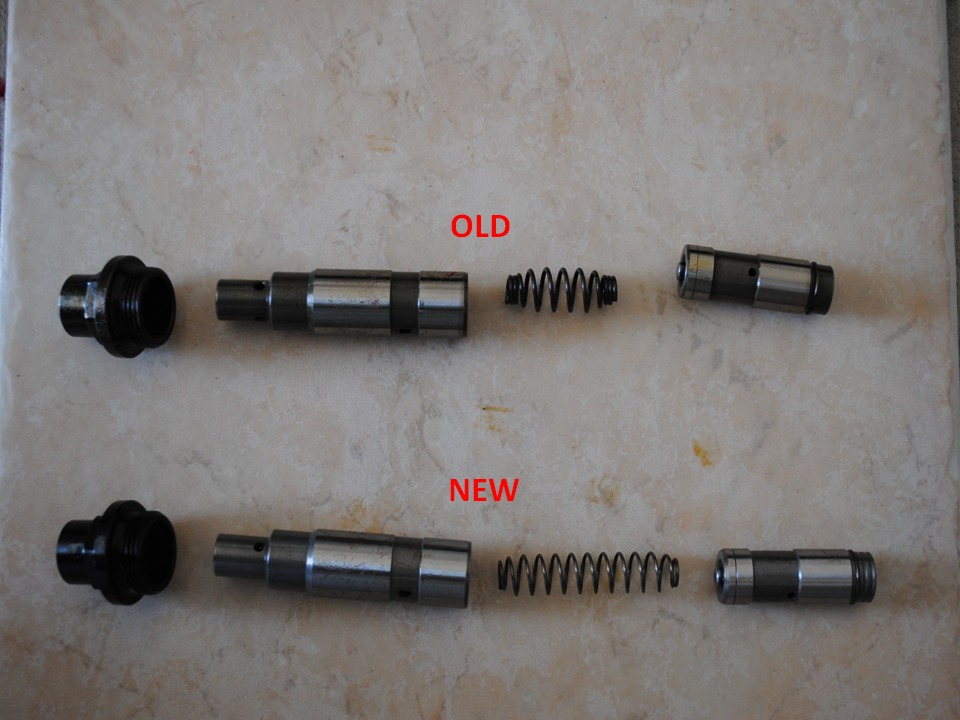
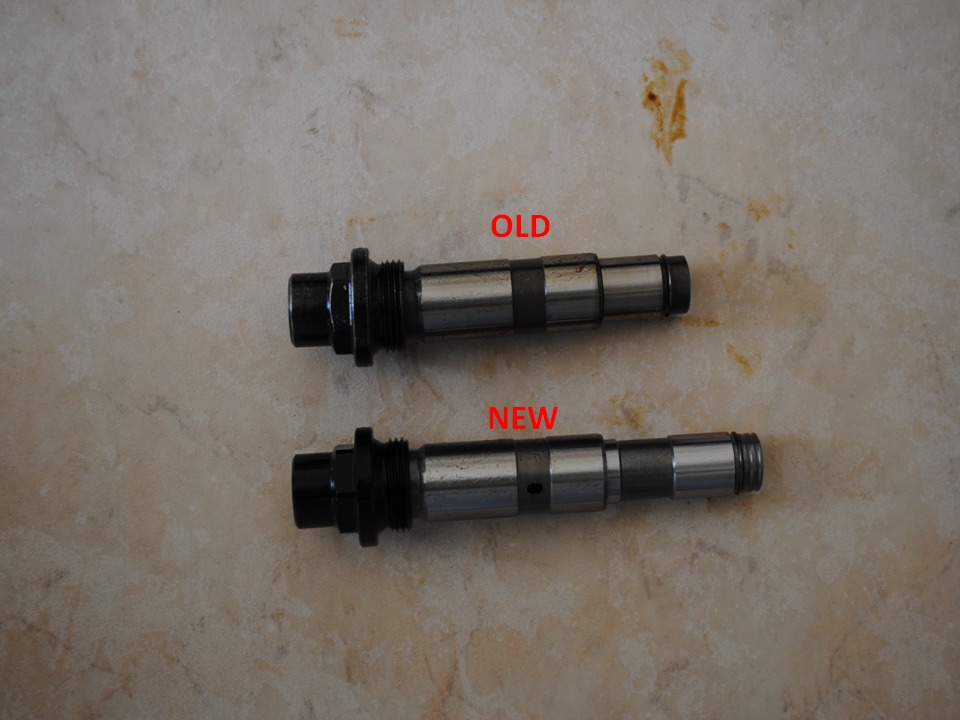
Here is the new tensioner compared to the old. The spring in the new tensioner is longer but not as stiff as the old spring.
As you can see, the new tensioner with the longer spring is almost an inch longer than the old. Will it work? We shall find out soon . . .
Now I tried to install the tensioner without compressing the spring and let’s just say…uh uh, ain’t gonna work like that.
There just isn’t enough room to contort your hand into position to be able to push the tensioner in and thread it in at the same time.
So, while pushing the piston down into the body of the tensioner, I used a tiny flat head screwdriver to push down on the retaining clip.
This locks the clip into a recessed edge inside the body which, in turn, holds the piston in place. Doing this made installation so much more simpler.
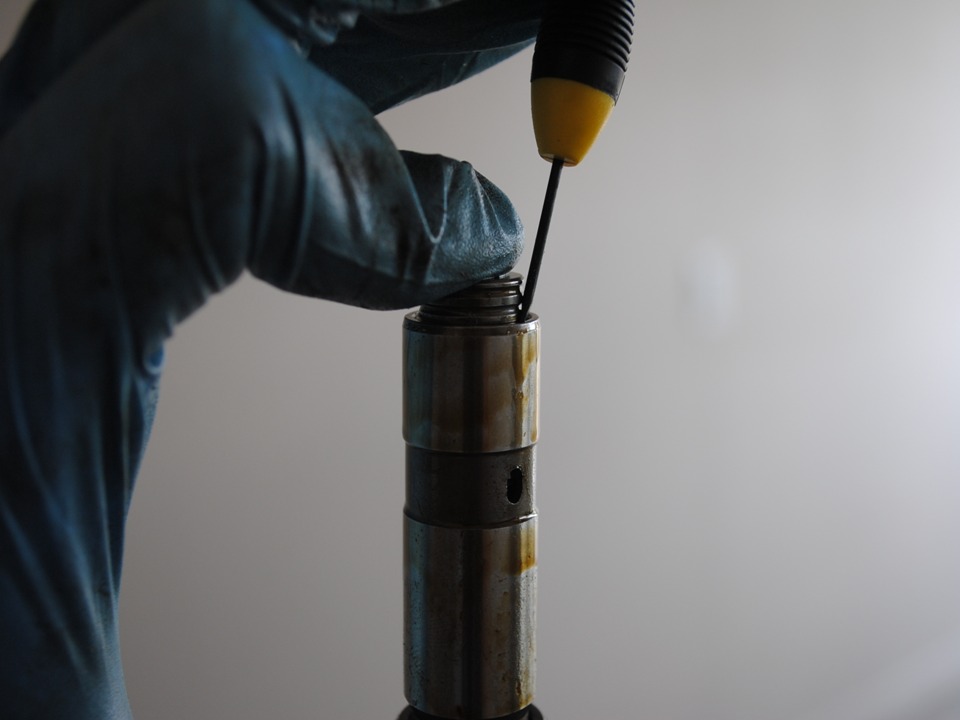
Once the piston is locked into place just insert it into the vacant hole and thread back in.

I’m not sure on the torque specs, but breaking the old one loose didn’t require too much effort and I didn’t notice any oil residue so, I just made sure that the new one was good and snug.
Now you just replace the air box and lid and you are good to go. Upon start up, you will notice a little rattle and clatter but it goes away after a few seconds.
I will post back later to let you know if this took care of the rattle on start up.