Article by: Toni Kosec
Applies to: all e32 and e34 models – that are equipped with a cabin micro filter (not all are).
Problem:
The air conditioner micro filter gets clogged up over time with all the dirt that would otherwise end up inside the IHKA/IHKR system or your car.
A clogged up micro filter has various symptoms that have a cause in restricted air flow through the air conditioning vents; in wet weather your windshield will fog massively and you have to use A/C all the time just to see the road.
Cleaning the inside of all your windows may help, but doesn’t eliminate the problem.
Just BTW: If your heater core is leaking (a normal thing on a fifteen year old car) your windshield will also be fogging, the air blown through the vents should smell of antifreeze and the mist on the windshield should have an oily touch.
Also, your coolant level should be slowly dropping. Replacing the heater core is another story altogether, but replacing the micro filter may help a bit with the fogging syptoms anyway, so read on.
When starting the car on very cold mornings the fogging symptoms are even worse, because the A/C compressor won’t start when it is somewhere below zero degrees C / 32 degrees F and you have no heat yet to defrost the mist.
It can also happen that the condensed humidity starts to freeze on the inside of your windows. (Big fun, I assure you… :-))
Another symptom of a clogged micro filter is that you have almost no heat in winter, since the air flow is too small to heat up the interior of the car.
Of course your coolant level is where it’s supposed to be, your IHKA/IHKR control unit doesn’t have any cold contacts on the PCB and your water valves and the auxiliary water pump are in working order, right? Also your sword works fine?
This is the reason that some people just take the micro filter out before the winter and all is well . . . Kinda 🙂
(Interestingly enough, the problem isn’t noticeable in summer, the over sized A/C unit can still keep you cool, even with a clogged filter.)
BMW says to replace the micro filter every two years, my recommendation for most of Europe would be to do it every 12 months, preferably before the winter.
Models: All E32/E34 cars made after 6/1990, including those without A/C. On a right hand drive car some things may be different than pictured.
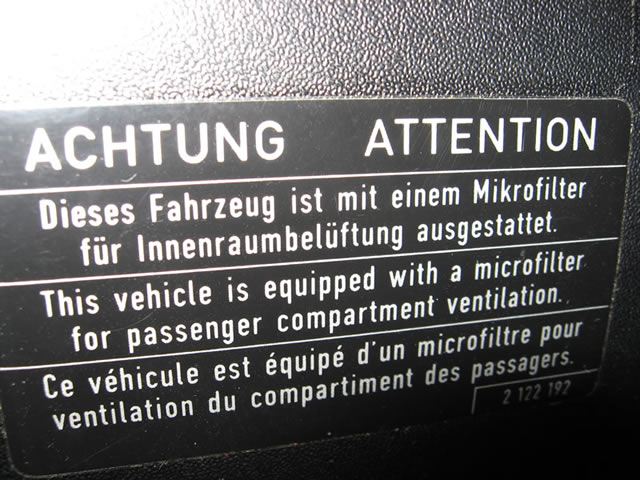
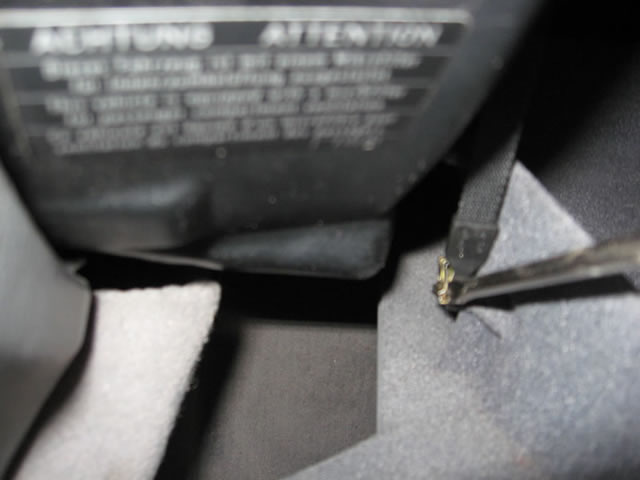
For the first few years of production some cars had this notice on a sticker inside the glove box compartment (later cars don’t have the sticker, but the micro filter is still there):
Background:
Around 1990 BMW got the idea that its flagship cars should have a micro filter built in their ventilation system.
As far as I know, no car was equipped with a micro filter when E32s started rolling out of production lines in 1986, and a few years later it was quite a problem for BMW to integrate the micro filter into the existing IHKA/IHKR aircon system.
The normal place for a micro filter to be located in newer BMWs is in the engine compartment where the end of the fresh air intake for the air conditioner is located.
This also allows for an easy replacement of a micro filter.
But because there wasn’t enough space in the engine compartment (think M70 here…) for such an easy fitting of a micro filter for the existing cars (without a complete redesign of… well, pretty much everything :-)).
BMW went another way: the micro filter is located deep inside the IHKA/IHKR, directly between the air conditioner evaporator beneath and the the double vent (the so called squirrel cage) above the filter.
This means big trouble as replacing the micro filter is a lot of work and most mechanics don’t really like doing it.
(When I replaced the filter for the first time on my car I saw that the installed filter was made back in 1997 which means nobody touched it for seven years.
All the related trouble must have been at least one of the reasons why the previous owner decided to sell the car :-))
The position of the squirrel cage above the filter means that fresh air is blown through the filter and when the filter gets clogged up the air flow is severely restricted.
But even with a brand new micro filter the air flow throughput is lower than in a pre 6/1990 car (there is a BMW bulletin published in TIS about the problem).
Replacing the micro filter:
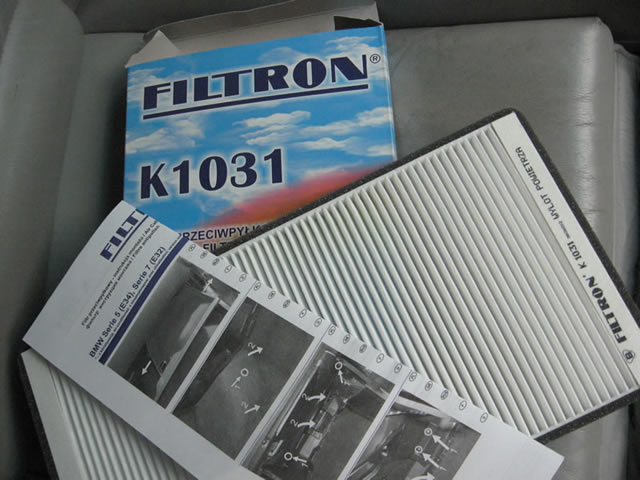
When you buy a new micro filter there should always be instructions for changing it enclosed.
Sometimes they are worthless, but in this case (the filter was made by a Polish company Filtron) they even had photographs and the instructions were competent. (Okay, I do like to show my sports seats :-))
Replacing the micro filter (on a LHD E32/E34) involves removing the following: the glove box compartment and its upper wall, the air conditioner duct for the passenger’s feet, the IHKA/IHKR control unit, the lid that covers the micro filter and the filter itself.
BTW: pretty much all BMW are prone to the infamous smell of public toilets from the air ducts when you turn on the A/C.
This happens because there is water condensing on the evaporator which makes it an ideal place for mold/bacteria growth.
If your car’s A/C smells, this is also the perfect chance to disinfect the evaporator using an alcohol-based spray, because you have to remove the micro filter before spraying into the opening where you pulled the filter out.
The pictures were shot on a 1991 E34 520i with a Behr IHKR/3-F climate control. The procedure is very similar for every E32/E34 with an IHKA/IHKR air conditioner.
Let’s get to work:
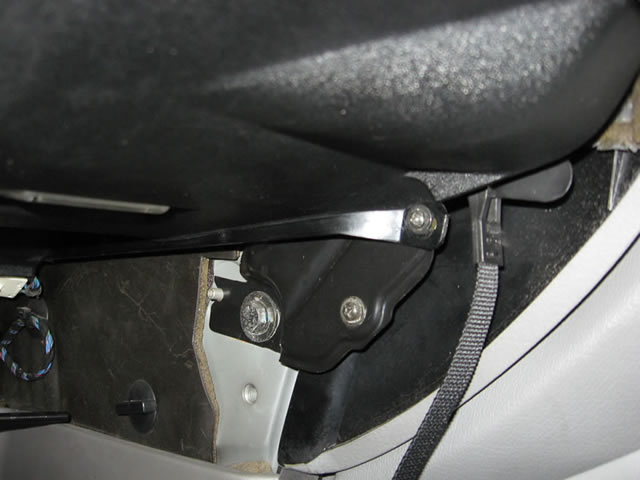
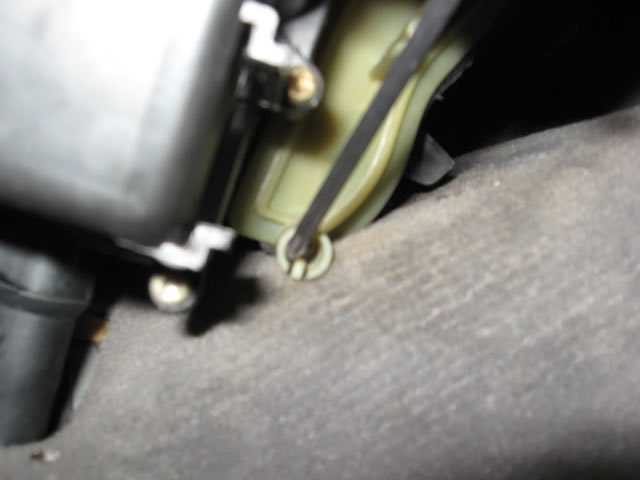
Open the glove box compartment and remove the two straps (the E32 has two gas shock absorbers instead of the straps, you can find out more about that here) that are holding the glove box on the sides:
To remove the straps you first have to remove the two metal clips holding them, help yourself with a flat screwdriver. Showing the left side:
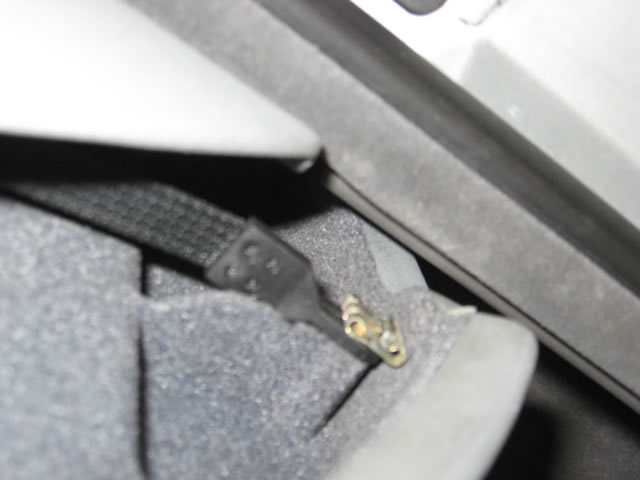
And the right strap:
Then remove two locking clips on the bottom of the back of the glove box.
First un-clip them towards the bottom, then pull them off the hinges. This is the right one, shown from below:
And the left clip:

Note: When you’ll be putting the glove box back at the end, you’ll have to properly adjust it first.
This is done by putting these two clips back on the glove box wall and on the hinges, then you adjust the closed glove box in the right position and then you clip them back up on the hinge.
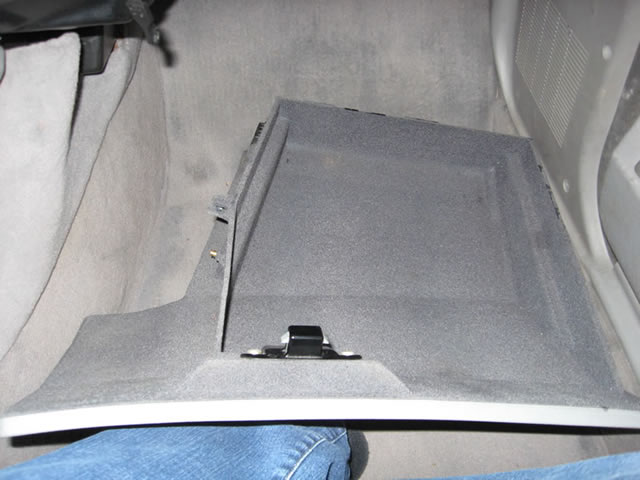
The glove box should then fall freely into your lap:
A close-up shot of the two locking clips:
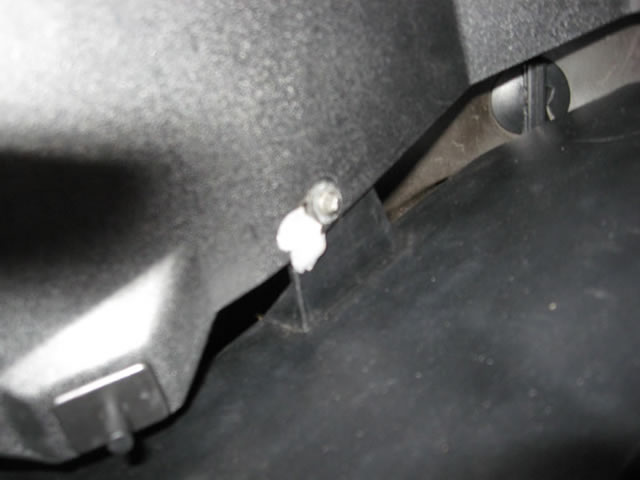
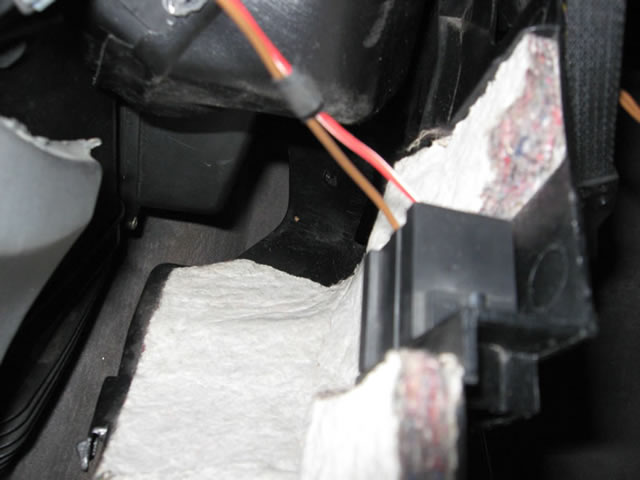
Also remove the black plastic screw (right next to the green sticker with a hand-drawn arrow :-)) on the right side of the center tunnel, then remove the piece of carpet it was holding for easier access:
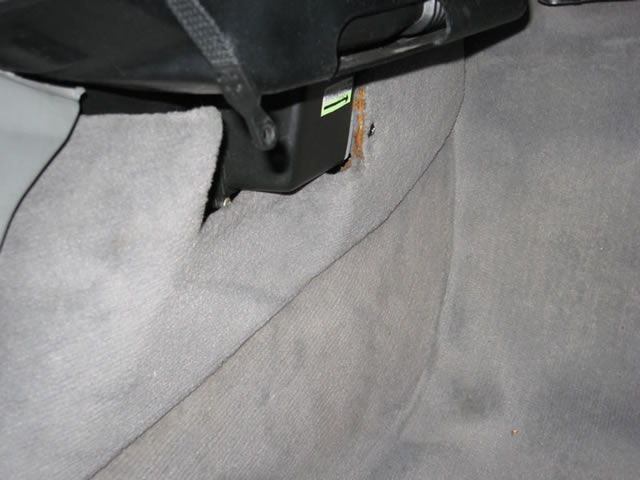
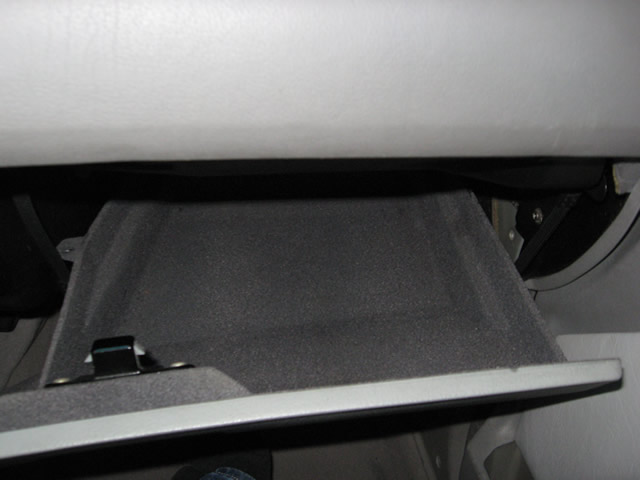
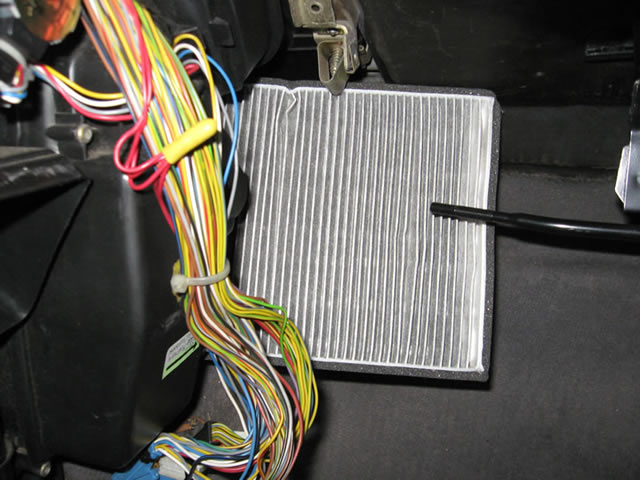
After removing the carpet piece you can already see the green plastic cover of the micro filter (with a little help from a camera flash).
Obviously somebody didn’t tighten the micro filter lid properly last year or there wouldn’t be leaves in here…
Time to get the vacuum cleaner out of the cupboard…
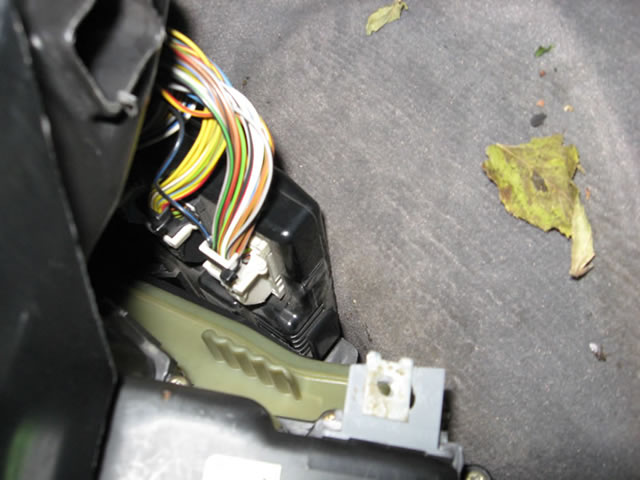
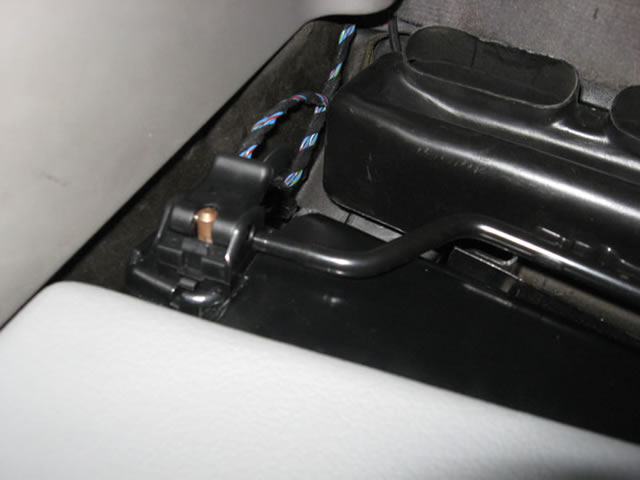
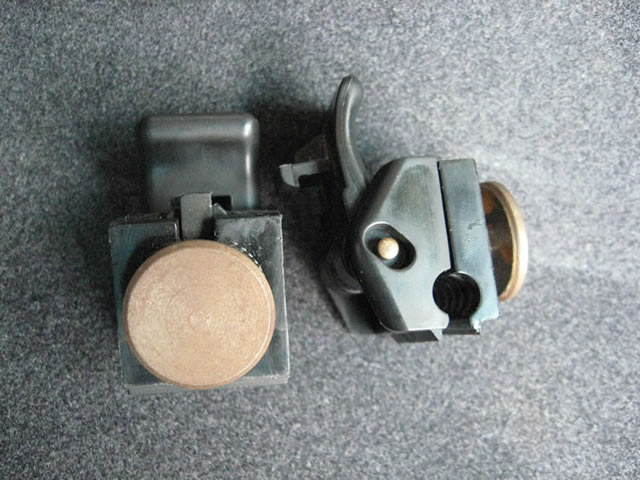
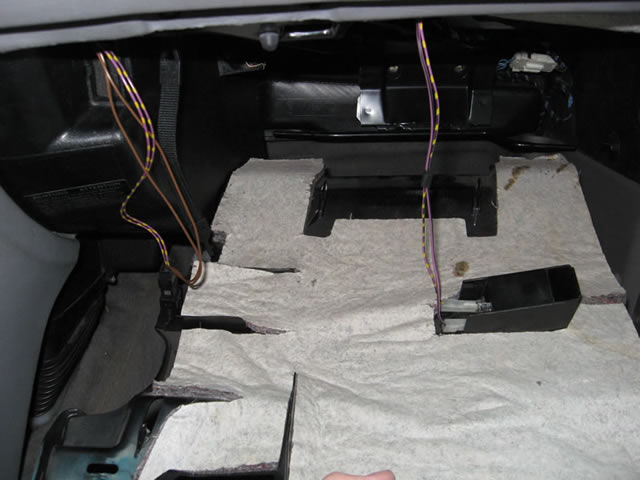
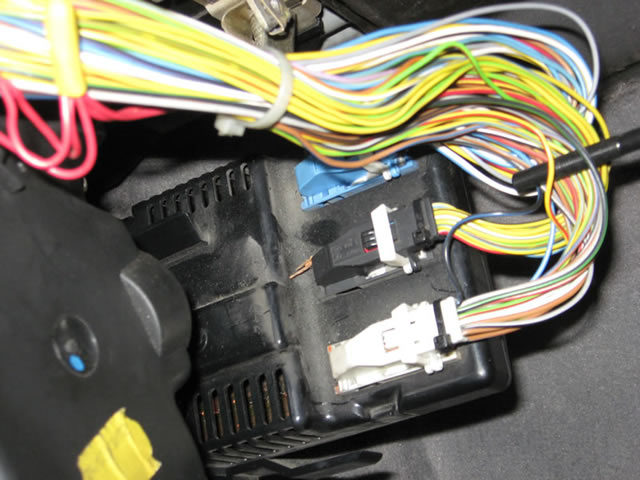
Pull out the square gray plastic piece (the cables are connected to the air conditioner control unit):
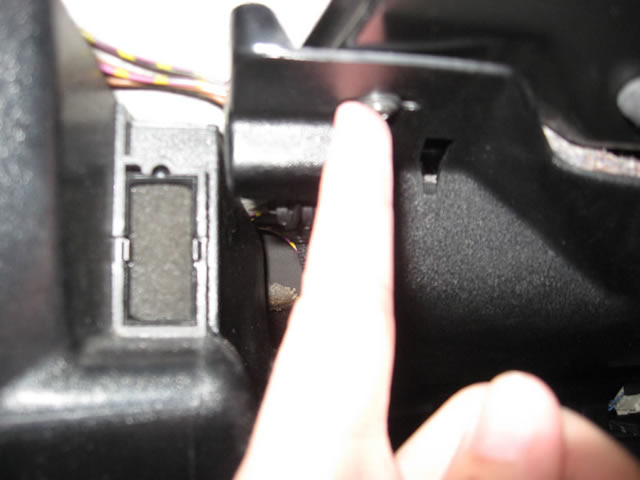
Now we’re going to remove the plastic upper wall of the glove box by removing a few black screws. Firstly, remove just the screw on the upper right:
Then remove the screw inside the glove box on the left side of its upper wall (The white thing is the sealing stuff the dealer used because they lost some other screw when disassembling the glove box…
Don’t do that at home :-)) behind the switch for a glove box light:
Finally, remove another screw on the left side of the glove box’s upper wall next to the plug for a BMW charging flashlight (as you can see there isn’t one in my car…) :
Then pull the upper wall of the glove box towards you. It is held by the wires for the glove box light and its switch. Remove the wires, and make sure not to lose the switch, it falls out easily:
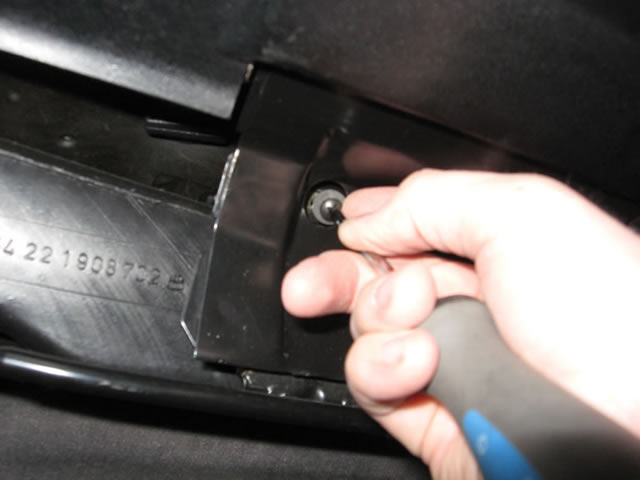
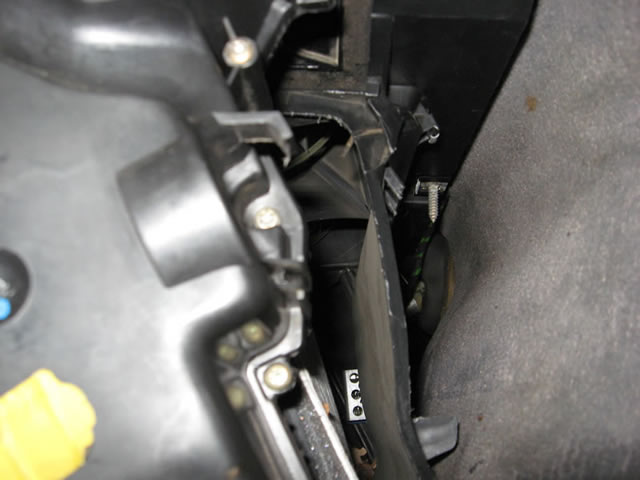
Next we are going to remove the air duct for the passenger’s floor heating. First remove the two screws in the center of the picture.
Do try using a magnetic screwdriver, so they don’t fall inside their metal housing, it’s a bit of a hassle to get them out…):

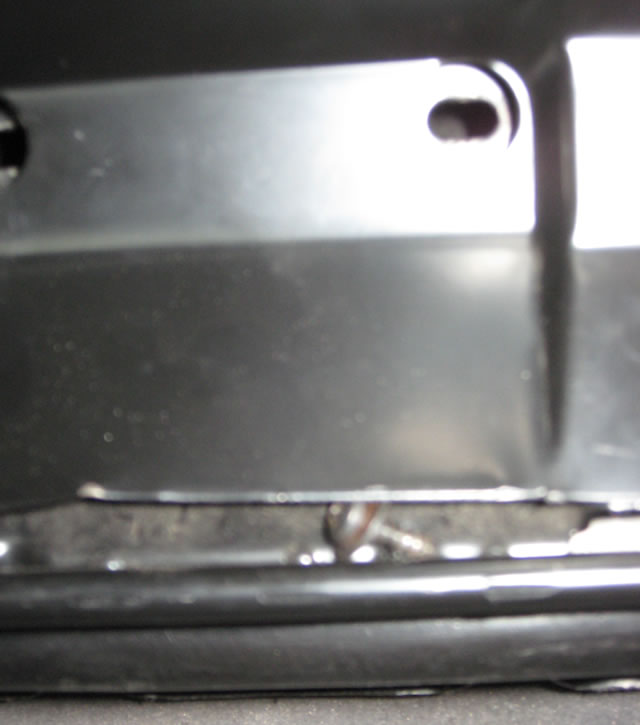
Taking care not to drop the screw into its housing (okay, so that’s not a magnetic screwdriver…):
If you managed to get the screw to fall inside the metal housing get a flashlight and take a good look at things from below.
Maybe you’ll have to pry open the housing a bit to get the screw out. After a couple of micro filter changes mine looks like this and it’s not that difficult to get screws out:
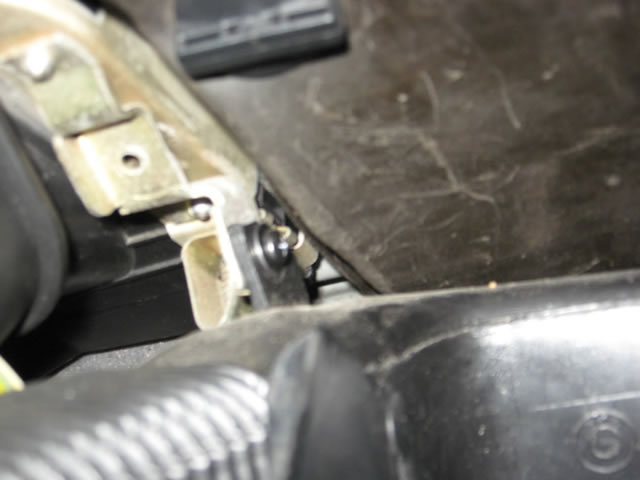
Then remove another black screw that holds the air duct to the dashboard, it’s located on the air duct bend inside the left corner of the glove box:
Now we are going to separate the air duct from the left inner plastic wall of the glove box.
Remove the plastic plug in the center of the picture that holds the duct to the inner wall. Take care not to break it because its head is very thin.
The dealer did manage to ruin mine and then couldn’t properly assemble the walls of the glove box. What you see is a new plug from a scrap yard:

The duct then freely falls down.
Remove the left side inner wall of the glove box by pushing it away from you (towards the firewall).
Make sure not to break its plastic guides (visible on the left) that are still snapped into the dash board:
The glove box’s left wall is now hanging by the wires for the BMW charging flashlight. Remove them.
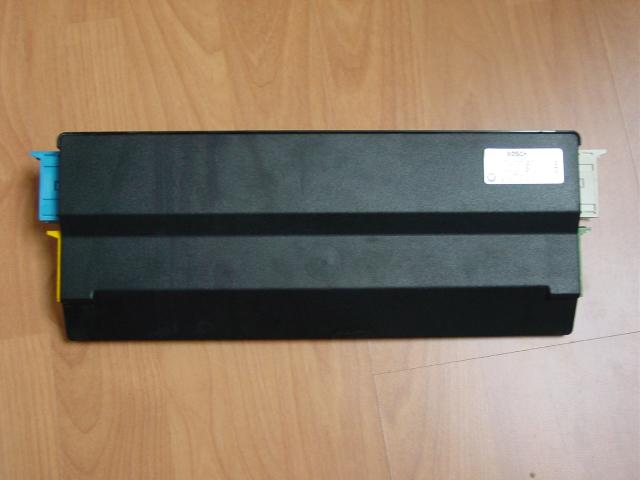
Then remove the air conditioner control unit.
In the picture you see an IHKR/3 control unit made by Löewe that is already partially pulled out, but you have to press the plastic tab on its upper right that holds it in place first and then you can pull it out:
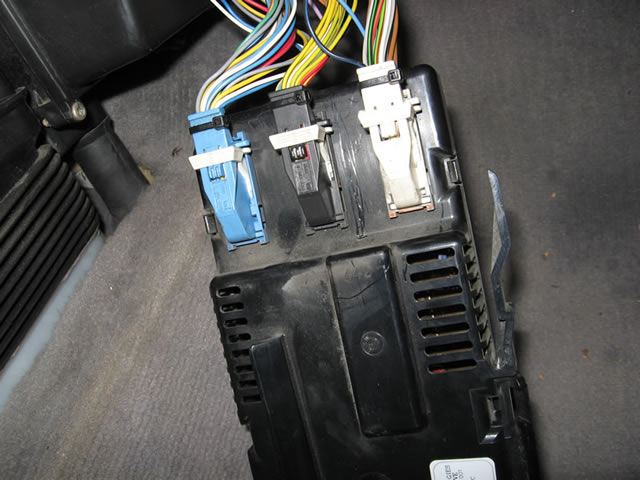
The IHKA control unit has four plugs, and two of them are on its left side:
Picture by Johan
I suppose that to disconnect the plugs you have to be able also to reach it from the left side of the center tunnel. You can do that by removing the plastic on the driver’s side above the pedals.
It would be best to tie the control unit to the upper wall of the glove box to make sure that the disinfecting spray (that certainly will leak out of the micro filter housing) won’t get to it:
(You need a functional air conditioner to disinfect the A/C, and with the unit removed it won’t work, right? 🙂
Of course, if you aren’t going to do all that disinfecting stuff you can just disconnect the control unit and put it away.)
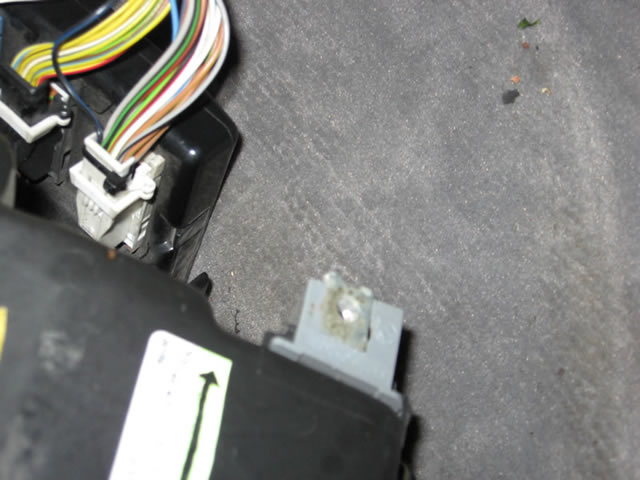
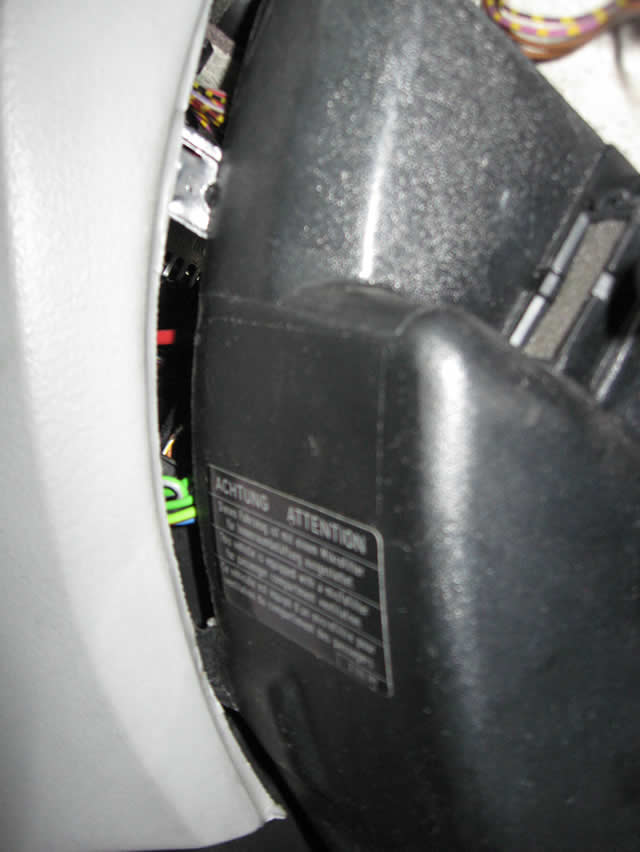
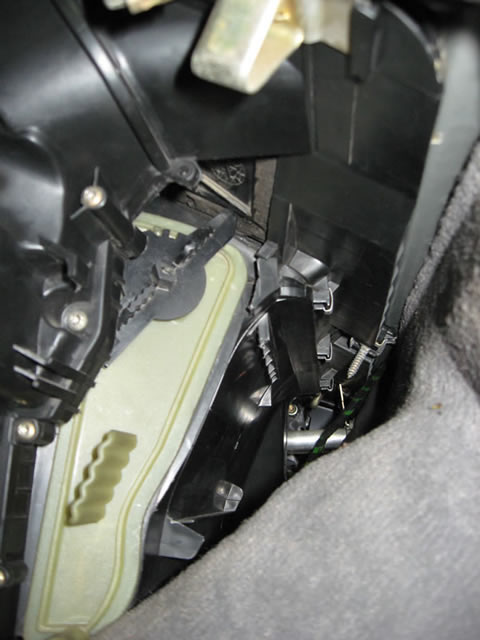
We are getting down to business. What you see is a sideways view of where the micro filter is.
The green thing is the micro filter cover, the control unit that we just pulled out was located next to it to the right. Turn the big black knob that holds the green lid in its place 90 degrees counter-clockwise, you’ll feel it click out of place when doing it:
Now remove the T-10 torx screw at the bottom of the green lid (You do have a set of torx screwdrivers, don’t you? If not, there’s a trip to the hardware store waiting…):
The green micro filter lid should then fall out of place by itself, this is how it it looks from inside:
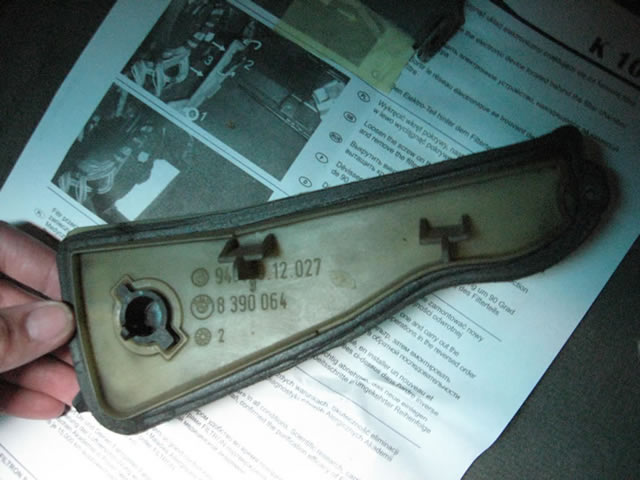
Take a look inside, the micro filter is a white thing on the lower left:
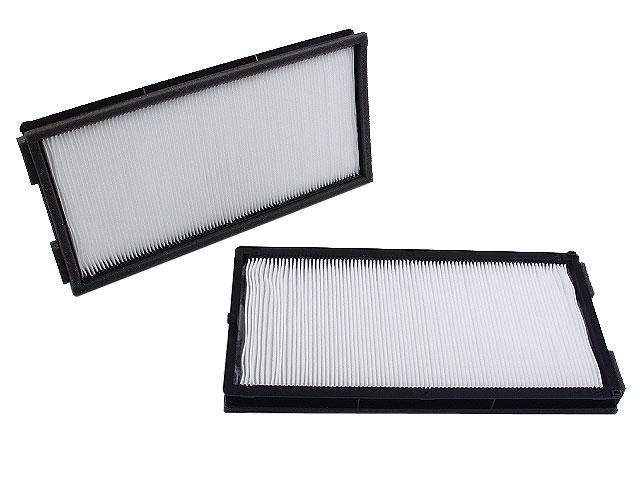
Pull out the old filter, and remember the way it was put in:
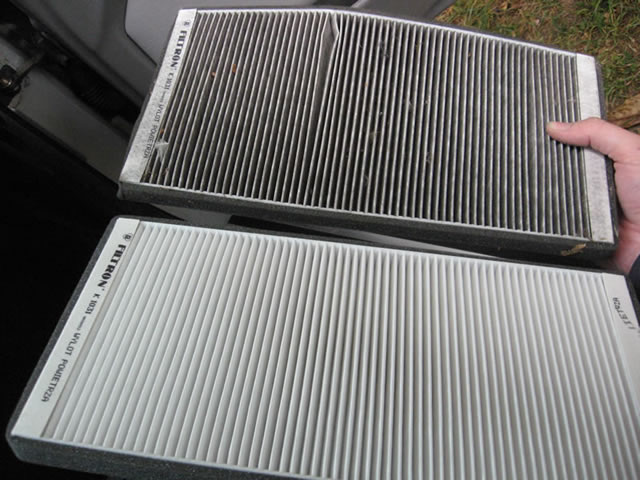
Here you can see the difference between a new and a filter that is 10 000 km/1 year old. Dirty isn’t it?
Now turn the ignition on, and set the A/C to cold and ventilation on full blast for a minute or so.
There should be some more leaves falling out of the filter opening, also vacuum all the dirt inside the micro filter housing.
Don’t forget to do this or your new micro filter will be clogged up again pretty soon.
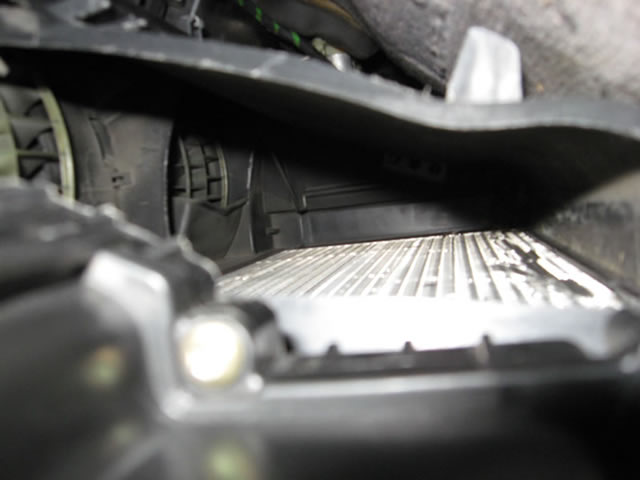
This is how a 15 year+ evaporator looks like. It’s still shiny because of the micro filter blocking the dirt from outside:
Now I’ve got a surprise for you… This is how an evaporator from an ’88 535i that didn’t have a micro filter installed looks like. Can you believe that?
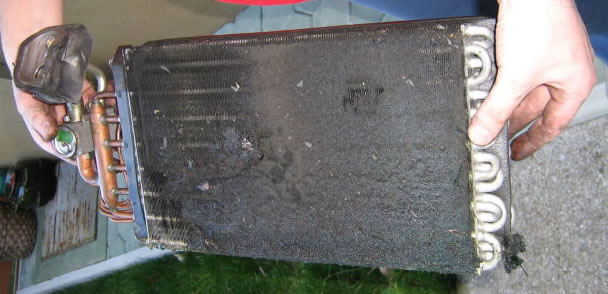
Picture by Baracuda / bmwslo.com
If you also want to disinfect your A/C, you have to spray inside the micro filter opening, which will disinfect the evaporator. All the instructions should come with the spray can.
Then put the new filter back in, put its lid back on and so forth. Reassembly is reverse of removal.
Total amount of time: I’ve changed my micro filter a couple of times now and it still took me an afternoon.
Skills needed/difficulty level: Not a problem. You will need a torx screwdriver.
Total amount of parts and costs (1 Euro equals 1 US Dollar for convenience): The original BMW filter costs about 25 Euros.
I went with the aftermarket filter from Filtron that set me back 10 Euros. The original BMW/Mann/Fram filter has a plastic frame, which this one (not surprisingly, it was cheaper) lacks.
But somehow it still snapped into place.
According to the ETK there are different part numbers for a micro filter made for the ventilation system with A/C and without A/C.
On the other hand, the aftermarket filter is the same for E32/E34 with A/C and without. Go figure…
Satisfactory level after the job done: Just another chore to get ready for winter…