Article by: Dudesky_E36
Applies to: All BMW models with small variations.
Spark plugs should be replaced every 10,000mi or once a year. It’s a fairly simple process and takes less than a half hour to do. It is however important to take your time and pay attention to detail because a mistake here can cost you time or money. Since the plugs will be removed, I also performed a compression test, which you can skip over if it doesn’t interest you. This article features a 6cyl 325 and a 328 and M3 will be almost identical. A 318 will be even easier (more on the 4cyl later).
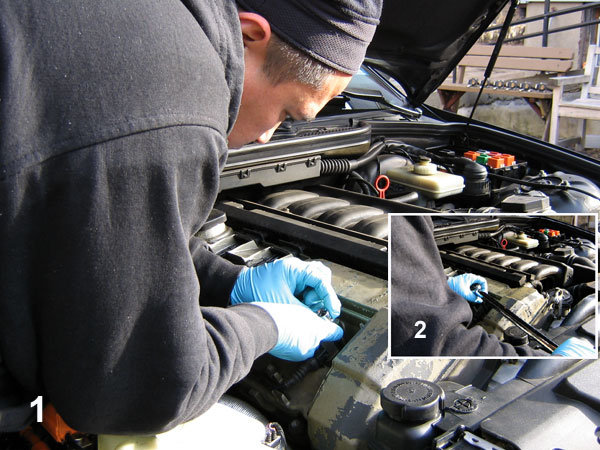
Ideally, you should change the plugs while the car is cold in order to prevent binding at the threads and possibly distorting the holes. But I’m also doing a compression test which requires the engine to be slightly warm, so I ran it at idle for about 3-4min. Begin by removing the plastic engine covers. Take off the oil filler cap. Pry up the decorative caps with a screwdriver to access the 10mm nuts or bolts that hold them down. 318 owners will find a cool little blue tool under the cover. This is for pulling the wires off the spark plugs (since the 4cyl does not have ignition coils sitting directly on top of the plug). Put the oil filler cap back on once the covers are removed.

This next step applies if you are also doing a compression test. If not, you can skip it. Remove the fuel pump fuse (#18), the fuel pump relay, and the main DME relay. Start the car and let it die as it burns off the remaining fuel in the lines. Crank it one more time to make sure there is no more residual gas.

With the coils exposed, pry up the metal retaining clips with a flathead screwdriver, and pull the wire plug straight back off the coil. Then remove the 10mm nuts to release the coil packs. Just pull them straight up and out. The coils are interchangeable, but I kept them in order anyway as I pulled them out. For 318’s simply use the blue tool to pull the wires off.
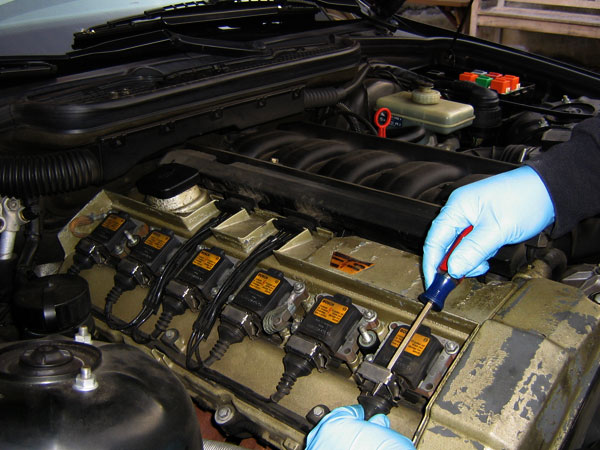
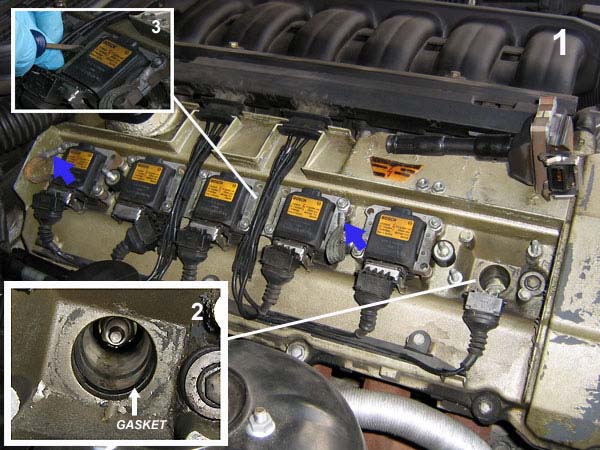
Photo below shows the first coil pulled out. In case you’re wondering how deep that plug hole is, it’s a little over 5”, so a 6” socket extension will do nicely when you remove the spark plugs. Some of you will see oil in there, and it’s not unusual to find the well filled up. Unbelievably, the condition does not affect engine performance and the spark plug fires normally. The leak is caused by worn valve cover gaskets located near the top of the hole (photo inset 2). You can see from my engine how the oil comes out and travels down. I’ll have to replace mine, but that will be for another day. As you remove the coil packs, thread the 10mm nuts back on the studs so you don’t lose them. Note the 2 ground straps indicated by the blue arrows in the photo. Make a mental note to put them back on later, or slip them back over the studs now before threading the nut on so you don’t forget. To aid in removing the coils, you can pry out the two main wire harness clips off the metal brackets with a flat head screwdriver (photo inset 3).
Make sure the holes are clean before removing the spark plugs. Use a shop vac or compressed air. If there’s oil, use paper towels to soak it up, suck it up with the shop vac with a straw attached, or use a turkey baster. Also clean around the top of the valve cover to be sure nothing drops into the holes- the last thing you want is crud in your cylinders.
Since the spark plugs are all the way down in the holes, it’s best to use a standard 5/8” spark plug socket with a 6” extension. These sockets have a rubber washer inside to grip the end of the plug as you pull it out. A regular 5/8” deep well socket will work, but you’ll need needle nose pliers to grab the plug. When removing the plug, nice and easy is the word! Use a longer breaker bar or slip a pipe over your ratchet handle. This provides better control and prevents any sudden jerky movements as the threads break free. Once they do, pull the ratchet/breaker bar off the extension and turn the rest of the way with your fingers so you don’t accidentally cross thread. Keep the plugs in order as you remove them, so you can diagnose any potential problems later.
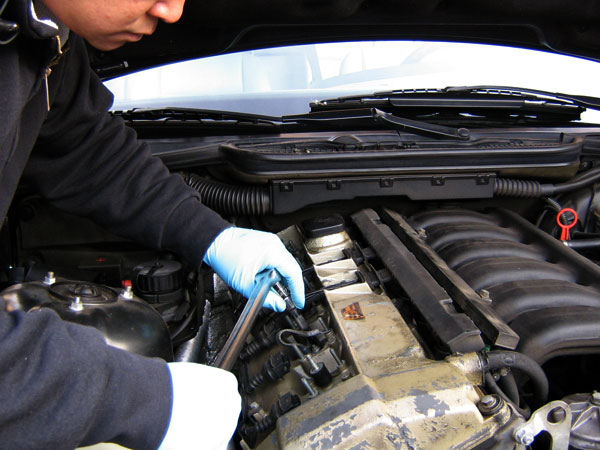
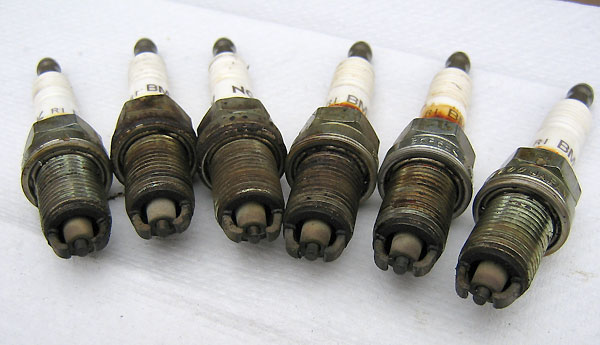
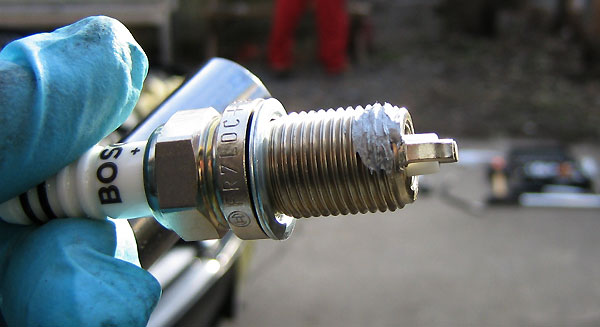
Photo of my plugs. Not too bad, I think the color is just about right. You’re looking for a tannish brown or a medium gray color. I’m not gonna go into reading your spark plugs, there are too many websites out there that do this. Do a internet search and you’ll pull up dozens of them.
Testing engine compression:
Now is a good time to do this, since you have all the spark plugs removed. It’s also easier on your battery and starter when they’re all off, as opposed to removing one at a time.
If you just had the car running (in case you weren’t following the spark plug removal process above), wait about 5min. This minimizes the risk of damaging the threads on the head when you pull the plugs out. Next is very important: remove the fuel pump fuse (#18) as well as the fuel pump relay and the main DME relay, if you haven’t already done this (relay locations are depicted in 2nd photo at the beginning of this article). Then start the car and let it die. Crank it once more to make sure there’s no residual fuel. Now you can remove the plugs.
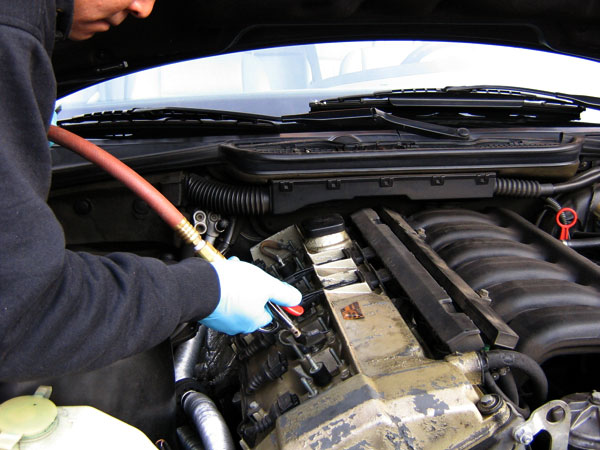
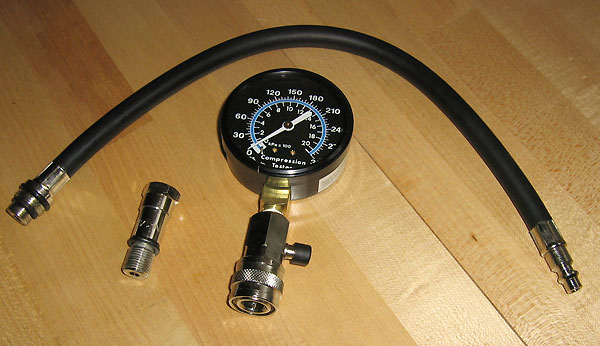
The average compression gauge comes with the hose and a fitting that screws into the spark plug hole. The gauge itself has a pressure relief valve on the side to let air out once you’ve taken your measurement. This set in the photo was $25 at Pep Boys. If your set has a separate fitting like this one, make sure you tighten it very well onto the hose, or you’ll end up leaving it behind in the spark plug hole when you unscrew the hose. These fittings are not easy to remove on their own, since the 18mm socket required will barely fit into the plug hole.
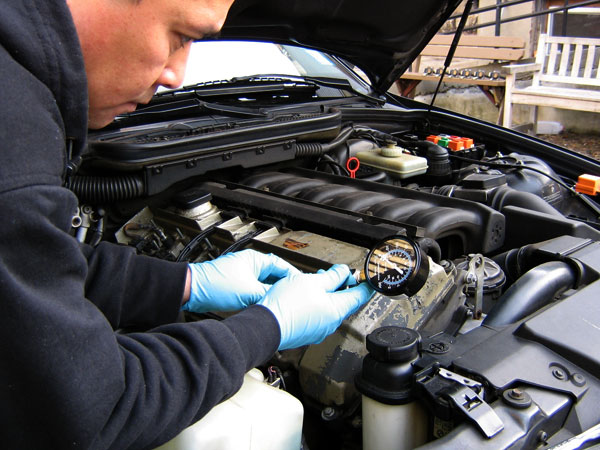
You can do this on your own, but you really want a helper to be at the driver’s seat. Screw the hose into the spark plug hole and tighten just enough to get a good seal, then connect the gauge at the other end. Have your helper put the gas pedal to the floor as he/she cranks the engine. Flooring the gas pedal allows the maximum amount of air to enter the cylinder. The needle on the gauge will rise up higher and higher with each stroke, and then level off to a point where cranking no longer has any effect on it. This typically takes about 4-8 compression strokes. Record the psi number, release the air through the valve, unscrew the hose and move on to the next cylinder.
My results were 230-230-230-223-224-232, pretty good for 146k miles on this engine. The most valuable information you can derive from a compression test is really just how close the cylinders come to each other. An acceptable result would be that they fall to within at least 85% of the highest reading. For instance, my highest was 232psi, so the minimum for the others should be at least 197psi. But more ideally, the figures should be within 5-10psi of each other. If you have a cylinder that is drastically off compared to the others, retest it to make sure you didn’t get a bad reading. And while the minimum pressure for an E36 is 142-156psi, low numbers themselves do not necessarily mean engine trouble. A lot of factors affect gauge readings: the gauge itself, incorrectly adjusted valves, premature camshaft wear, altitude, temperature, and even the condition of your battery can retard the readings. Those who run aggressive cams will typically produce lower than average numbers as well. The important thing is that whatever the actual numbers are, they shouldn’t vary too greatly from each other.
Installing new spark plugs:
Now for the home stretch. Pretty simple and straightforward, but first a word on anti-seize compound. There have been discussions regarding the use of it on the plug threads. According Wayne Dempsey of Pelican Parts, Porsche does not recommend the use of it, citing that it acts to raise the electrical resistance between the plug and the cylinder head. But the thought of a plug getting stuck was too scary for me, so under advice from fellow member (thanks C1apton), I’d say just a dab couldn’t hurt.
Stick the plug into your 5/8” socket and extension, and thread it into the hole by hand . . take care not to cross thread it. Then use a torque wrench and tighten it to 18ft-lb.
Installation of the remaining parts is the reverse order of removal. Don’t forget to put the ground straps back over ignition coils 3 and 6. I have found no place on BMW torque spec sheets, the Bentley manual, or online for the torque specs on the ignition coil nuts. I just cranked them hand tight, but judging from their size, I’d say a 10mm nut shouldn’t require more than 15ft-lb of torque. Put your fuses back in, clear all your tools, and give the car a go.
Last and final step: grab a brewsky, dudesky- you’re done!