Article by: Itsablurr
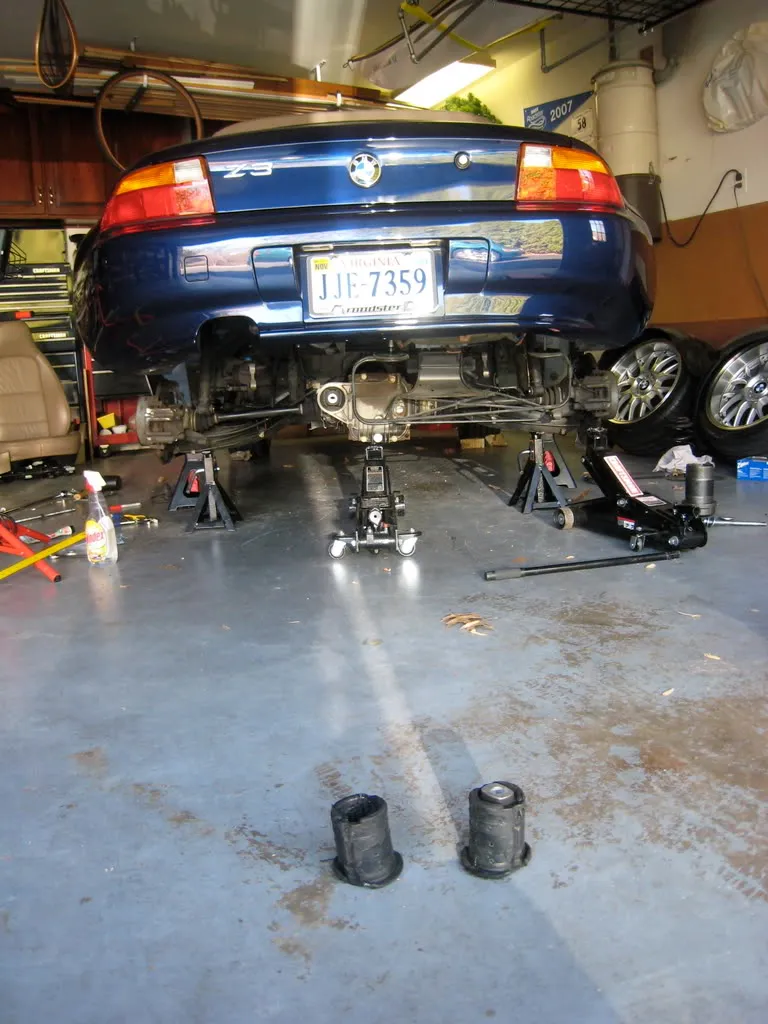
Article applies to: e36 and Z3 models.
Don’t pay the ripoff prices (a few hundred bucks last I checked? ) for the ‘real’ tool when you can make your own from a few simple, readily available parts to the tune of $25-$30 at absolute most. It works just as easily, and will last just as long. Now, as requested from the other thread . . .
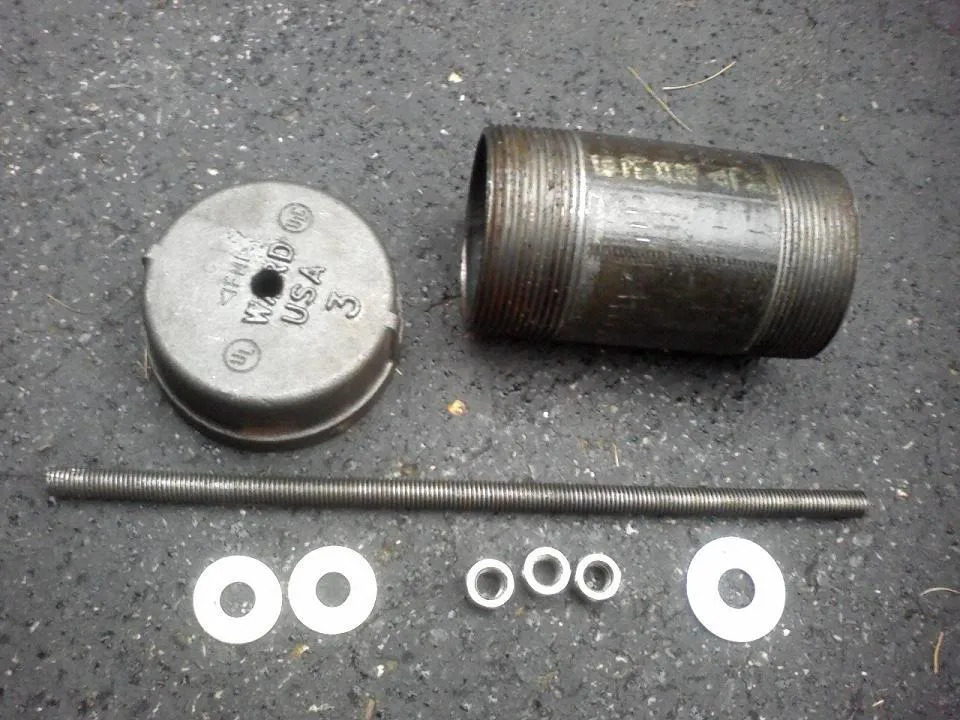
Shopping list: *all parts can be found at Home Depot/local pipe or plumbing supply store. To find a local supply (they are all over the friggin place around me), simply plug in the keywords plumbing/pipe supply *your town*, *your state* into google maps.
– Qty 1 3″ diameter black pipe nipple, standard 6″ length (Purchased at local pipe store, as HD only stocks up to 2″ diameter)
-Qty 1 3″ black pipe end cap (Purchased at local pipe store, as HD only stocks up to 2″ diameter)
-Qty 3 grade-8 1/2″ nuts (Home Depot)
-Qty 2 grade-8 1/2″ washers (Home Depot)
-Qty 1 3/4″ steel washer (Home Depot)
-Qty 1 length of 1/2″ steel threaded rod (Home Depot)
Pic of all the bits (after prepping for assembly):
Tools (to assemble tool, and to use tool):
assemble:
-1 Dremel w/ cutting wheel -or- Jigsaw/Bandsaw w/ metal cutting blade
-1 Drill Press or Hand Drill
use:
-1 Box Wrench
-1 Vice-Grip
-Oil (I used a nearly empty leftover quart of 10W60 that I had laying around)
-Flathead screwdriver (or other equivalent thing to use as a wedge- actual usefulness is debatable. I just used it to be double sure everything was aligned for the easiest extraction possible)
-Handheld Propane Torch
To Assemble the Tool:
-In the Pipe End Cap, drill a hole in the center to slide the 1/2″ threaded rod through, with a small amount of clearance in the diameter.
-The threaded rod can be purchased in either 12″ (not in stock at my store) or 3′ lengths. If purchased in a 3′ length, use the Jigsaw/Bandsaw to cut it to an approximate 10″ or 12″ length (this length leaves a fair amount of margin when using the tool).
-The tool can be configured and used in 2 different ways; one way to remove an oem bushing, and another way to install a bushing.
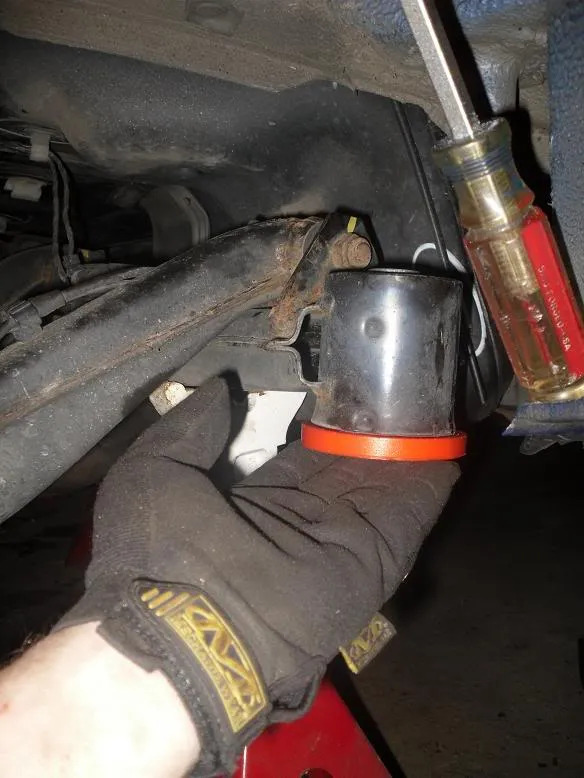
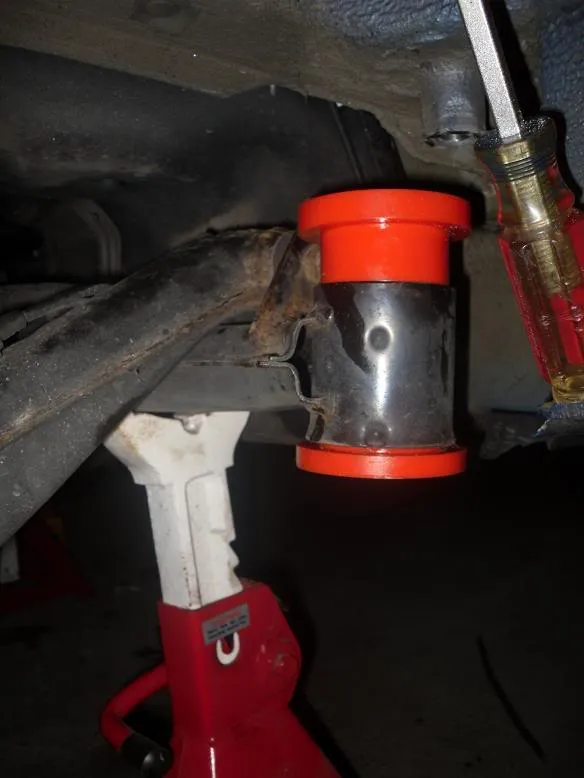
Removing the Sub-frame Bushings:
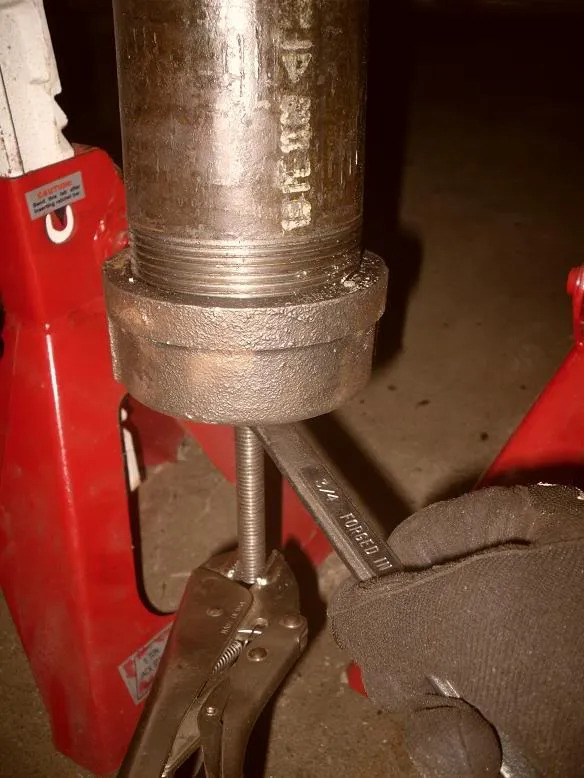
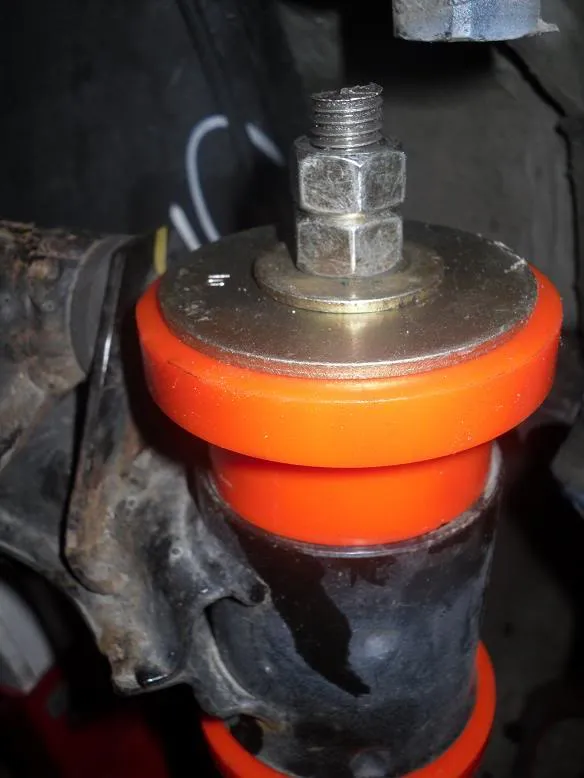
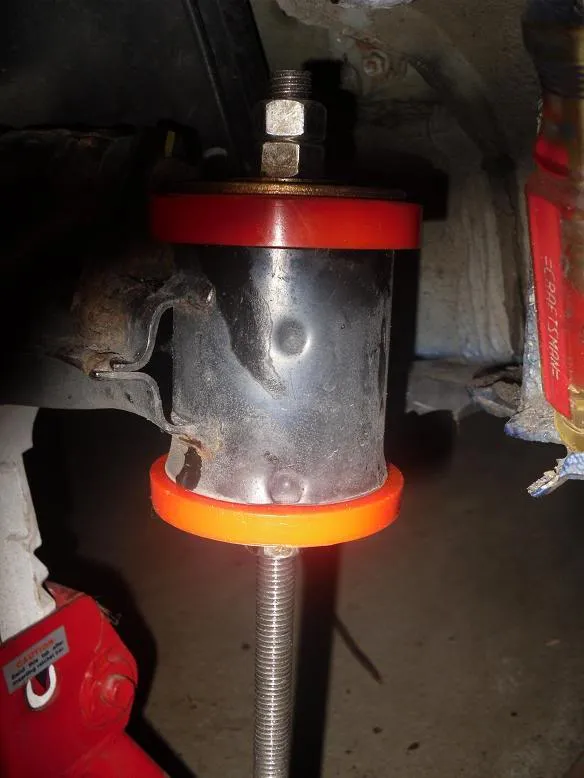
Tool will be used as it is seen configured in the following pictures:
Top:

Bottom:
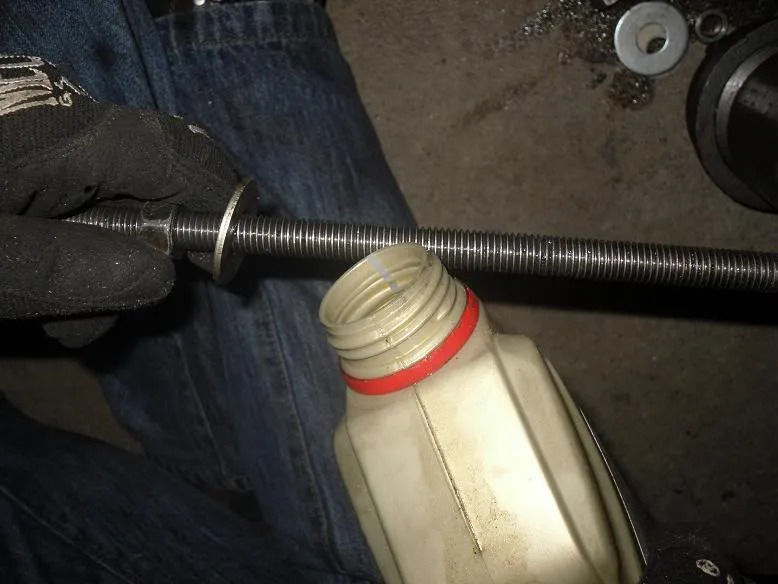
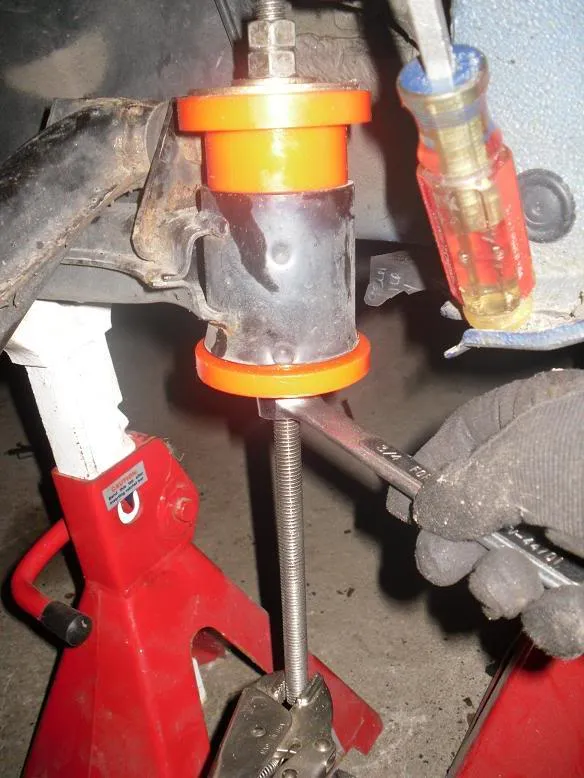
1- Be sure to oil the threads with a small amount of oil. While using the tool with the proper technique, oiling may not even be necessary at all with how easy the stock bushing comes out, but it is in the interest of potentially extending the useful life of the rod should some stubbornness be encountered.
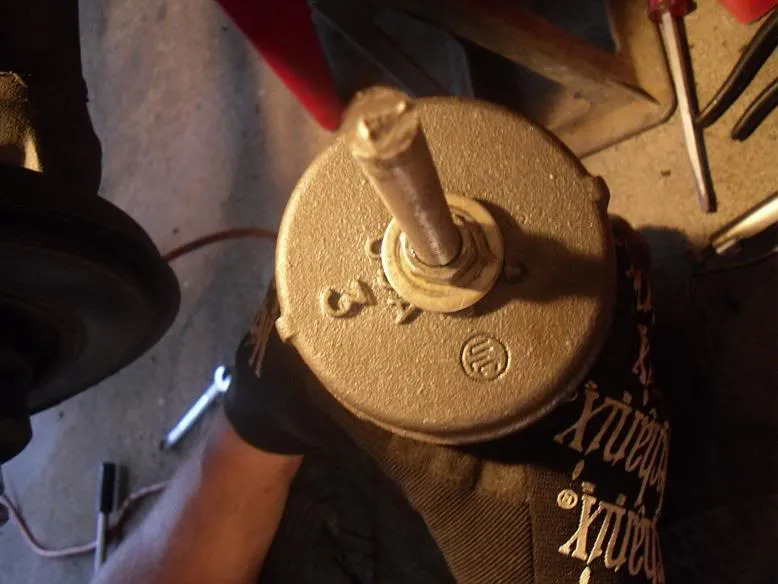
2- Assemble the tool onto the bushing… on the underside of the tool is 1 1/2″ grade-8 nut with 1 1/2″ grade 8 washer, on the top side of the bushing is 1 3/4″ washer, 1 1/2″ grade-8 washer, and 2 1/2″ grade-8 nuts locking together. Wedge flat-head screwdriver on outer side if desired.
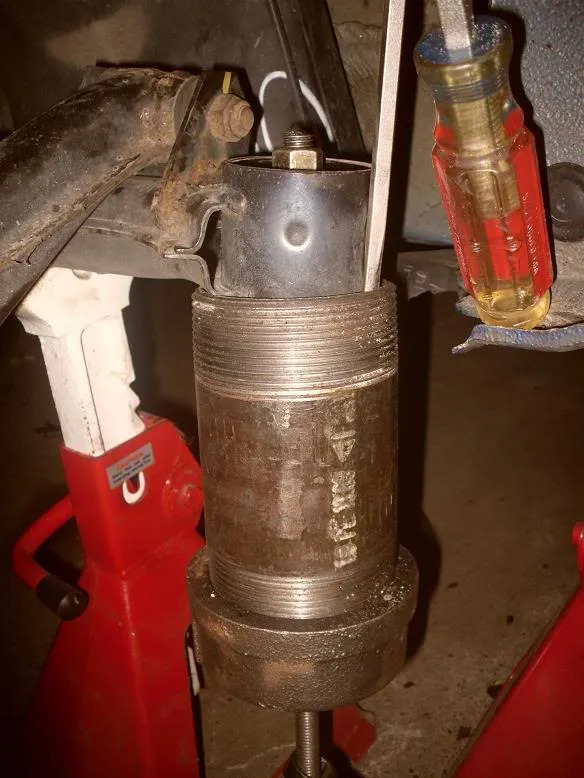
3- With the box wrench on the bottom nut, and a set of vice grips clamped on the bottom of the rod for leverage and to prevent spinning, tighten tool so that it is preloaded and snug, beginning to compress the bushing.
4- Apply heat from the propane torch against the outside of the bushing sleeve on the sub-frame to heat it up and get the rubber soft and oily. You only need to apply it for a quick min or two.
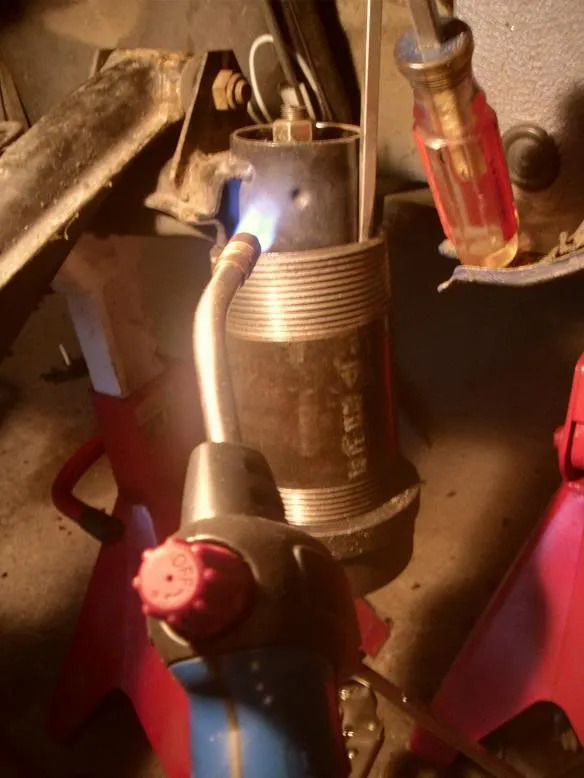
5- Tighten the tool to extract the bushing. Stop maybe one or two times through the extraction to re-apply heat from the torch. When getting close to the end, you will hear the bushing sucking itself out.
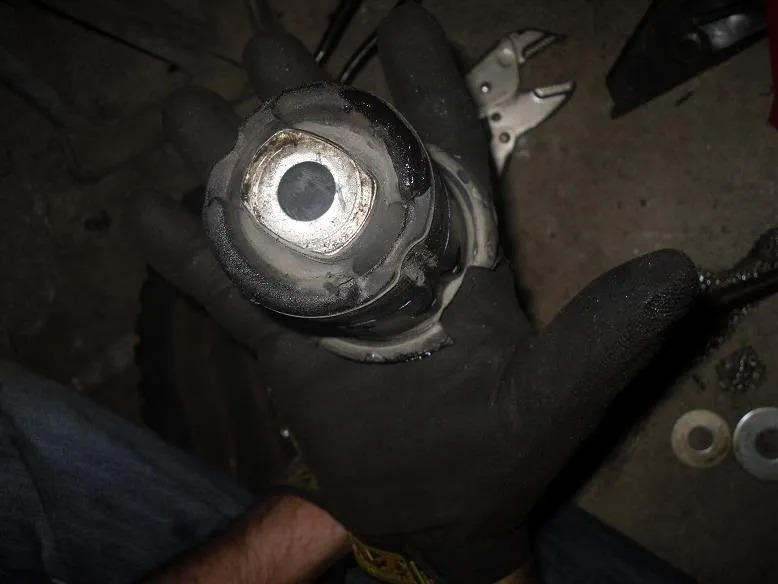
6- Look at the bushing that is now in your hand, and be amazed at how friggin easy it was!
*** note: to remove IE bushings with this tool, the bottom bushing lip must be slightly kissed with a Dremel sanding drum to fit the 3″ pipe around it, and no washers used on the very top to compress just on the metal insert back through. Top half can be popped out with a rubber mallet very easily.
Installing a new IE bushing:
– The tool will be used again to install the 2 piece bushing, only without the 3″ pipe components, and with the addition of the large washer included with the new bushings or from the old ones.
1- Check out the bright, shiny bushings…. half with the metal insert is the bottom, the other is the top.
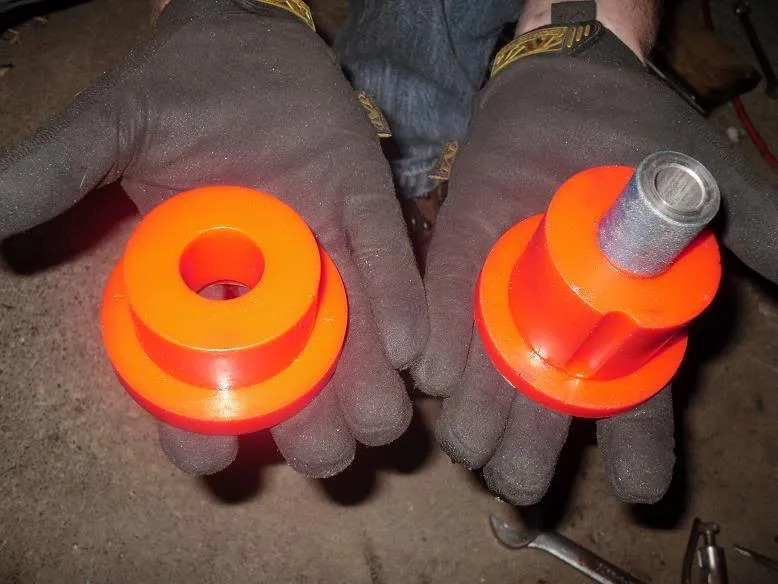
2- Insert bottom piece by hand into the bushing sleeve on the sub-frame… it should slip in by hand fairly easily.
3- Place the top half on the top side of the bushing sleeve.
4- Assemble the tool onto the bushing. Lubricate the rod. The rod goes through the pieces, with 1 1/2″ grade-8 nut, 1 1/2″ grade-8 washer, and 1 3/4″ steel washer on the bottom side. On the top side is 1 large washer (included with bushings, or taken off with OEM bits), 1 1/2″ grade-8 washer, and 2 1/2″ grade-8 nuts locked together.
Assemble Box wrench and Vice-Grips onto bottom of rod as before.
5- Tighten the bits together, and the bushing will easily squeeze into place!
Job of removing and installing the bushings themselves should only take a few minutes apiece each way. Oh, and if you’re wondering what the random inverted screwdriver is in some of the pics, I used my long one to prop the partially unfastened fender liner out of the way… made work way easier.
Thank you to my wonderful GF for sitting in the garage through the process to take the pics
***Editor’s Note***
Comment by PbFut:
“A hardened rod is needed if you don’t want to use a torch. Which I recommended for two reasons. One, you are very close to the plastic fuel tank. Two, sub-frame has a protective coating on it to keep from rusting. Heating will weaken the metal and destroy the protective coating. It is also important to use a washer very close to the size of the bushing and trim a relief in it to pass by the keeper dimples in the sub-frame sleeve. If you don’t, the tool has been known to pull the center of the OEM bushing out and leave the outer ring of the bushing in place. Heating does make the job easier in some ways but I am not sure I would suggest it. After helping many with the tool over the years, and fielding some pretty odd questions from some “experienced” car guys, I would say that it probably is not a good idea to suggest the heat method to the general forum population. Many do not realize that there is a plastic gas tank right next to the work area.”