Article by: jmciver
Article applies to: written for the E36, but applicable to all BMWs.
I feel the need, the need for MORE speed!
The engine on this car is a perfect host for forced induction. Unfortunately, the best type of forced induction (i.e. turbo or supercharger) can be a bit expensive. In comes nitrous, a relatively inexpensive way to get boost. When used moderately and correctly, it is very safe, contrary to popular myth. If you choose to go the nitrous route, be sure to do your homework (I did). Besides, one good thing about this particular kit is that if I finally do get that supercharger kit, the nitrous system can still be used.
DISCLAIMER:
This modification is to be followed and used at the sole risk of the individual performing it. When performing any modifications, there will always be the risk of damage to the car.
MODIFY AT YOUR OWN RISK. Read the procedure carefully and be sure that you feel comfortable with the modification before you begin. Now on to the fun stuff!!
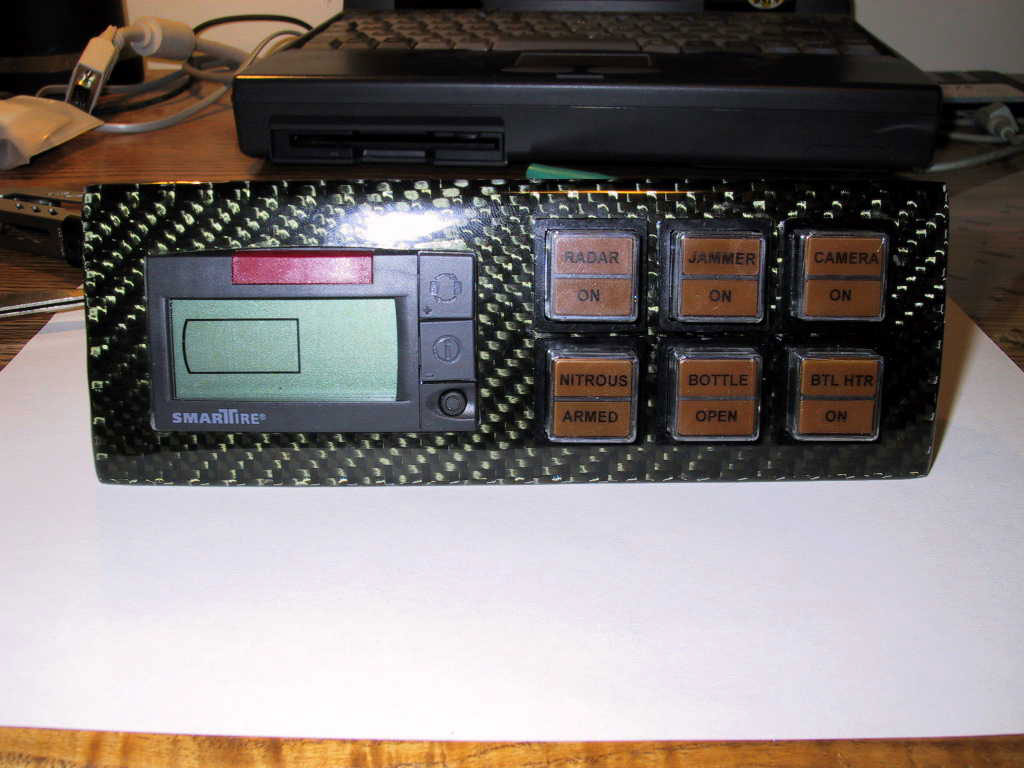
The Control Panel:
You may have seen this on another part of my site. This piece is important since it allows the driver complete control over the system. It is here that the remote bottle opener, bottle heater, and system arming are controlled. The switches are wired so that the system can’t be armed or the bottle heater activated unless the bottle is open. This interlock is important for two reasons: 1) the bottle heater is not supposed to be on unless the bottle is open, and 2) since this is a wet kit, you don’t want extra fuel spraying into the intake when there isn’t any nitrous flowing. These interlocks are not necessary, but they make it harder for the operator to accidentally mess up.
Safety Stuff:
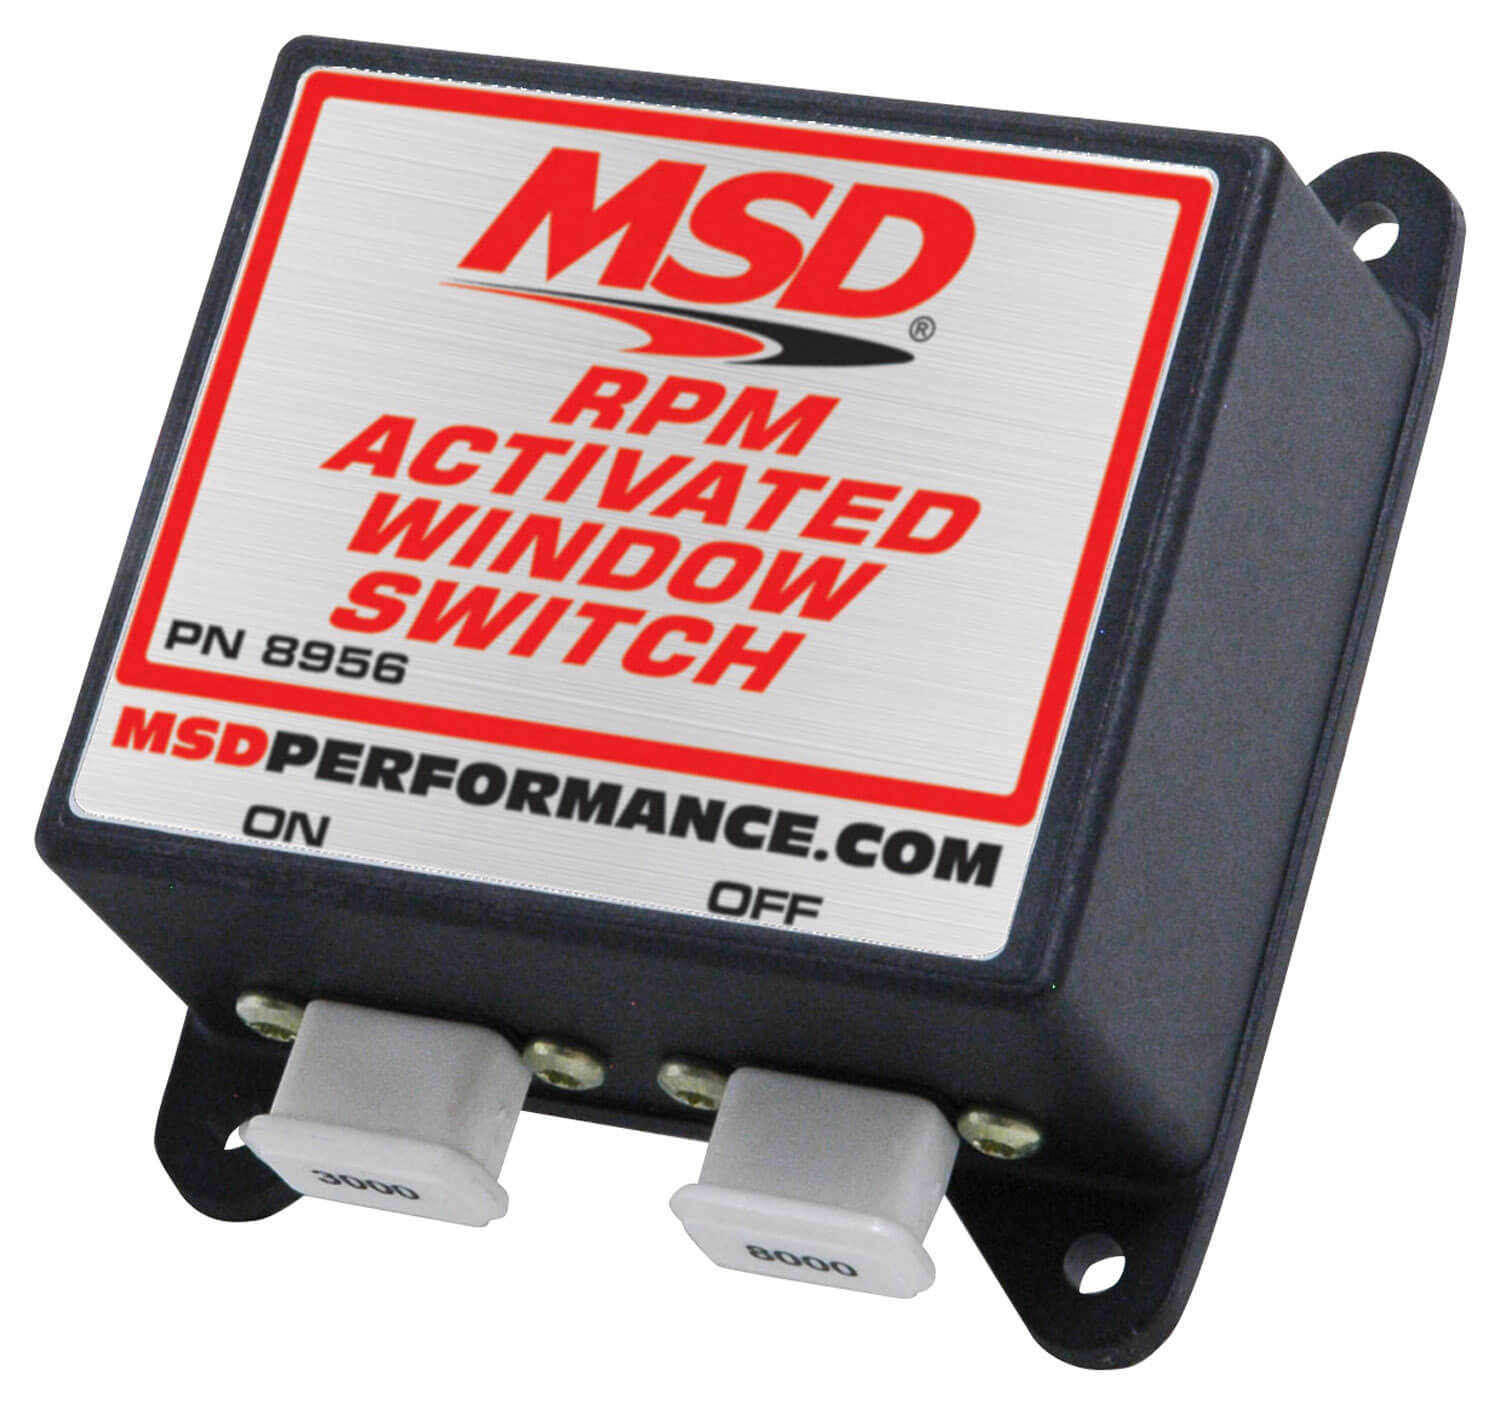
The image on the left is the RPM Rev Window switch from MSD Ignition. This will ensure the nitrous is only flowing in a certain RPM band. This helps to prevent getting on the nitrous too early (unnecessary stress on the engine and smoking the tires) and staying on it too long (hitting the rev limiter and leaning out). Again, this is not needed to use nitrous safely, but it makes it harder for the driver to make a silly mistake that can hurt the engine. To set the RPM band “pills” are plugged into the switch. I plan on starting with an RPM band of 3000 to 6000 RPM. The image on the bottom is the low fuel pressure safety switch. If fuel pressure gets too low, the nitrous system will shut down to prevent damaging the engine due to a lean condition. The kit also comes with a Wide Open Throttle (WOT) switch. This ensures the nitrous will only flow when the car is at full throttle.
The Kit:
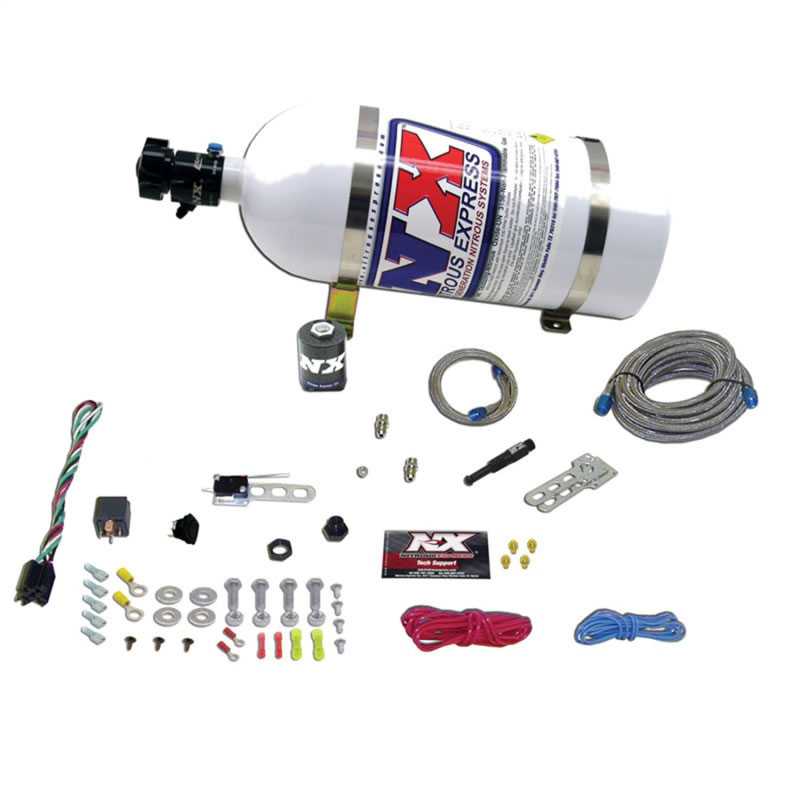
I decided go with Nitrous Express EFI Import kit # 20923. I chose to go with this kit since it is a wet kit, which means both fuel and nitrous are sprayed into the intake manifold at the same time. The install is a little more involved but I feel this is safer for the engine. The kit comes with everything needed for a nitrous install. It can provide “shots” of 35, 50 and 75 horsepower. The only changes that I made to the basic kit is the arming switch, which you saw above and I used a larger, separate filter. The filter that comes with the kit attaches directly to the solenoid, which made solenoid placement very challenging.
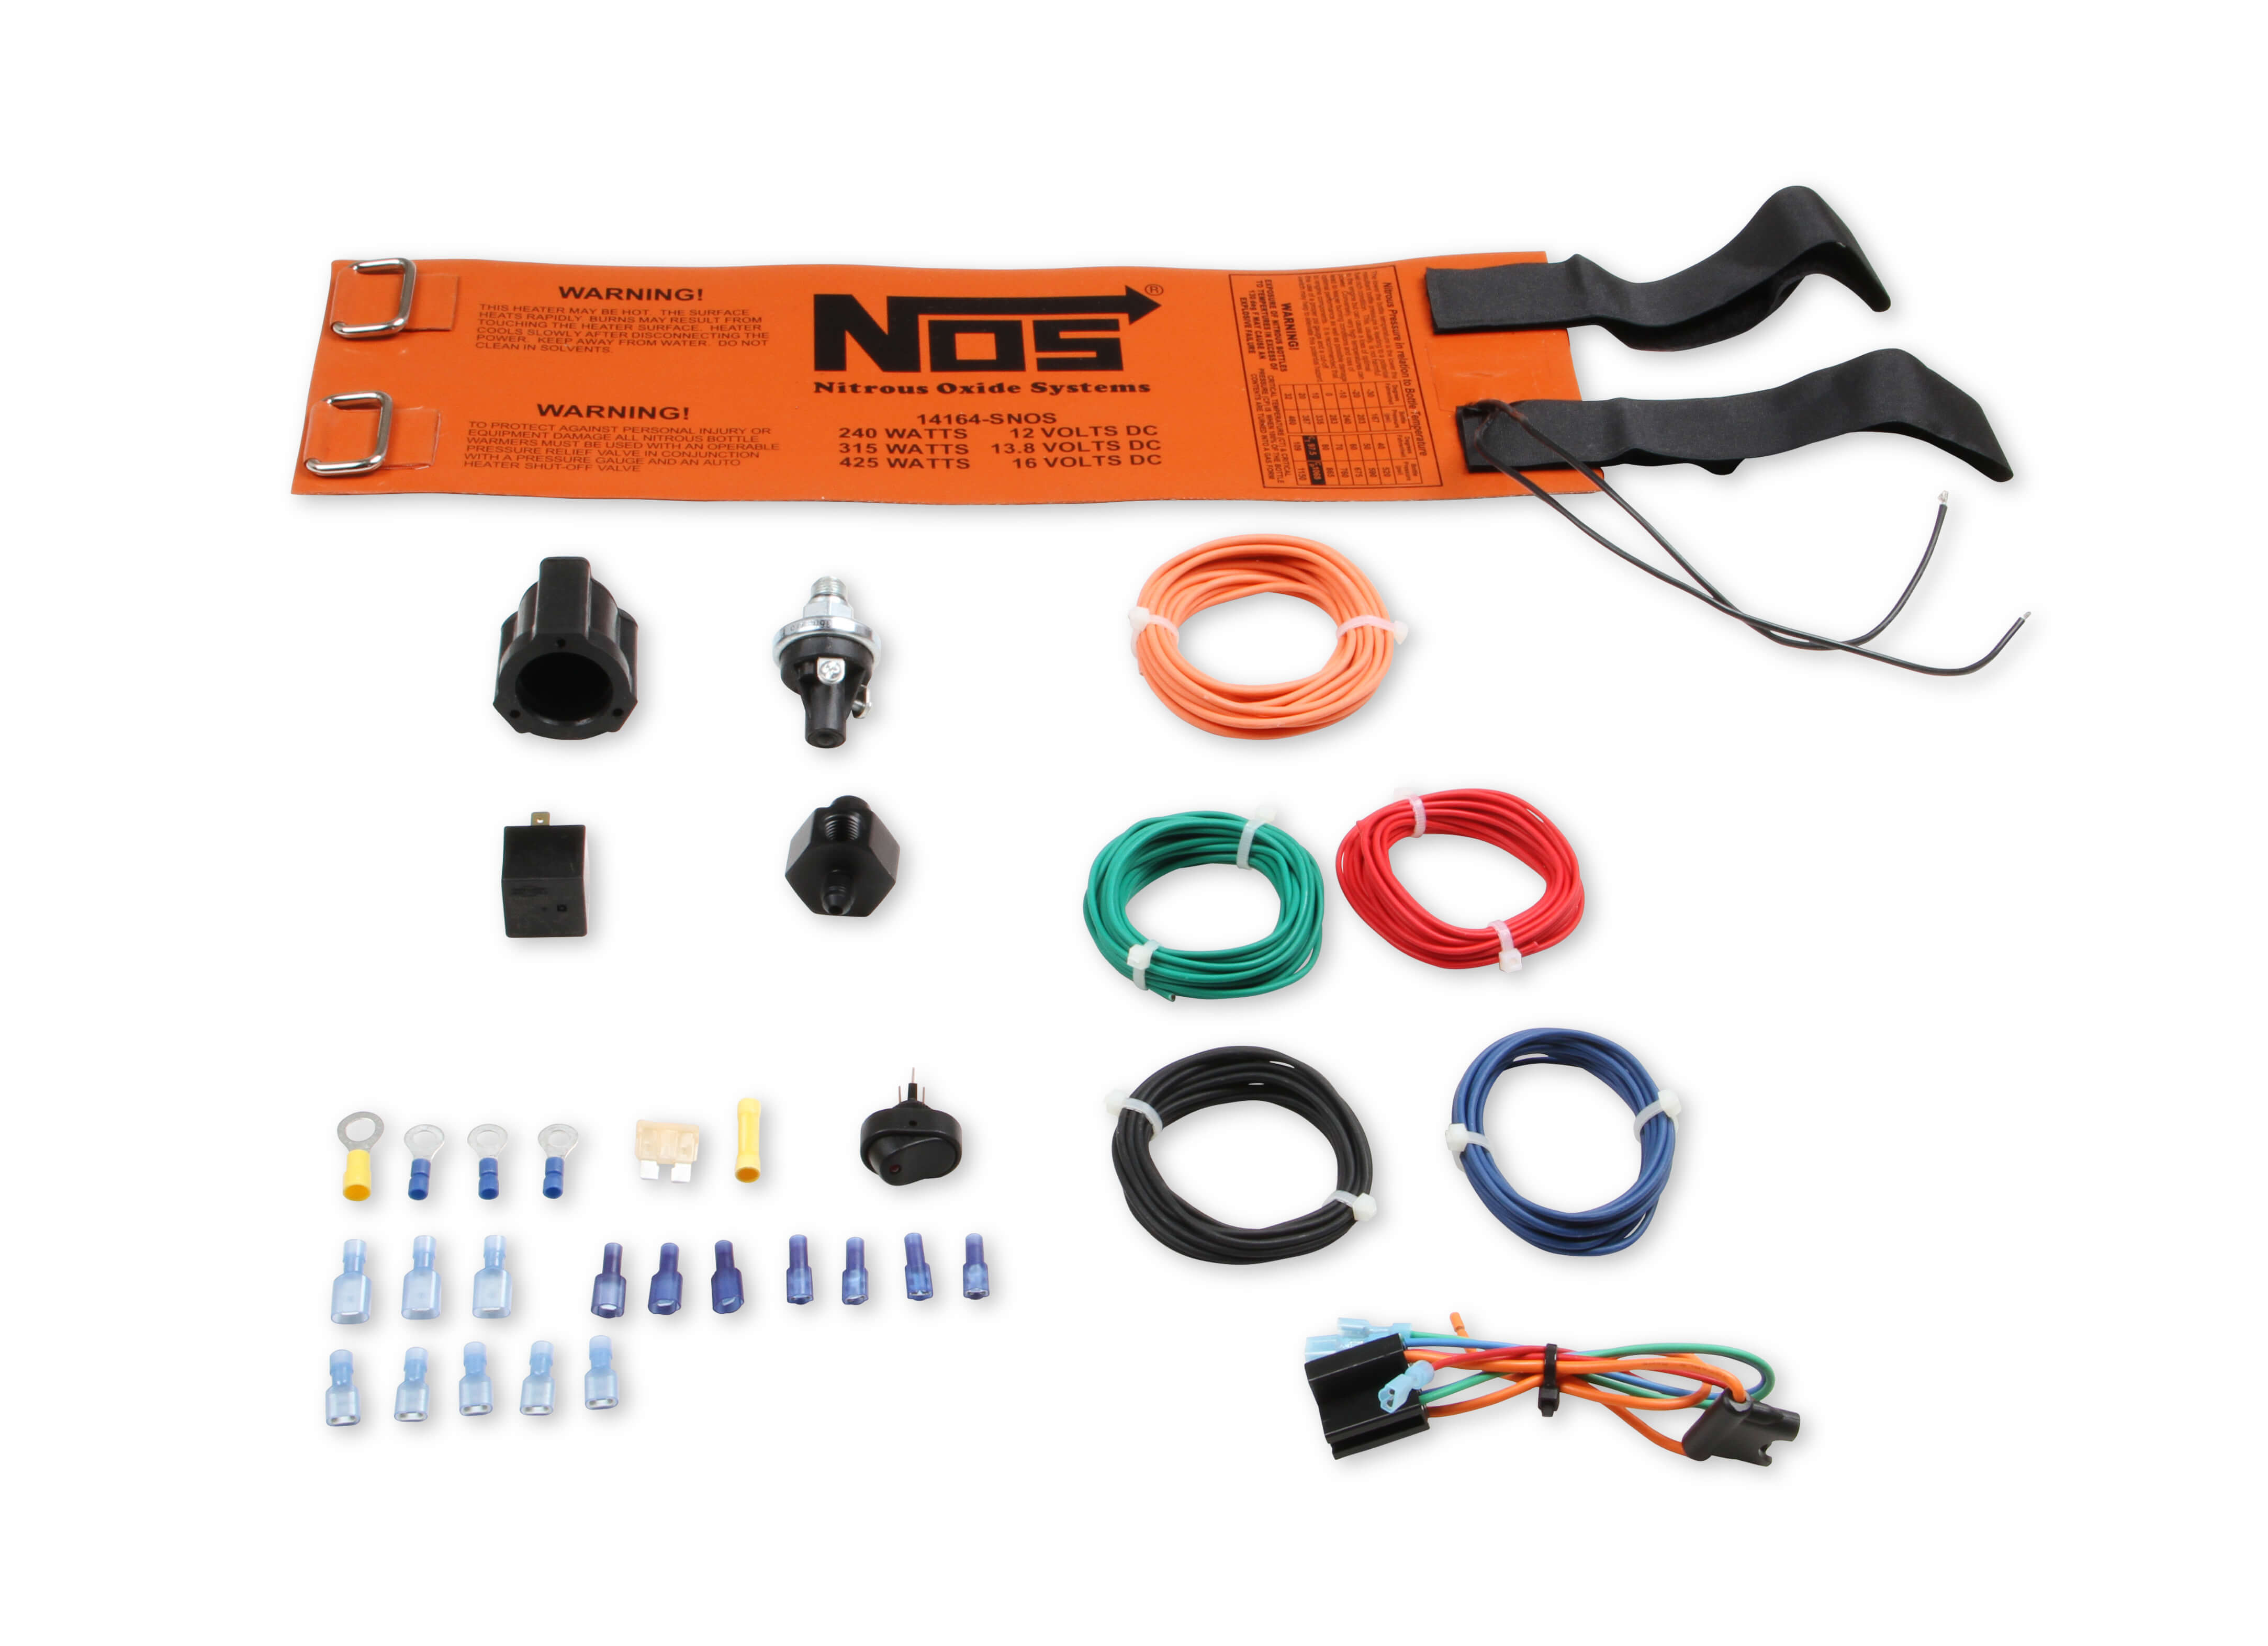
The Accessories:
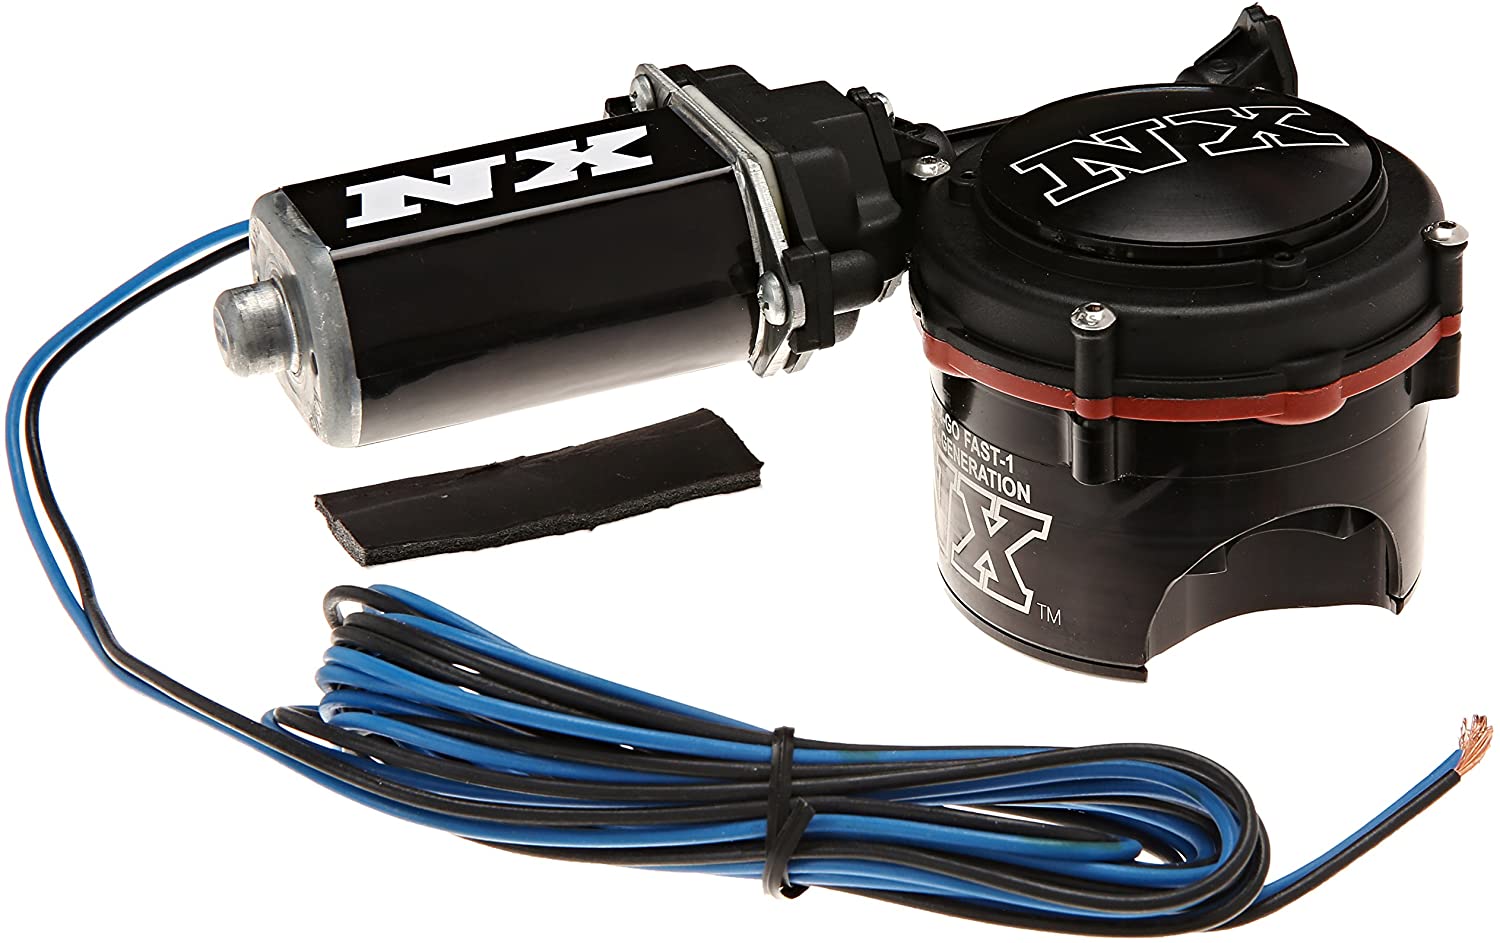
Although these are not necessary to operate the nitrous system, they make operation more efficient and more convenient. The pictures below are of the Nitrous Express Remote Bottle Opener followed by the Automatic Bottle Heater. Since the bottle will be installed in the trunk, this allows the bottle to be opened with the push of a button by the driver. The heater accessory keeps the nitrous bottle at the optimum pressure for the best system operation.
Solenoid Mounting:
Locating a good place to install the solenoids was not easy. I originally wanted a stealth install, but after looking in the engine compartment, that proved to not be practical. Either custom brackets would be required or several engine components would have to be removed in order to make a stealth install. That was unacceptable to me. I chose to use the universal brackets that came with the kit and use mounting points already in the car. I did not want to drill any holes or shoot any studs on the sheet metal. This proved to be very challenging since there is not a lot of space to work with in the engine compartment of an E36 M3. However, after thinking about it for a while and some trial and error, the spots I eventually used worked out very well.
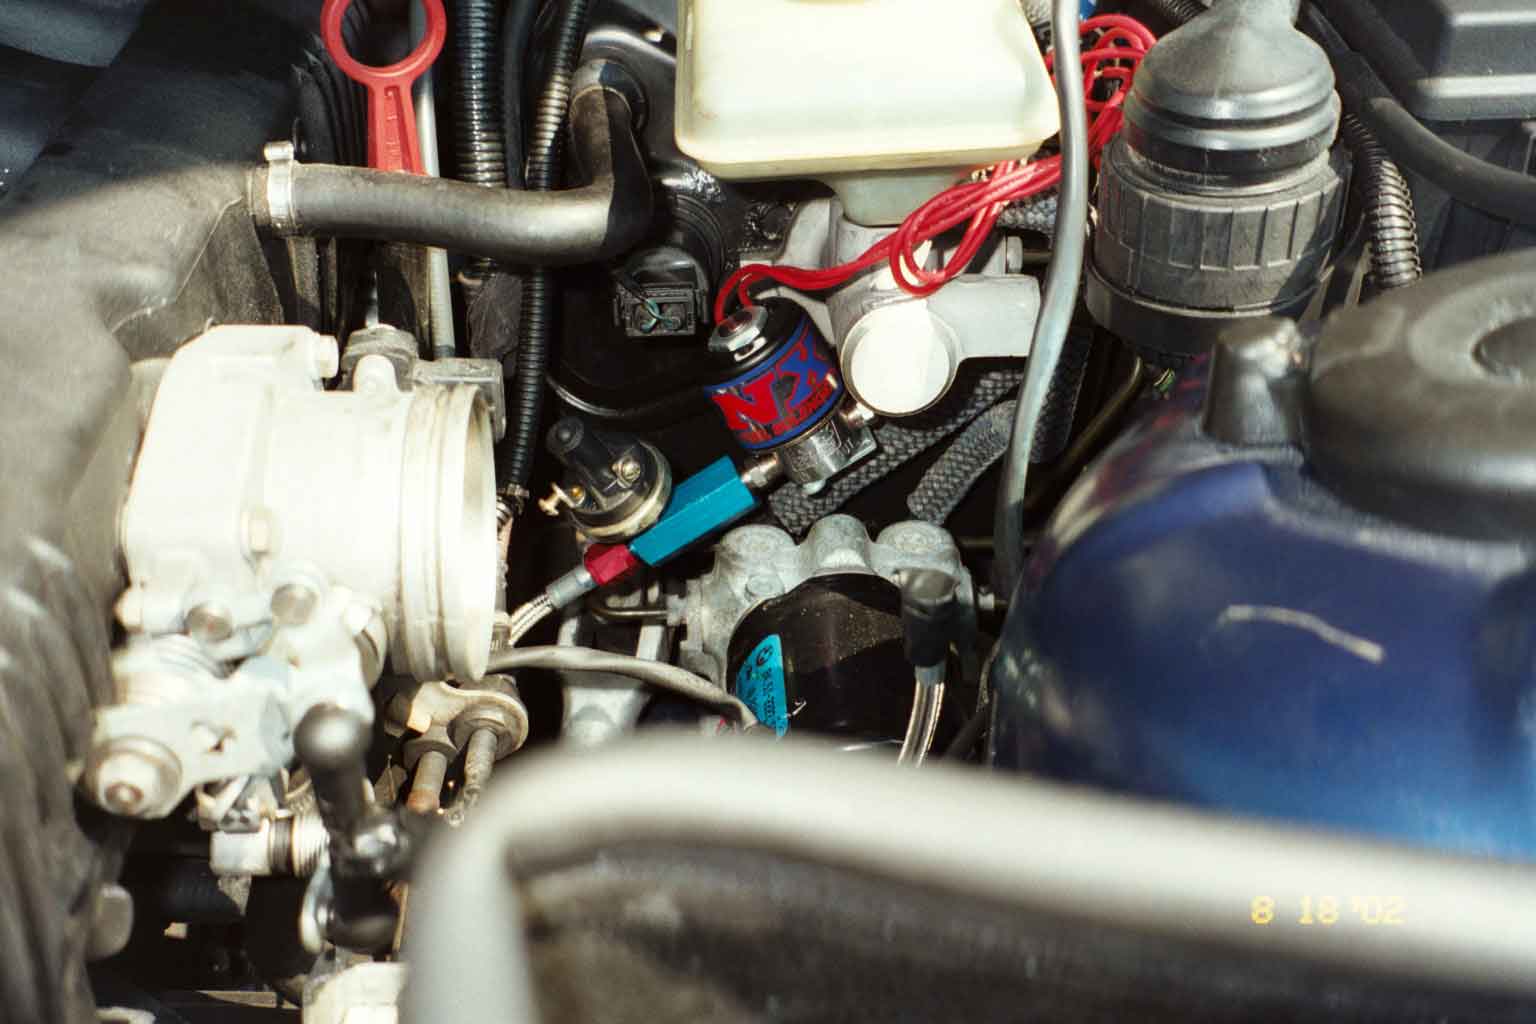
Fuel Solenoid w/Fuel Cut Off Switch:
I mounted the fuel solenoid on the fire wall just below the brake fluid reservoir on the driver’s side. There was a stud with a 13 mm nut that held a wire bracket in place. I bent the universal NX solenoid bracket and it fit in the spot as you see in the image here. Getting the nut off was easy however tightening the nut with the solenoid in place was a different matter since the solenoid blocked it! To make things easier, I attached the fuel pressure safety switch, inlet, and outlet hoses to the solenoid before I mounted it.
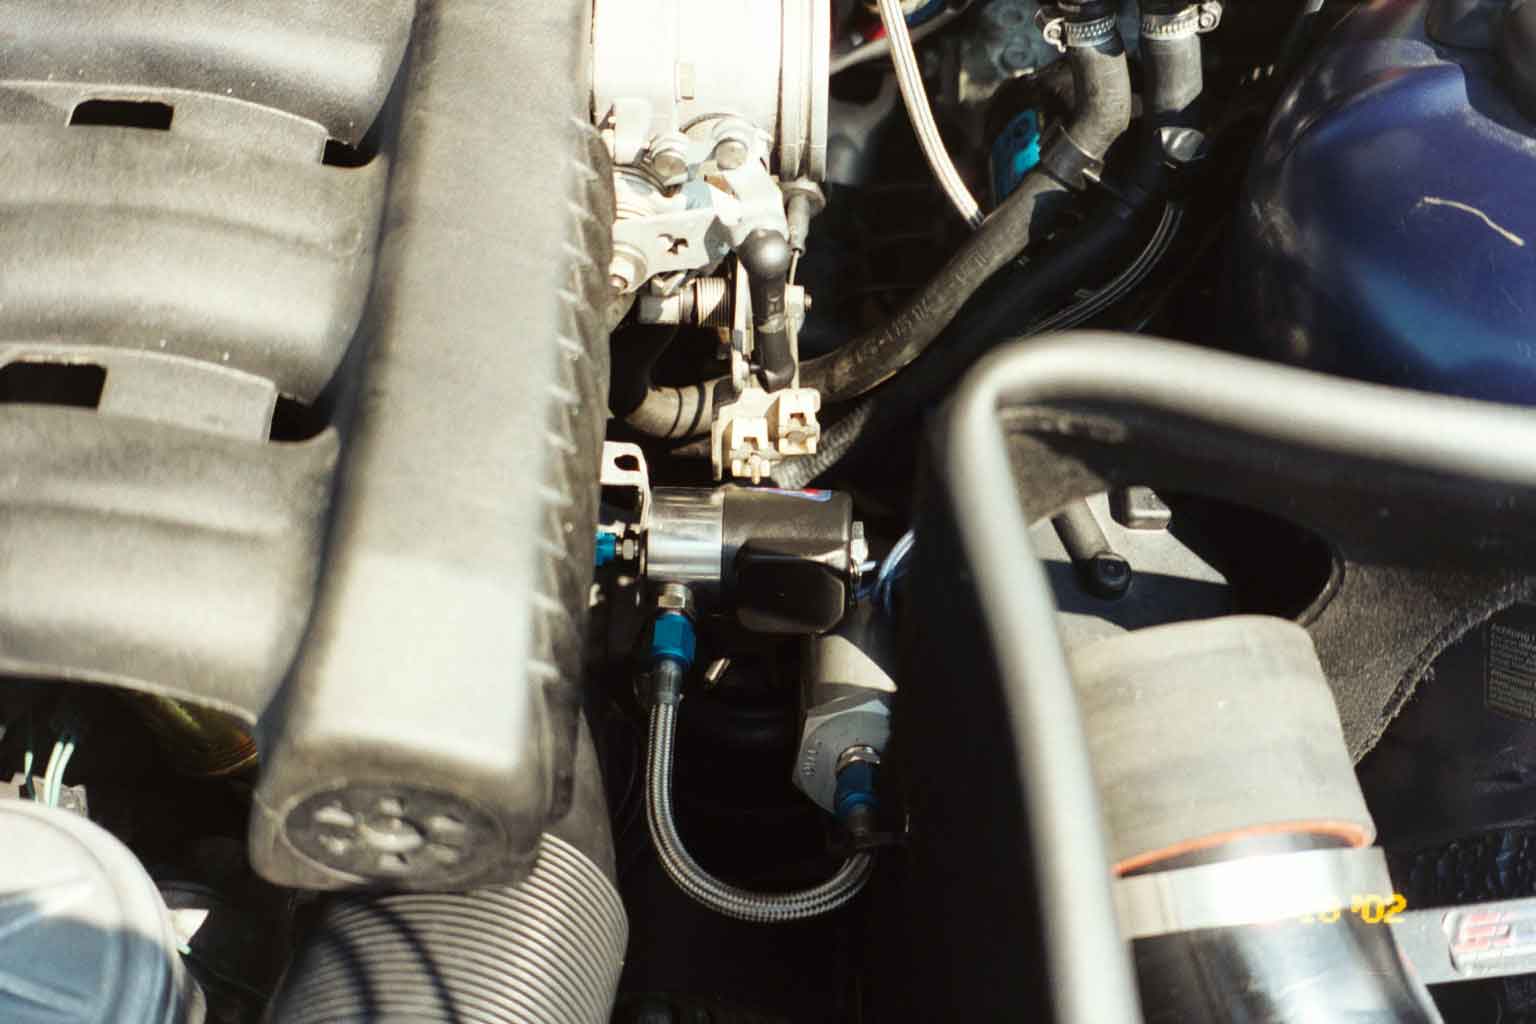
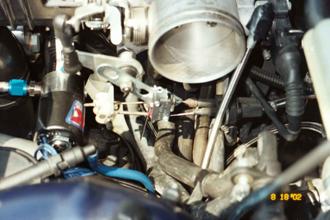
Nitrous Solenoid:
I decided to mount the nitrous solenoid just below the forward portion of the intake manifold. There is a bracket that goes from the engine block to the forward part of the intake manifold. I used the screw on this bracket to secure the solenoid as you see in the image. I chose to use the larger nitrous filter with 6” line instead of the filter that came with the kit. This gave me some more flexibility with mounting the nitrous solenoid.
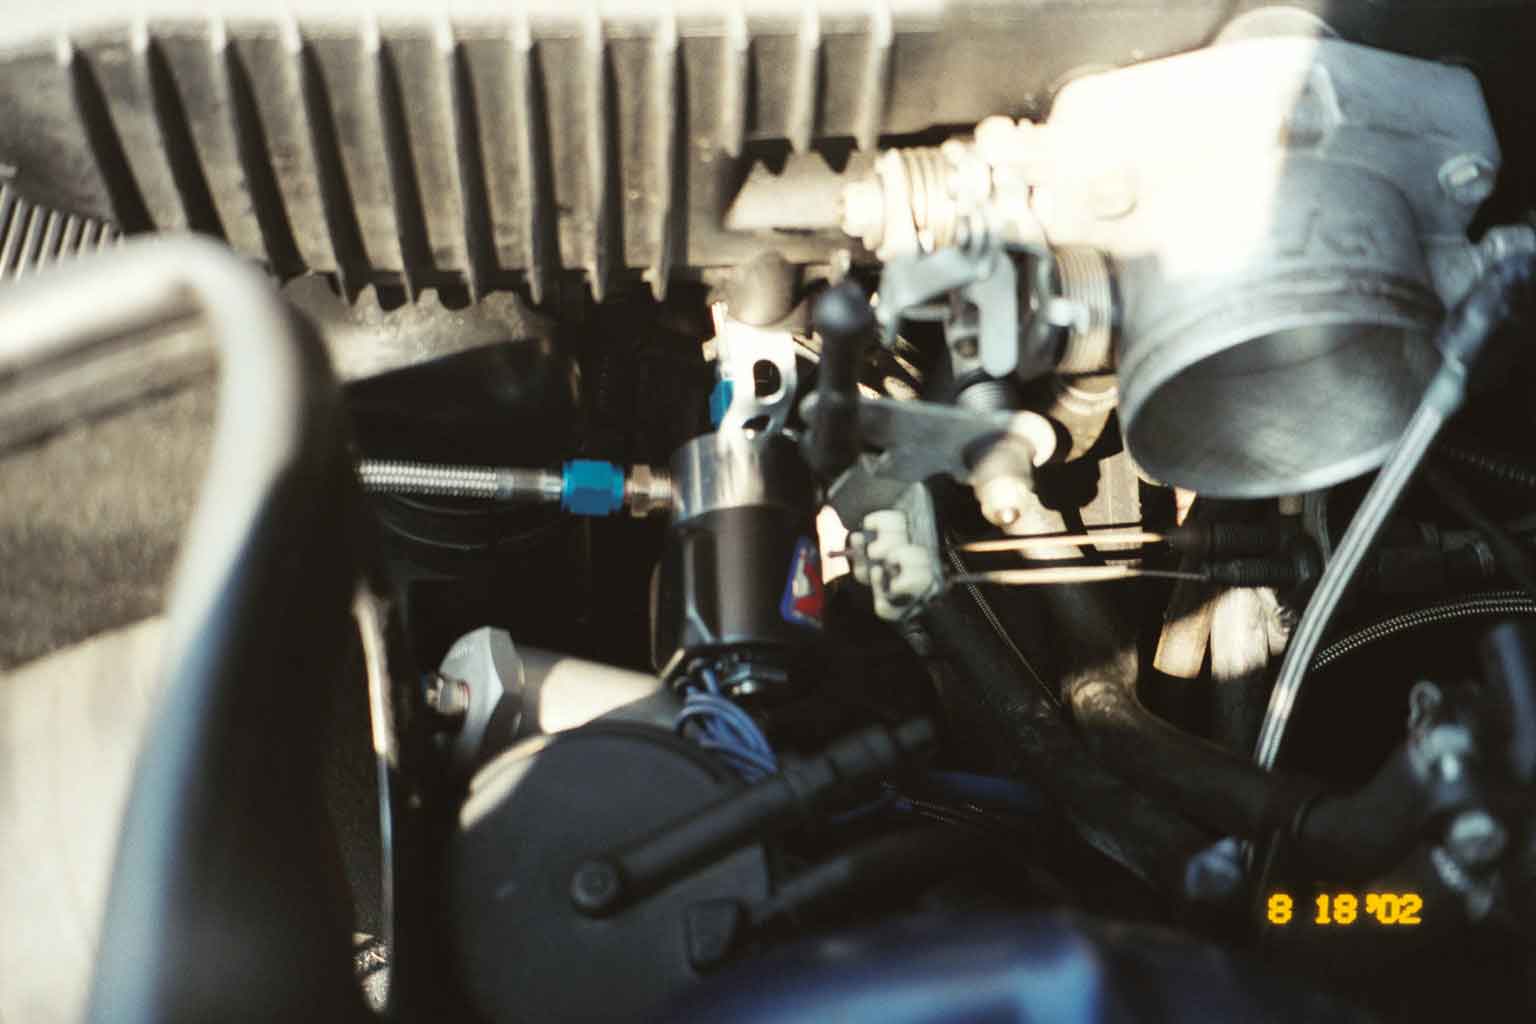
Wide Open Throttle Switch:
Finding a good location to mount the wide open throttle (WOT) switch took me a while to figure out. Once I did figure it out, it worked perfectly and the switch is very easy to access. I mounted the switch to the linkage between the throttle line from the accelerator pedal in the car and the throttle body. In this case, a picture is worth a thousand words so take a look at the image to the left. It took a few minor tweaks to get the WOT switch in just the right spot. But once it is in the right spot, only the switch is activated and there is no extra force being exerted against the bracket.
Nitrous Supply Line:
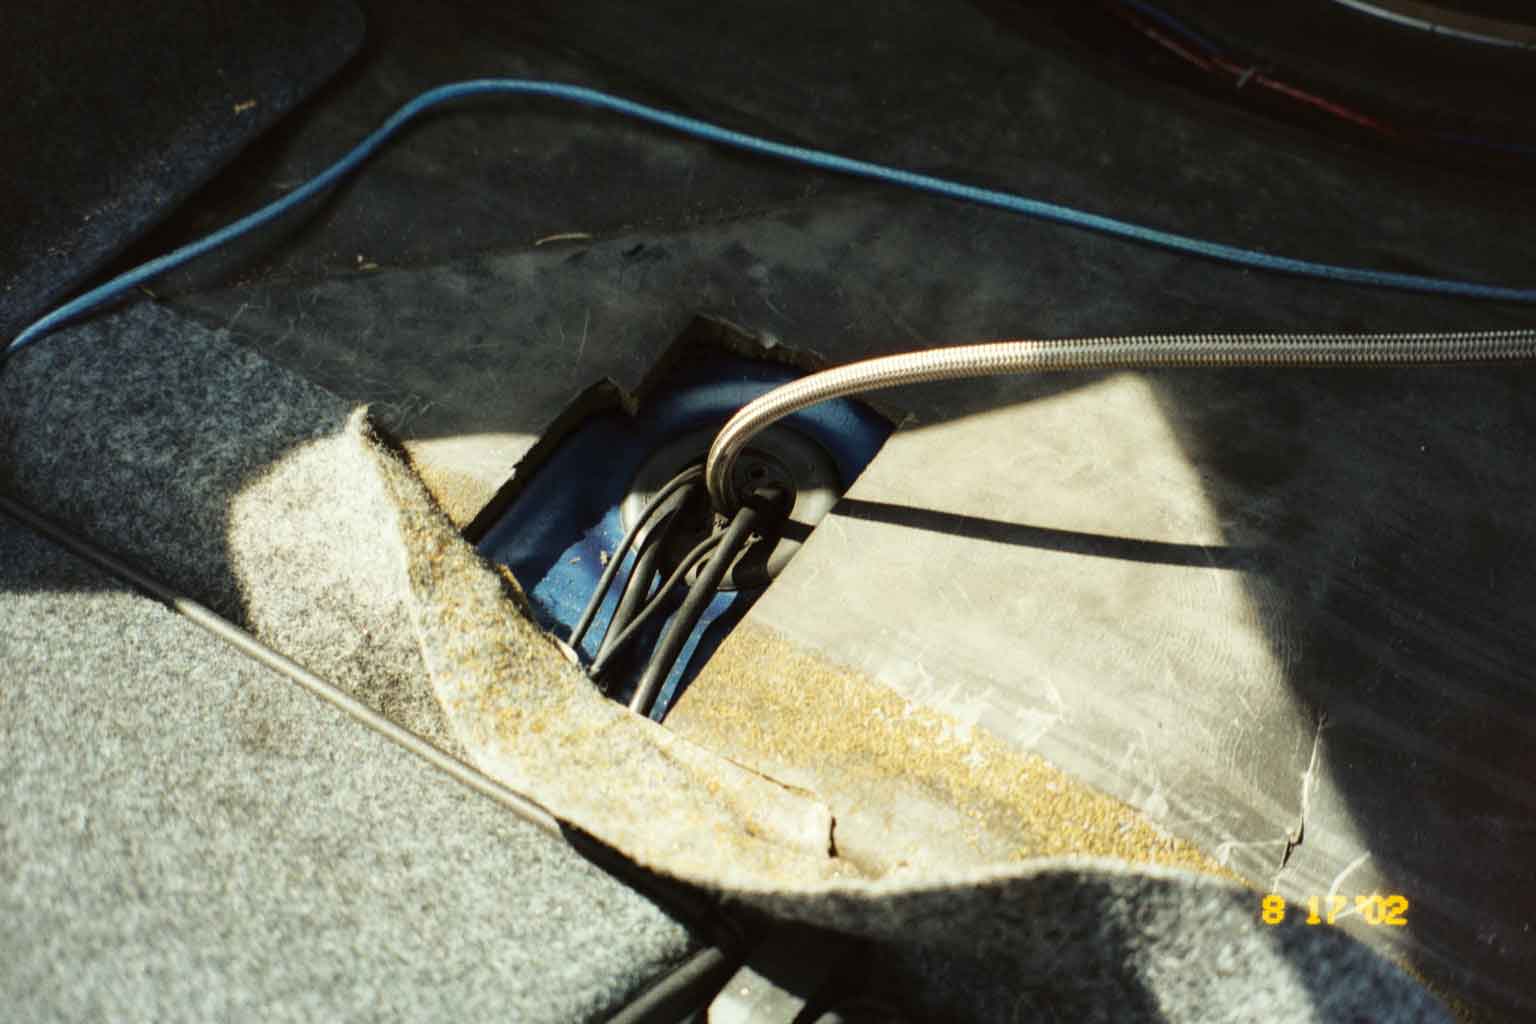
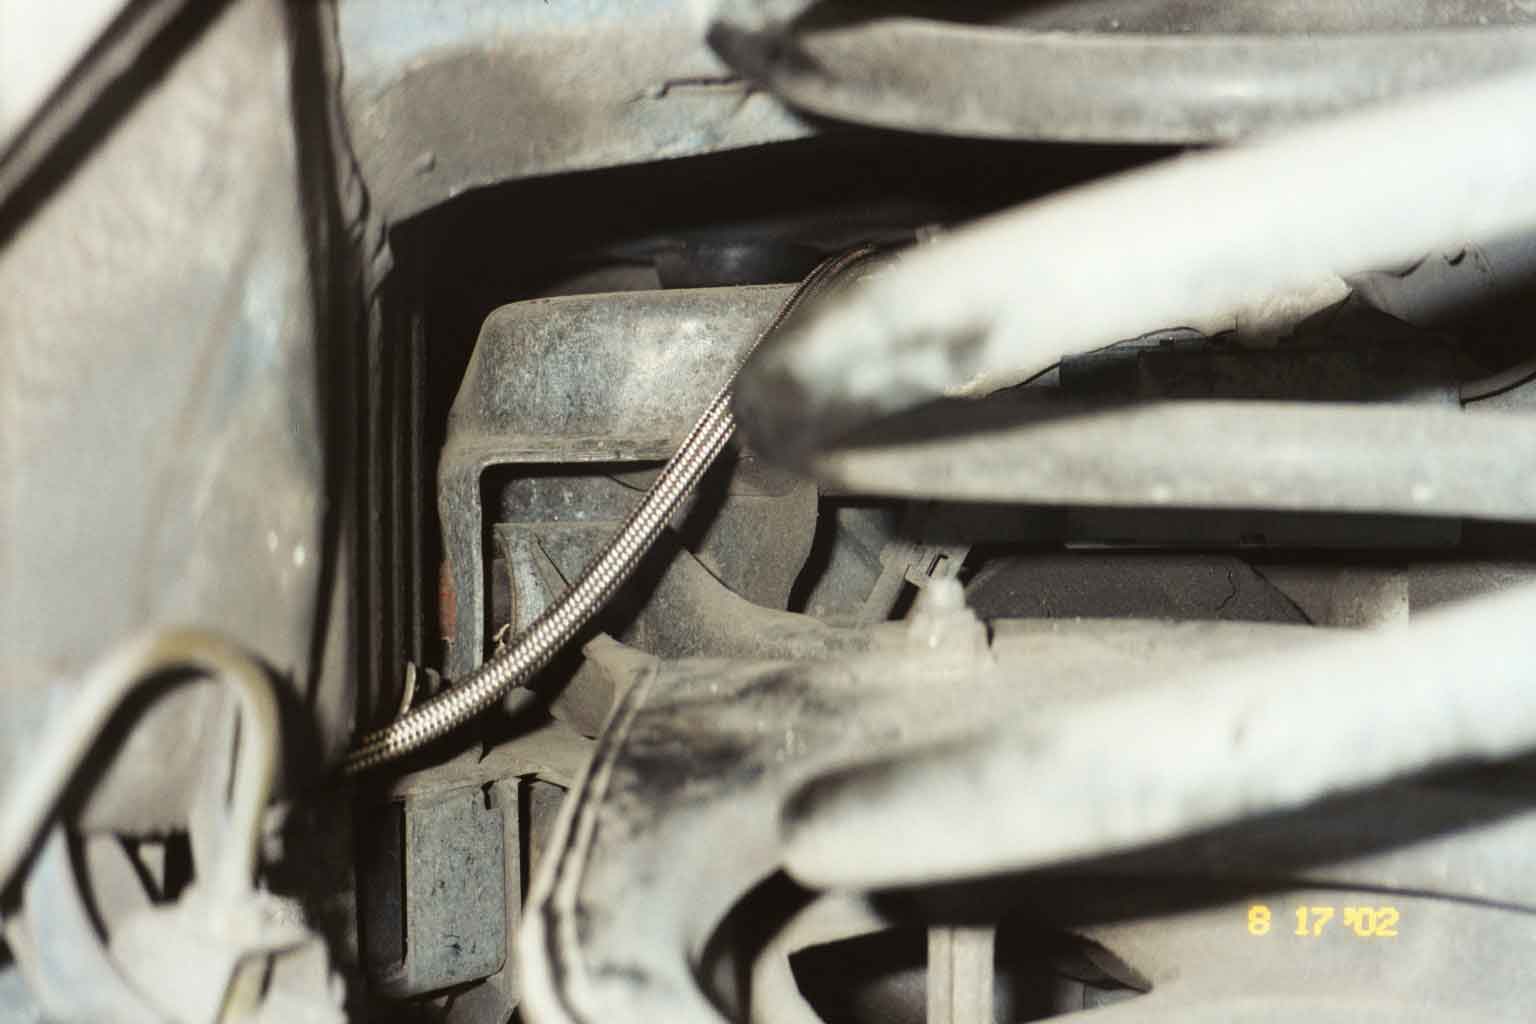
To get the supply line from the trunk to outside the car, I chose to use the rubber grommet located just behind the passenger side rear seat. My car has fold down seats so access to the grommet was pretty easy. From the rubber grommet, I went above and to the left of (towards the drivers side) the differential carrier. I then routed the line next to the fuel tank so that it came out next to the fuel lines heading to the engine compartment. Again, a picture is worth a thousand words here. I found it necessary to remove the driver side rear wheel to get proper access to route the line under the trunk. From this point on it was pretty easy. I used tie-wraps to ensure the line was secure.
Fuel Line Interface:
The kit came with a fuel “T” to tap into the fuel line. I chose to tap in the fuel supply line right where it enters the engine compartment from below. This was primarily due to the short length of the fuel hose in the kit and it was the easiest place to access the fuel line. It is there that the fuel line goes from a metal tube to a rubber hose, which was approximately 8 inches from the fuel filter (my fuel filter is located outside the car under the drivers seat). Make sure you tap the supply line (the one coming off of the fuel filter) and be sure to have a rag or small container to catch the excess gas after you cut the line.
The “Shark” Nozzle:
The nozzle is installed in the rubber boot between the air flow meter and the throttle body, on the bottom. Make sure the nozzle is oriented so that it will spray directly into the throttle body.
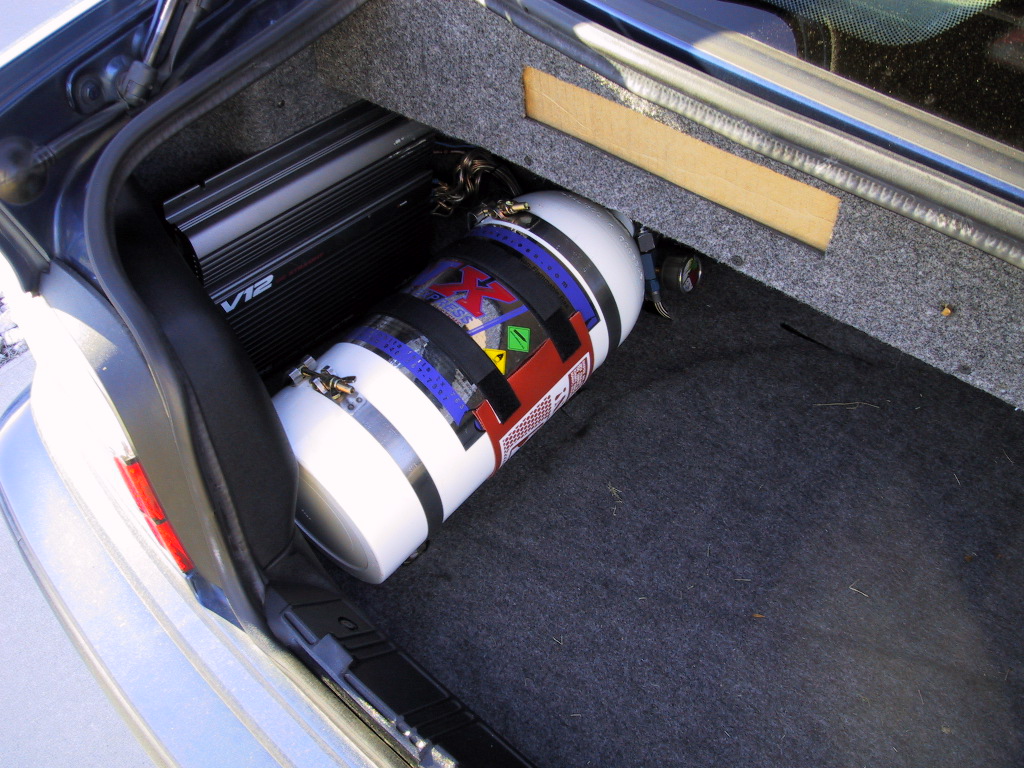
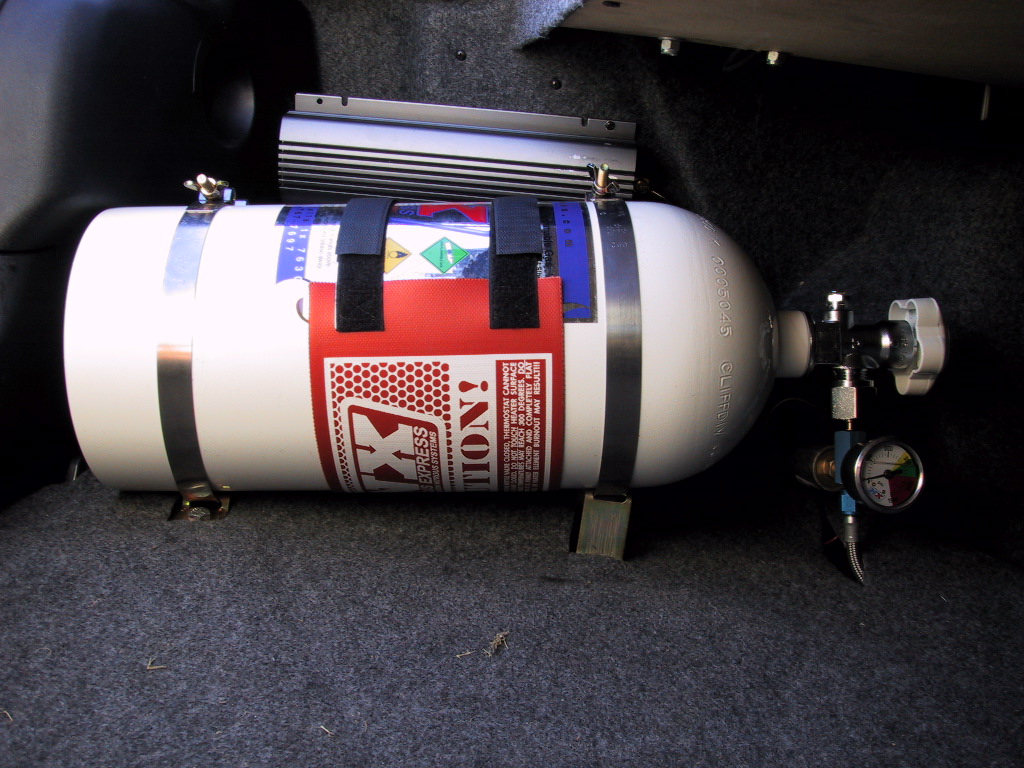
Mounting The Bottle:
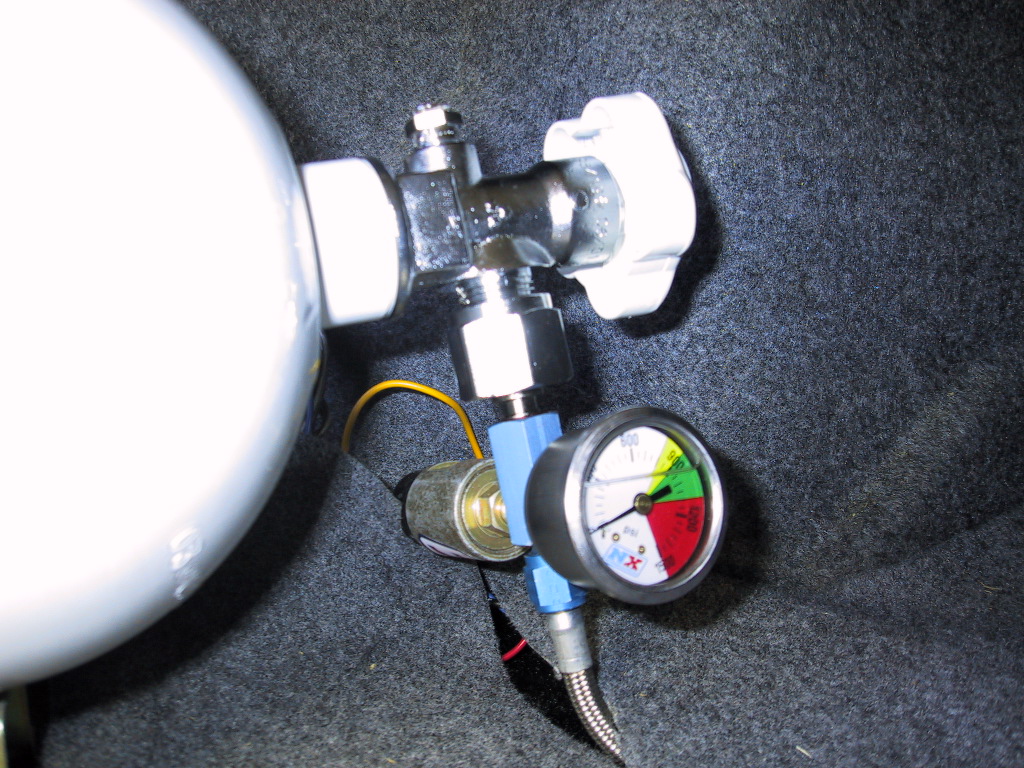
I chose to mount the bottle in the trunk on the drivers side. This was pretty easy and just involved removing the plastic trim that is on that side of the trunk and drilling holes for the bottle brackets. In the image to the left you can also see the bottle warmer installed as well as the pressure gauge. The transducer for the bottle warmer (bottom pic) is mounted on the other side of the pressure gauge in the same blue manifold.
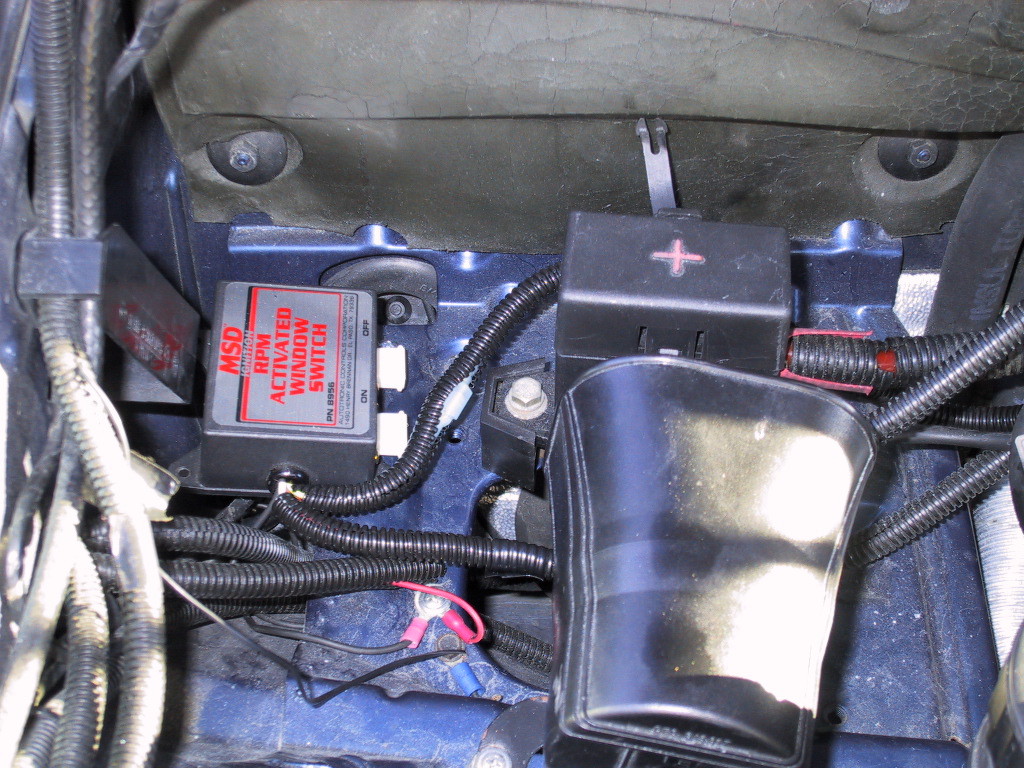
Mounting The Rev Window Switch:
I mounted the rev window switch on the passenger side of the engine compartment, in the back corner. The only issue with the switch is heat. If it gets too hot, it will shut down (failing open to protect the circuit). So far, it has worked fine in this spot. I used a few self tapping screws to hold it in place. Mounting it in this location was ideal since it was close to the tachometer signal input and a switched power source. The tach signal and switched power source I used came off of the diagnostic port. The tach signal was pin 1 (black wire) and the switched power source was pin 16 (green/white wire). Below the picture of the switch is the wiring diagram of the switch.
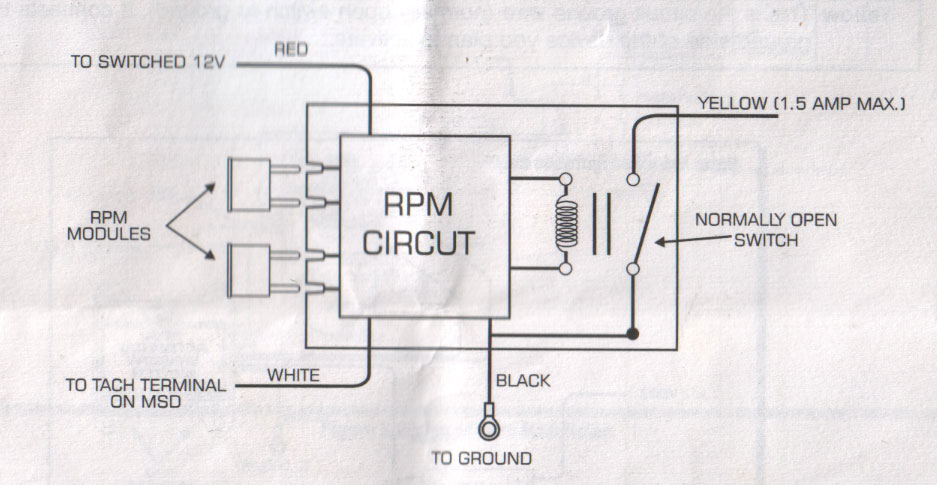
Wiring Diagram:
Wiring the system was pretty straightforward. I added a few things that were not part of the kit like the fuel pressure safety switch and the rev window switch but that was not very difficult. To the left is a basic wiring diagram of my system.

System Setup:
To start off, I am using the 35 shot. Although I know the E36 M3 engine can take up to a 75 shot, I wanted to take things slow. I also installed a set of NGK spark plugs (model #BKR7E). These plugs are one heat range colder than stock and are non-platinum type plugs. They are gapped at .035 inches. Also, I set the rev window switch to activate at 3000 rpm and deactivate at 6000 rpm. That way I don’t have to worry about spinning the tires or bouncing off of the rev limiter (very bad!!) when using the system.
Well, that’s it. Now it is time to go have some fun!!
A Word On the Safety Devices:
As I said above, the three safety devices I used in my system (WOT switch, Fuel C/O switch and the Rev Window switch) are not necessary to safely operate a nitrous system. However, the devices make operating the system much easier, especially for a novice like me. Now I did do my homework and I know that it is best to only use the nitrous at WOT and that you don’t want to spray at too low an RPM or spray while bouncing off of the rev limiter. On the other hand, remembering these things while actually driving and using the system is distracting and takes away from the fun of using the system in my opinion. You should keep that in mind when deciding which safety devices to use.
Peace of mind is worth a lot in my book!!