Article by: M5 Jed
Article applies to: e60 M5 models.
I couldn’t find a DIY on this by doing a simple search. If there is one, may the search gods strike me down dead.
If not, here’s something that would be of use and help to the community.
This isn’t my personal car, it’s a client’s and he requested to trouble shoot a limp mode issue he was having.
Ultimately the limp mode was caused by incorrect installing of the intake plenum (incorrectly seated throttle body to plenum gaskets) and disconnected vacuum lines at the rear of the plenum.
The fuel would also cut out at WOT for some reason so we went ahead replaced the fuel pump and filter.
I didn’t come across the problem of the unseated TB gasket and disconnected vacuum lines until I replaced the thermostat.Anyways, here’s the DIY.
Best do to this DIY with a very empty tank, like 10 miles left in the range. If your car catches on fire, not my fault. If you get showered with gasoline, not my fault.
If you get high from all the gasoline fumes, enjoy but still not my fault. If you attempt this DIY without some common sense, not my problem.
Don’t be cheap and take your car to get fixed at a proper shop. But if you don’t trust your car to anyone else cause they’ll muck it up, read on . . .
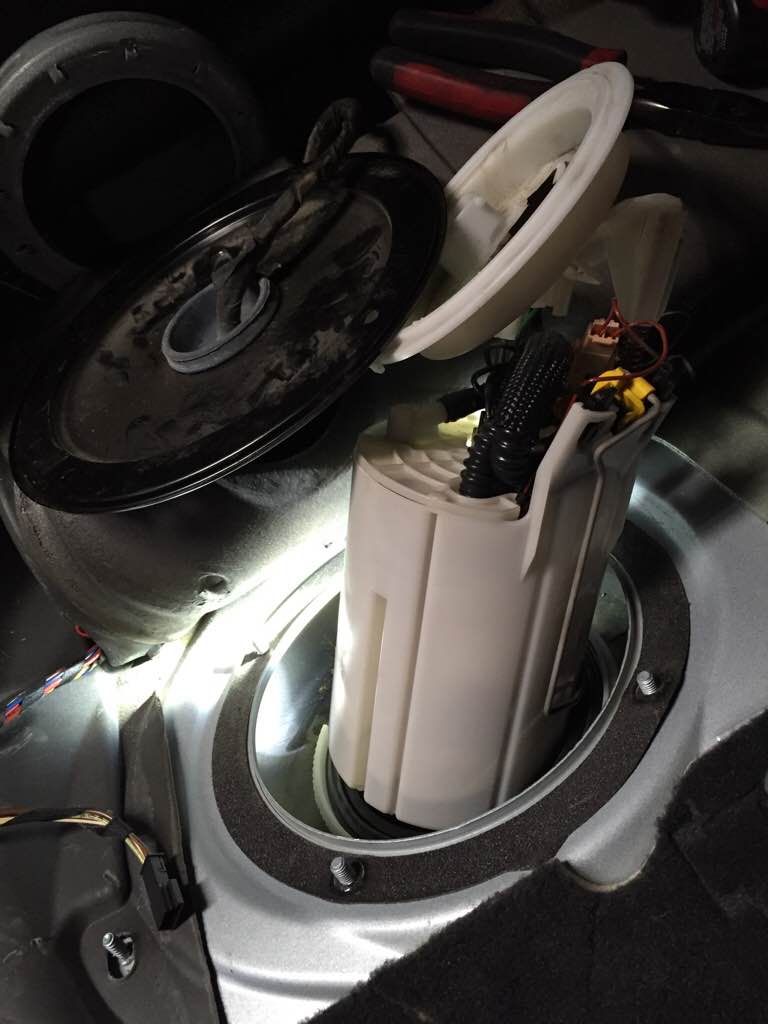
Both the fuel pump and the filter are located inside the fuel tank and are accessible through access panels under the back seat.
1. Disconnect the battery at the negative terminal only. If you don’t know where your battery is located. Stop here and take your car to a proper shop.
2. Take a nice thick towel, fold it once or twice, and place it on top of the bottom trunk latch to cover the receiving catch.
This will save you the headache of trying to open your trunk with a disconnected battery. You do have the trunk release under the backseat to open the trunk.
3. Remove backseat bottom cushion only. Pull straight up. If you have heated back seats, disconnect the connector plugs. Set the backseat cushion aside.
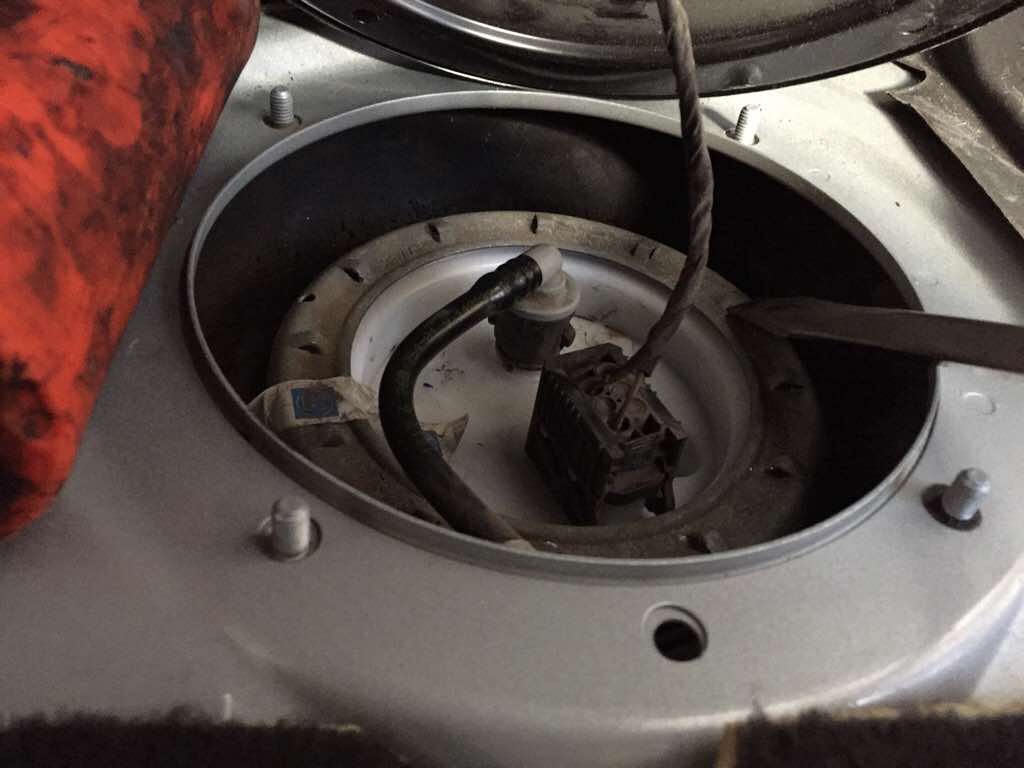
4. Fold the insulation over to expose the access panels, they are round covers secured by 4 10mm nuts.
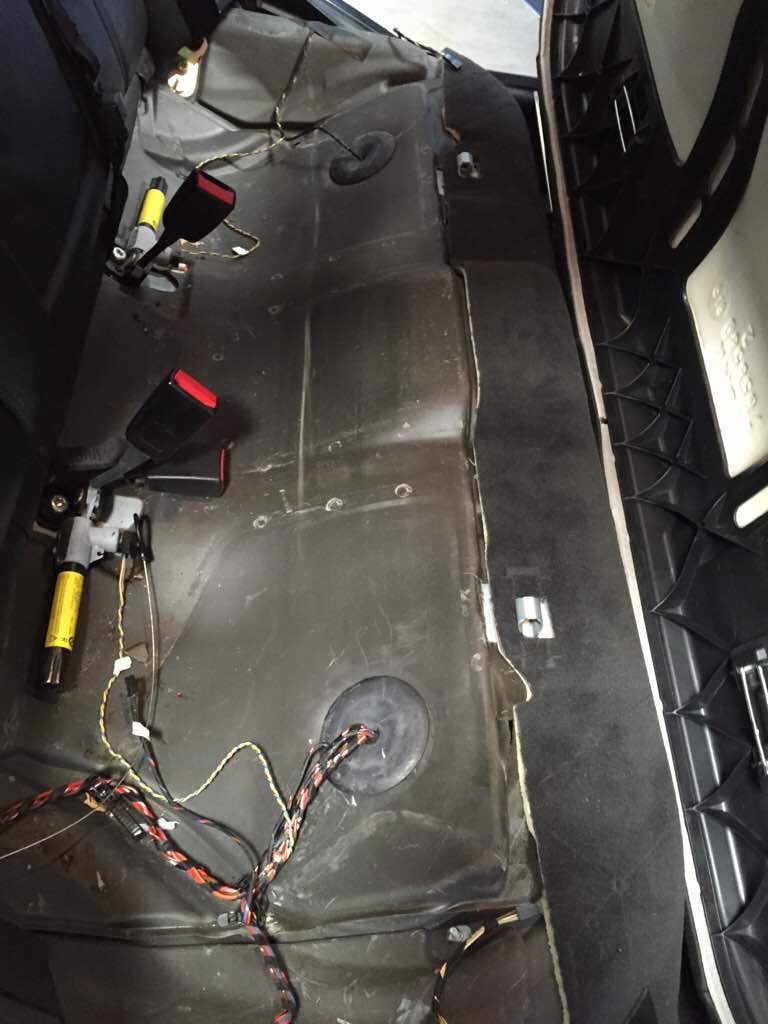
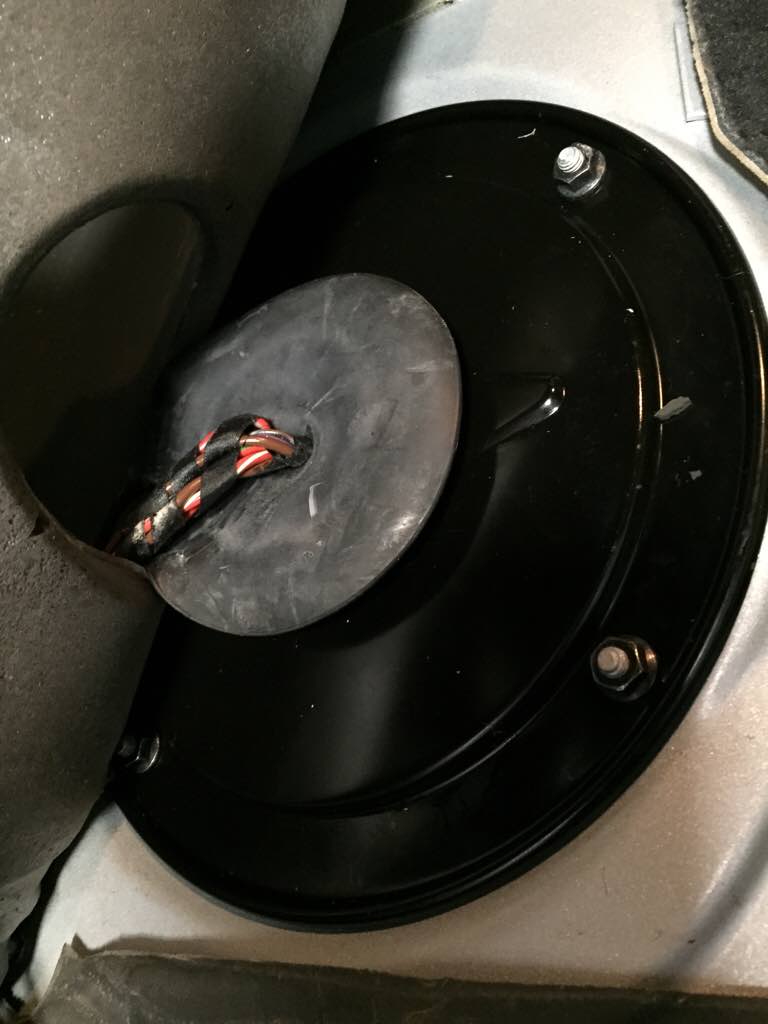
5. Remove the 4 nuts and flip the cover over to expose the top side of the fuel pump sealing ring.
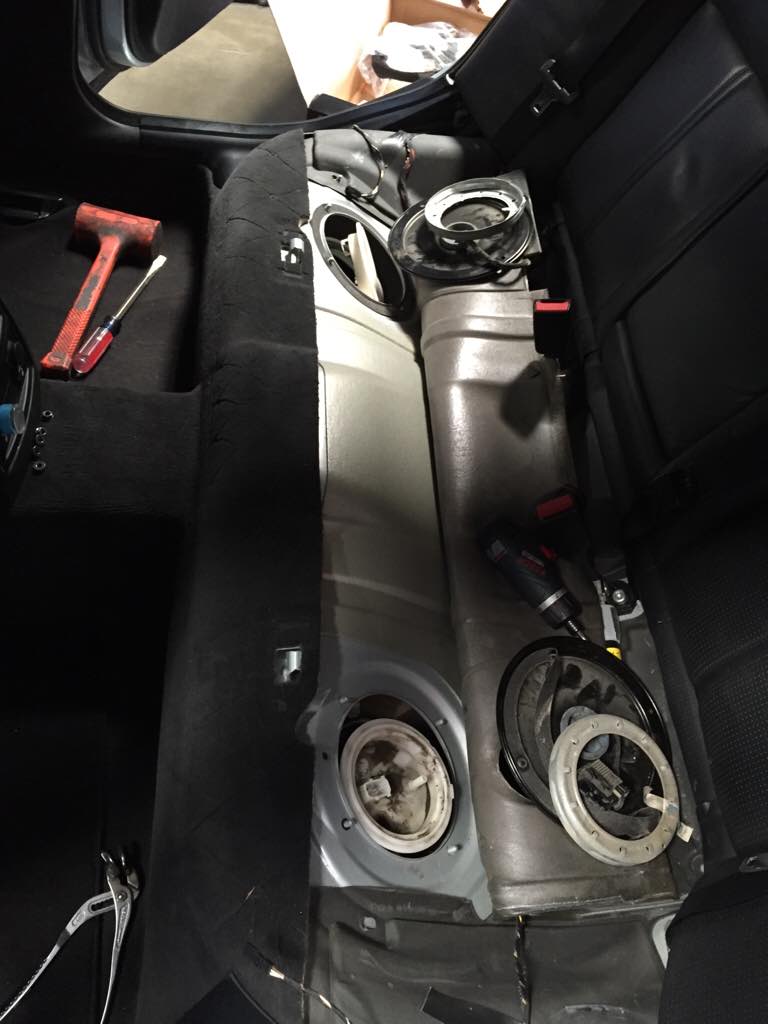
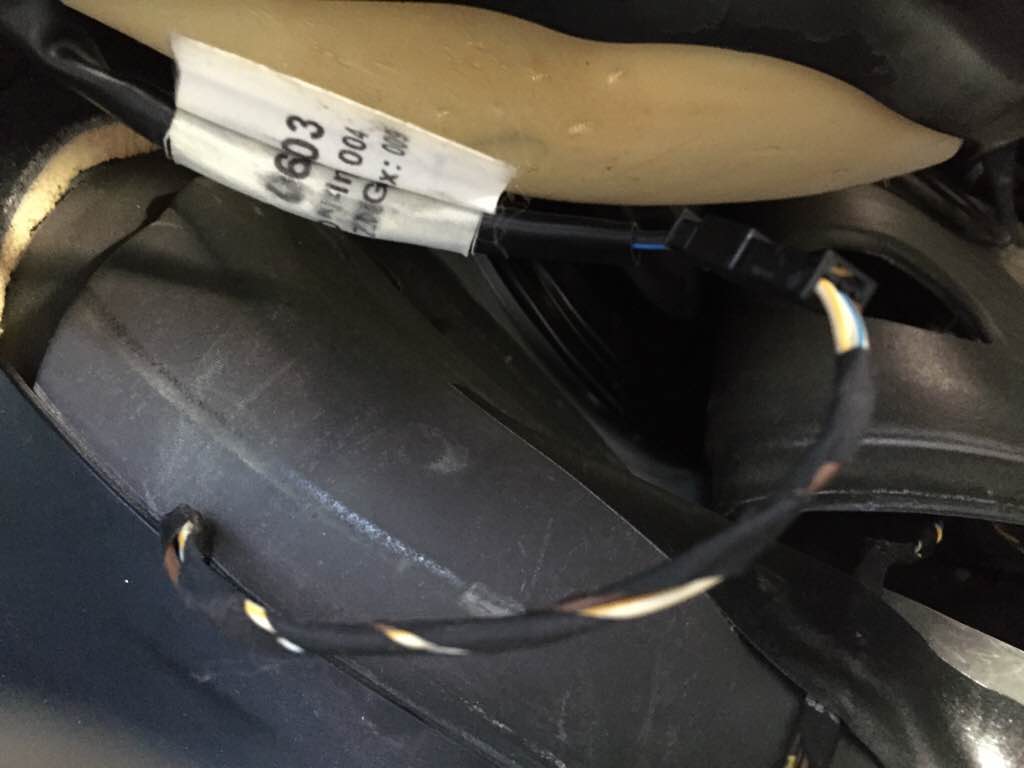
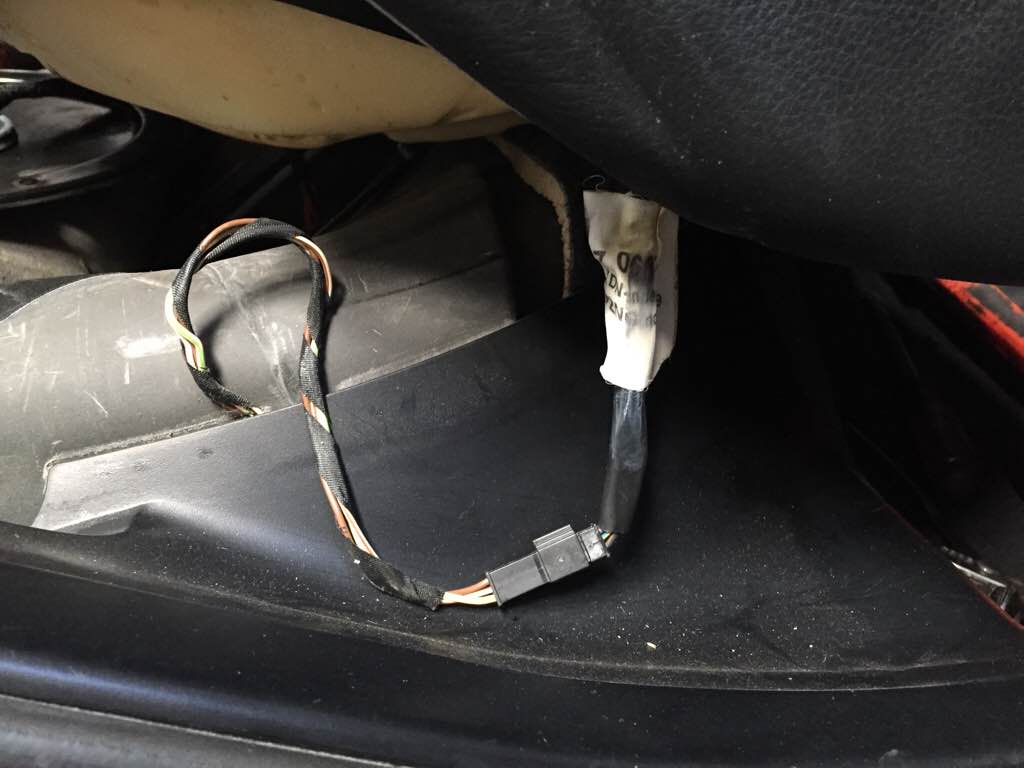
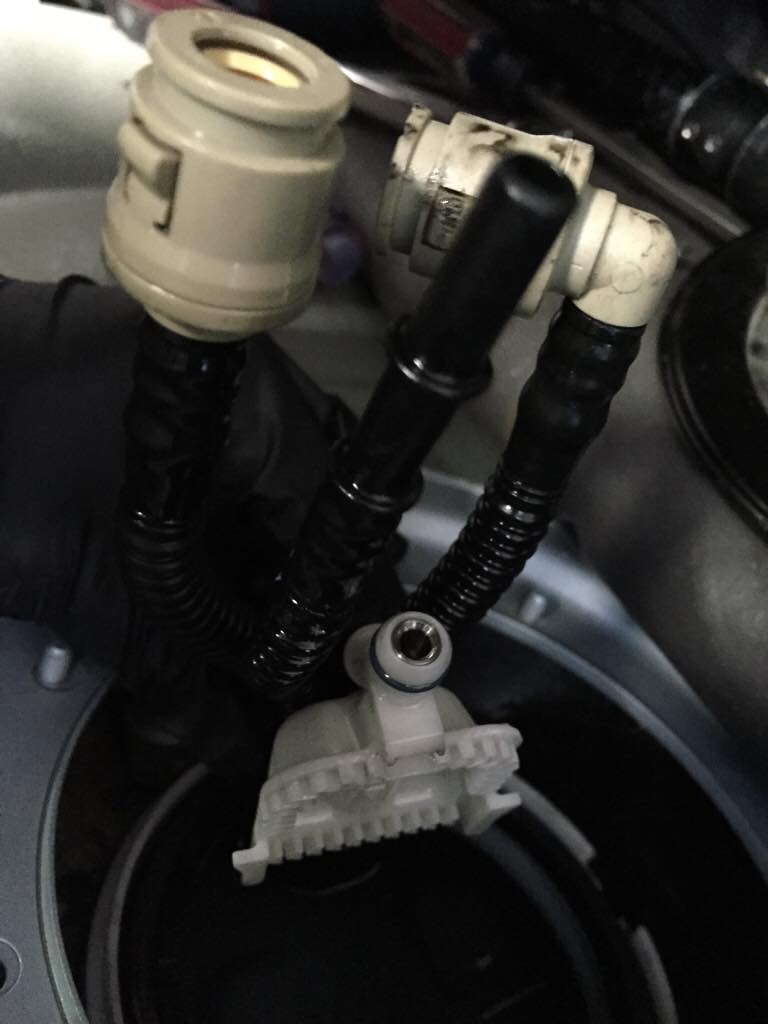
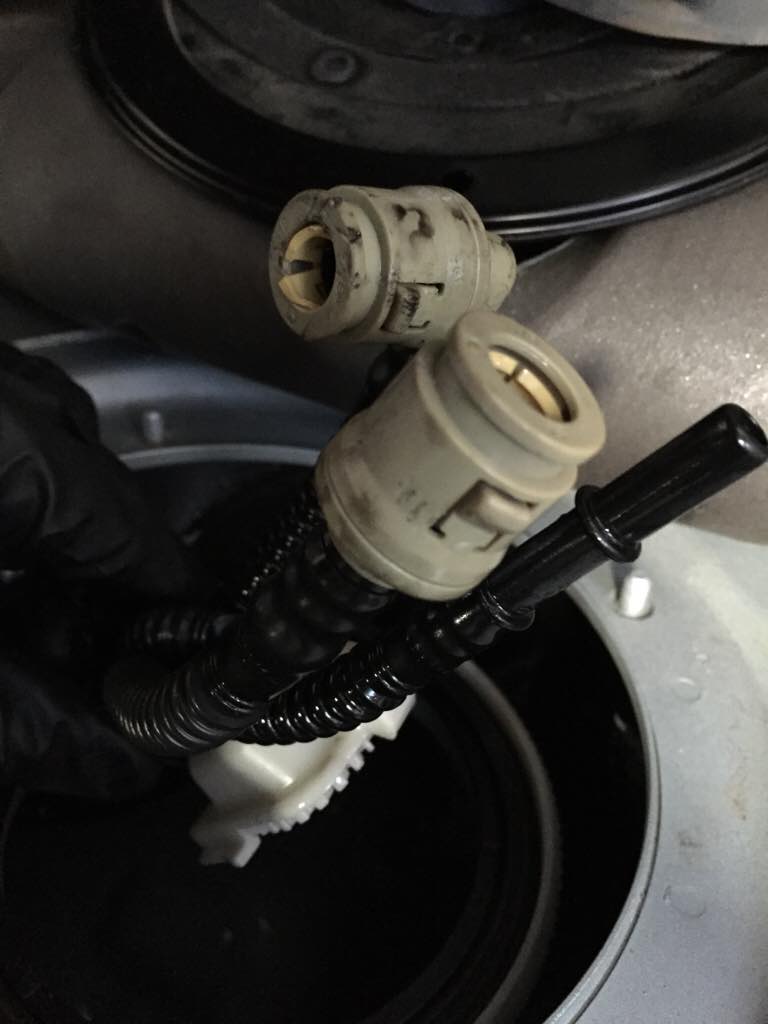
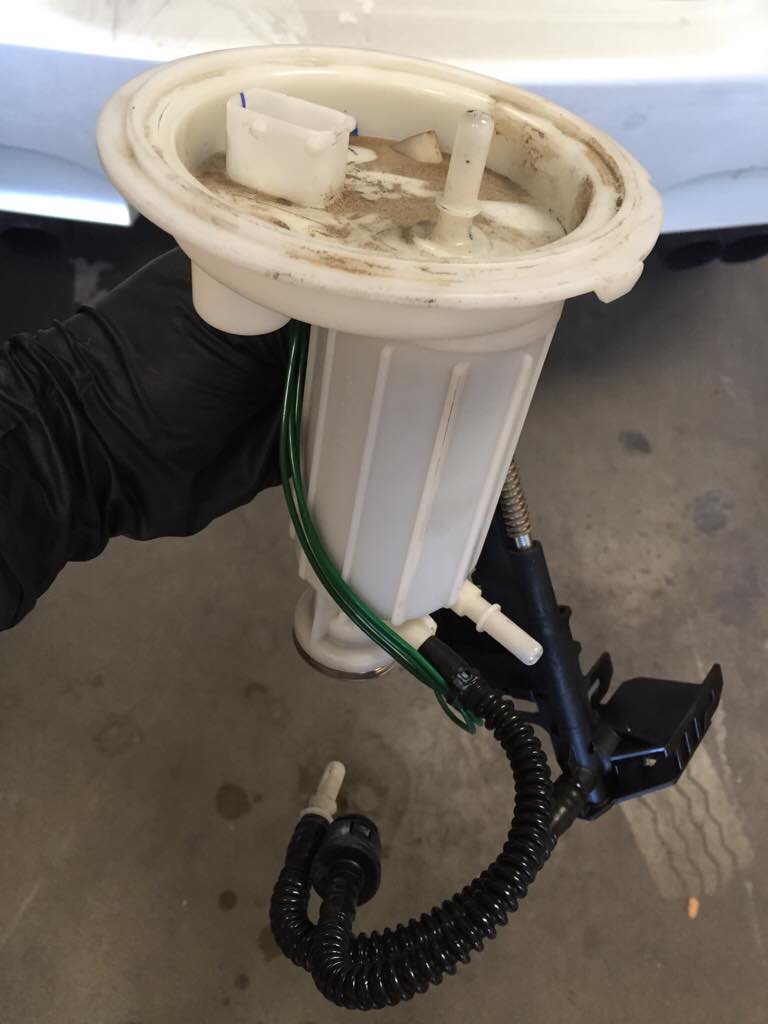
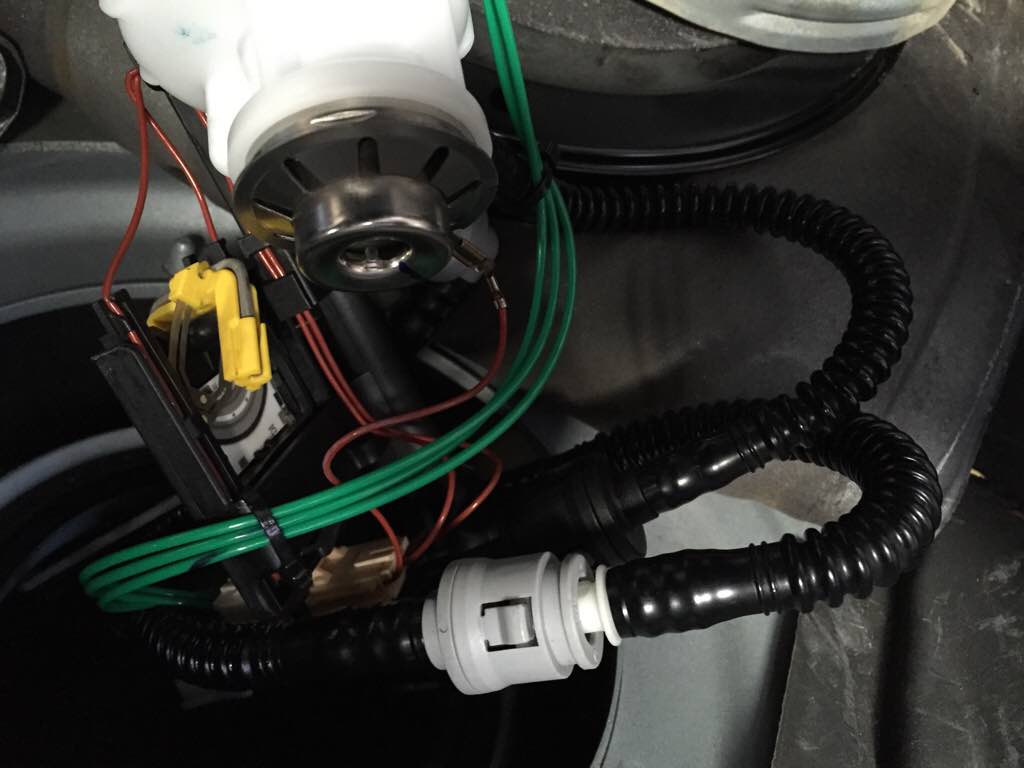
6. Begin with the seal ring on the driver side, that’s the fuel filter. On the passenger side is the fuel pump itself. Disconnect connector plug.
On the driver side is the fuel filter, disconnect the connector plug and feed line by squeezing the side ears and gently pulling up.
Be gentle with this quick disconnect because if you destroy it, you will have to replace the whole line, by dropping the tank.
Splicing in a new connector is an alternative but then your car won’t be perfectly original anymore and you’re car will suck and be slow.
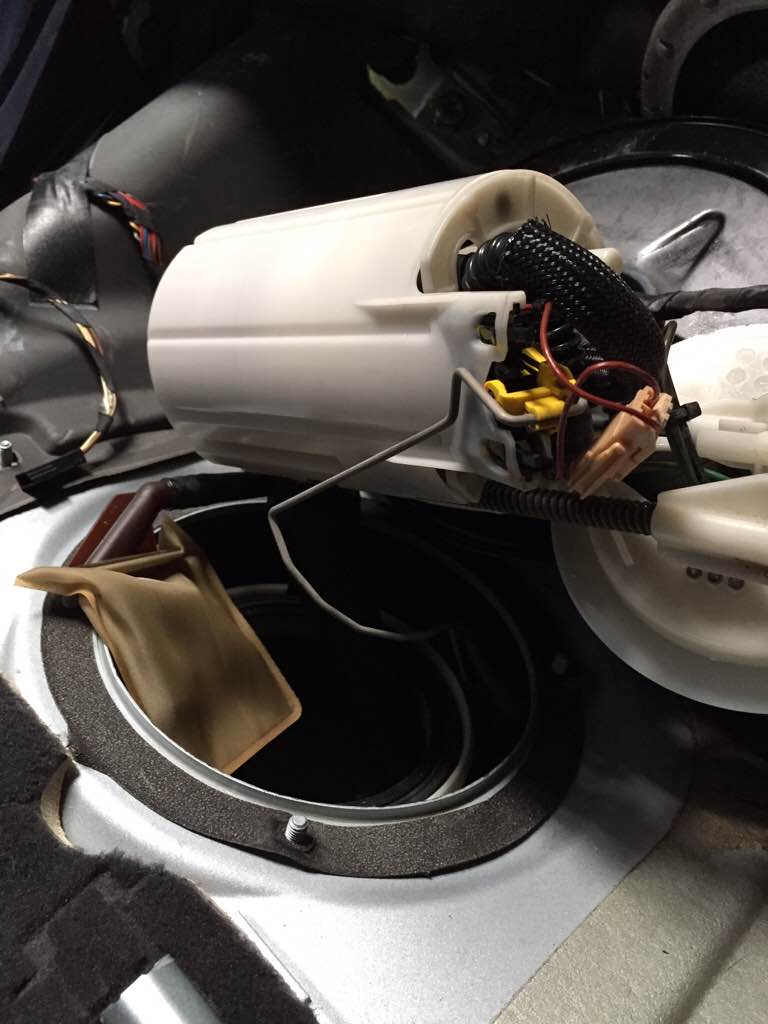
The fuel filter is attached to the hose cluster of the fuel pump.
You need to disconnect this hose cluster at the bottom of the fuel filter before you can even begin to remove the fuel pump on the other side.
7. On the driver side seal ring, take a dead blow hammer and large flat blade screwdriver and start tapping/hammering the seal ring causing it to rotate counterclockwise.
You might want to spray some WD40 in between the seal ring and the top lip of the fuel pump housing so it can move easily.
The seal ring is screwed in very tightly. There is a special BMW tool to open this. It costs bajillion dollars so you probably can’t afford it.
My dead blow hammer method works just as well and just about every household has one.
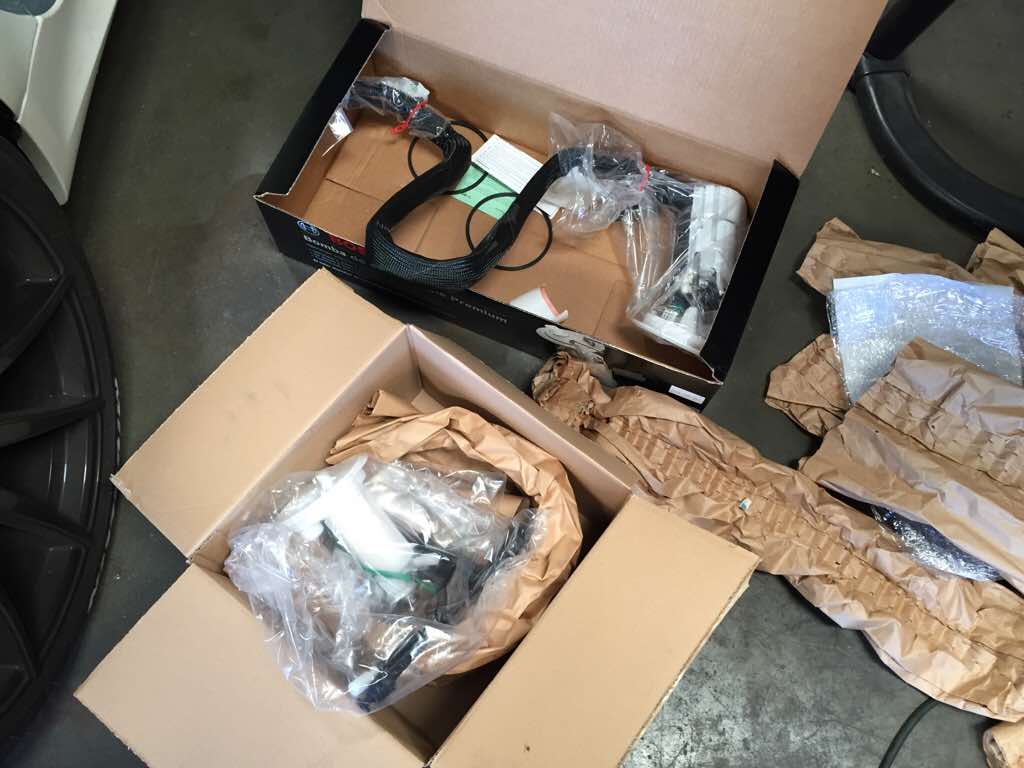
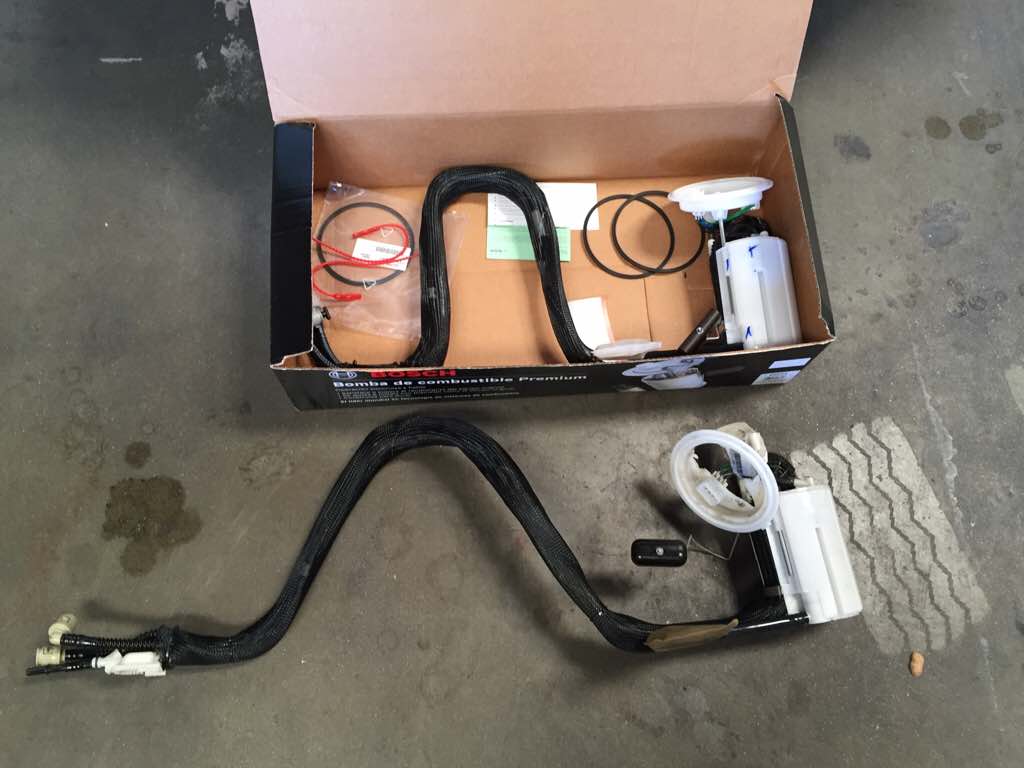
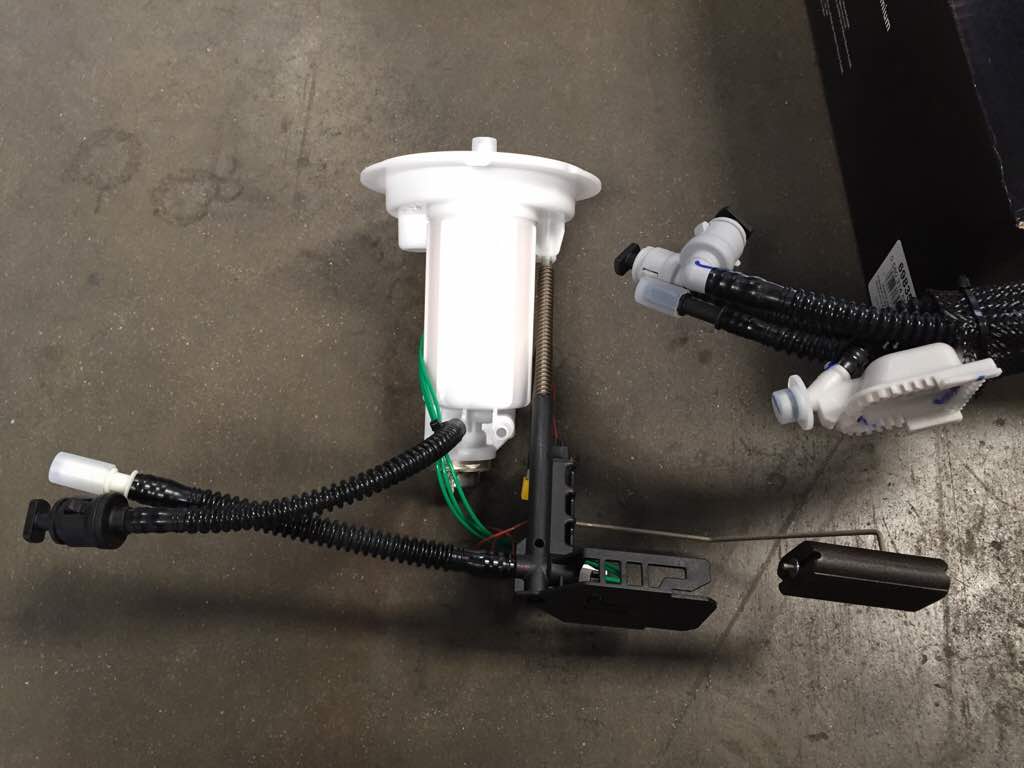
8. So you know what the parts look like. Here are some pics of the old and new part.

9. Once your are able to rotate the seal ring by hand, put some downward pressure on the top of the housing while you remove the seal ring.
Both the fuel pump and fuel filter have a spring loaded mechanism that pushes against the floor of the fuel tank, causing them to pop straight out and make a mess of things.

10. Once you are able to pull up the fuel filter, disconnect the quick-connect connectors of the hose cluster.
There’s also a square type white plastic base you need to un-clip by pushing the release downward and the white plastic base will slide apart.
This will free the fuel filter from the hose cluster and you will be finally able to pull it out completely.
Be very careful not to damage the floater and contact housing, you will reuse this on the new fuel filter housing.

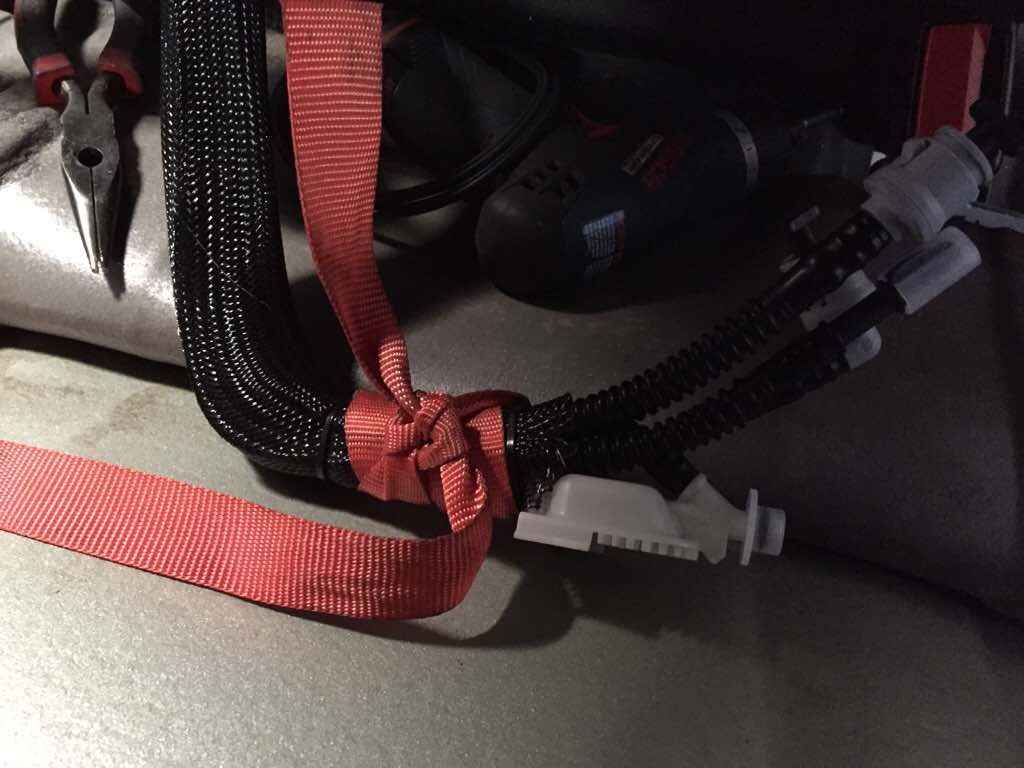
11. Take a 5 foot strap (from a tie down) and tie it securely to the end of the hose cluster. You will need this to route the hose cluster of the new fuel pump through the hole in the hump of the fuel tank.

12. Do the same process on the passenger side of removing the seal ring.
Once you are able to pull the fuel pump straight up, carefully maneuver it in a way that you don’t break the floater assembly and drop it into the tank.
The hose cluster needs to go through that small hole between the two banks of the fuel tank. There is enough room, but again, don’t force things.
Things can break and left in the tank. You can use the strap as a guide to maneuver the hose cluster through the hole and out.
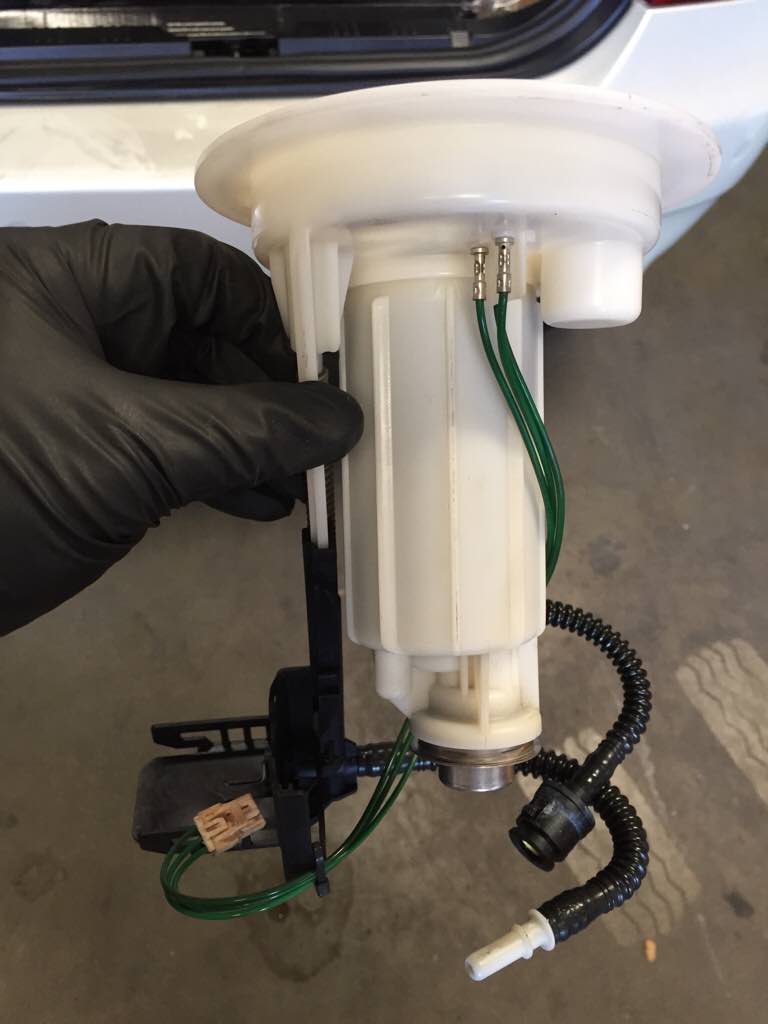
13. Remove the floater device and the attached electronics on the old fuel filter. Take this floater assembly and attach it to the new fuel filter housing.


14. Set aside new fuel filter for the moment. Take the new fuel pump assembly and secure the strap that is coming out of the pump’s hole to the new hose cluster.
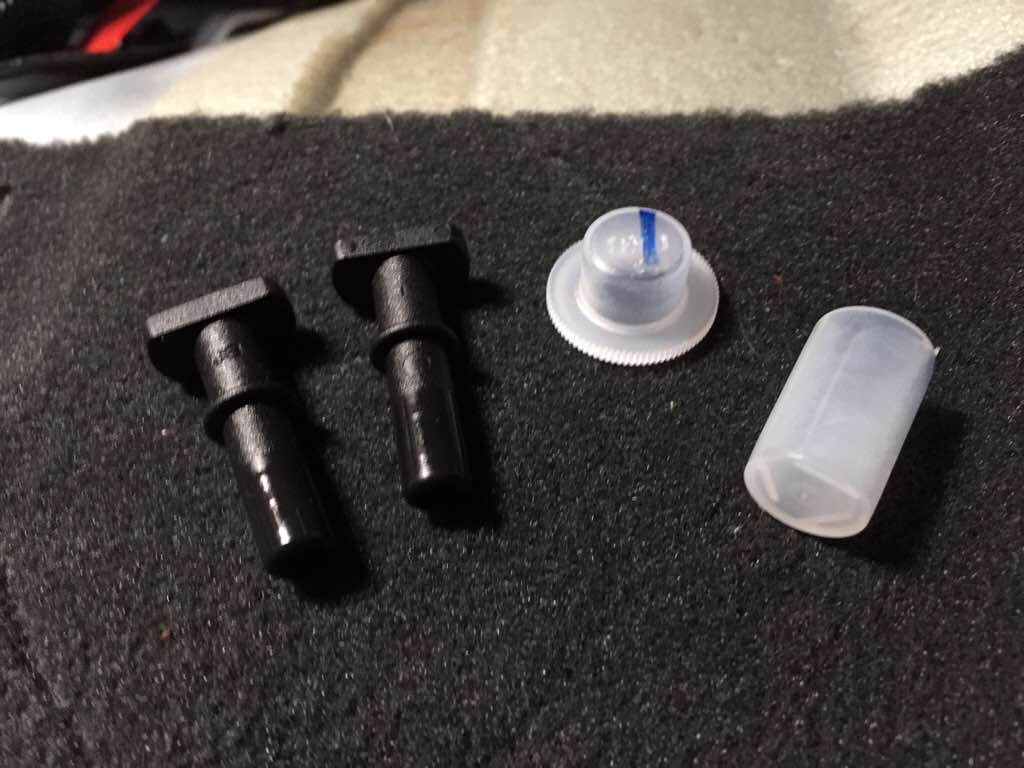
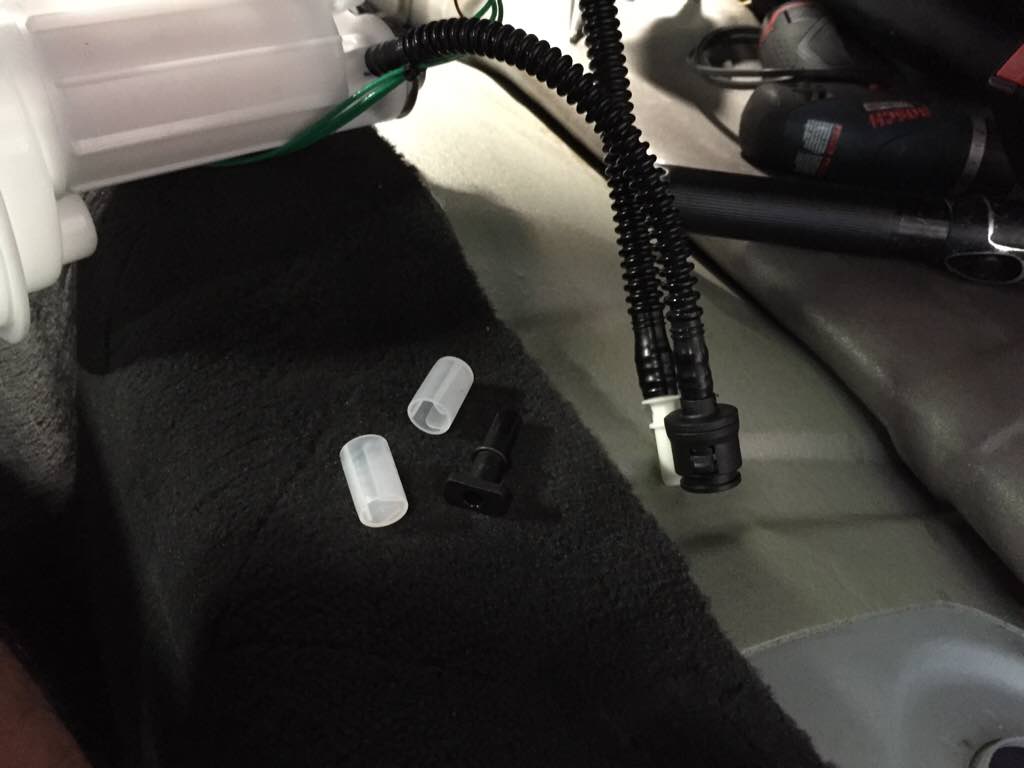
15. Before you stuff the new hose cluster into the hole, remove the plugs so they do not get lost in the tank.
16. As you feed the hose cluster into the hole, begin pulling the strap out of the other hole. You will come to a point where the hose cluster will get stuck.
You can reach into the passenger side hole, follow the hose and gently wiggle the end of the cluster into the hole between the two banks of the fuel tank.
Be patient, it will fit through. Once through, keep pulling the strap until you can see the cluster. At this point, you will need to position the fuel pump in the right orientation.
Look inside to make sure that the floater is free and not caught on the hose cluster.
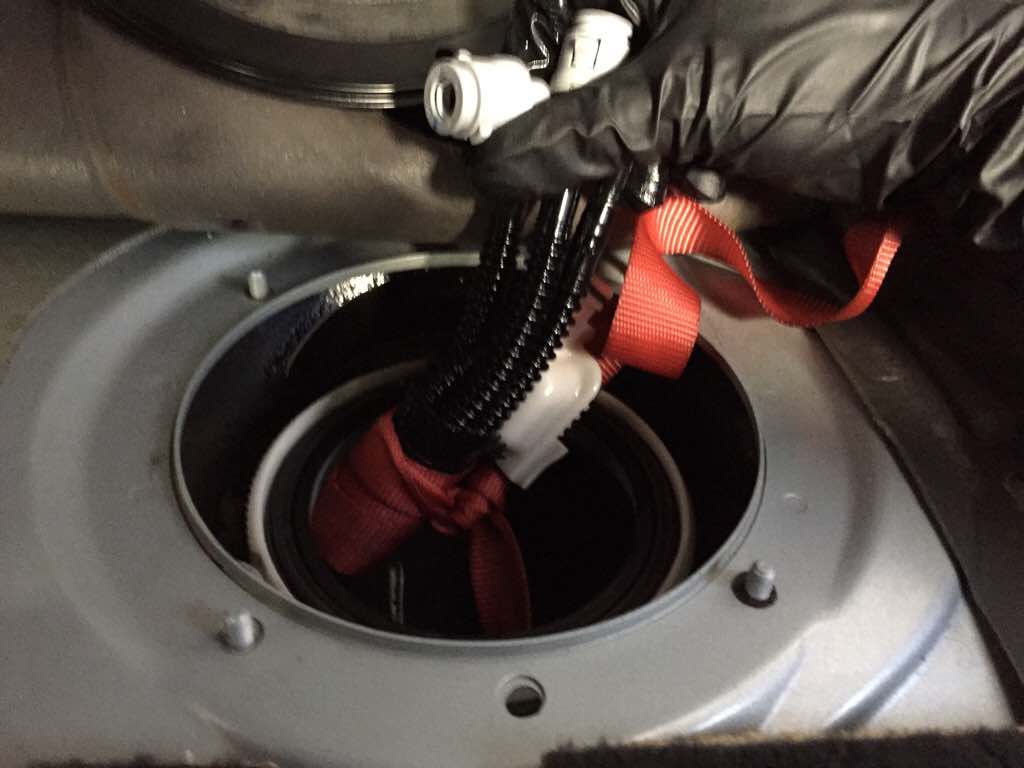
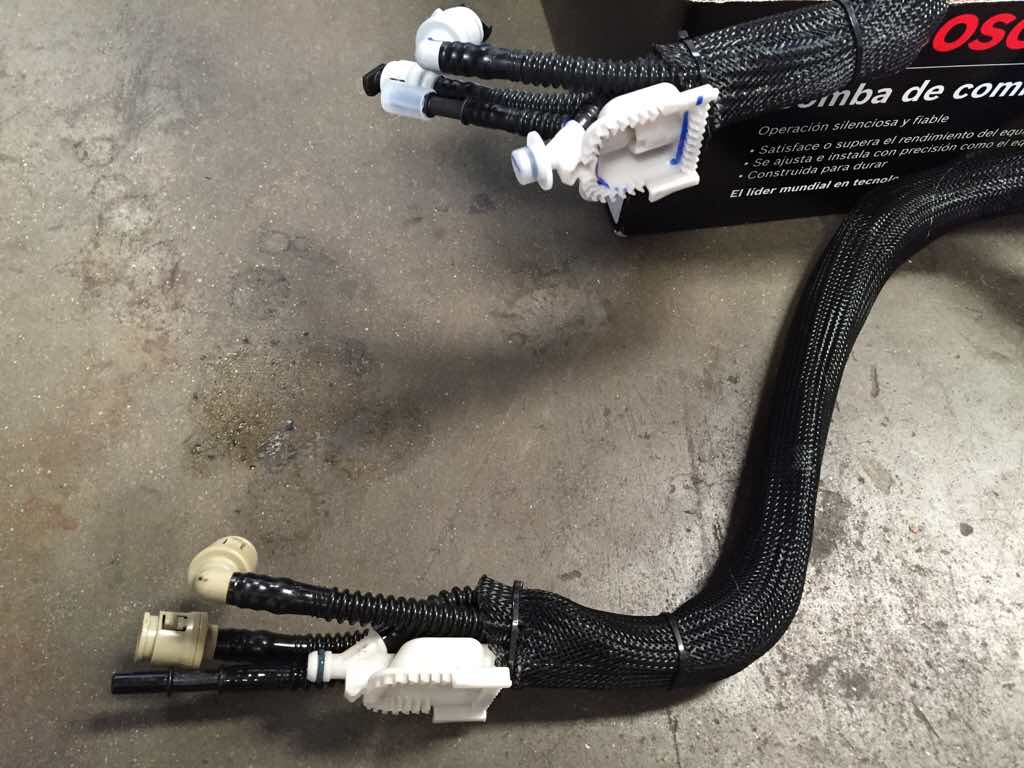
17. Remove the strap from the hose cluster. Take the newly assembled fuel filter housing and begin attaching the hose ends to the right connectors.
It’s impossible to confuse the connections. Only one way they will connect with each other. Make sure you properly attach the white square base to the bottom of the fuel filter.
Again, don’t forget to remove the plugs on the hose ends.
18. Once all the hose connections are made, you can seal everything up. Replace the large o-rings with new ones that come with the new parts.
Begin with the fuel filter side, push down on the filter housing and make sure the tab on the lid matches the slot on the neck of the tank.
Keep downward pressure on the lid while screwing the seal ring into place. Make sure the seal ring is tight otherwise fuel leak will occur.
19. Secure the seal ring on the lid of the fuel pump on the other side. Again, tighten the seal ring properly to avoid fuel leakage.
Tip: Fill up the tank all the way to full. Overfill it the fuel tank by clicking the trigger several times.
Go on a test drive, any leaks occurring during the test drive will show here. Leakage means the seal ring isn’t torqued down right enough.
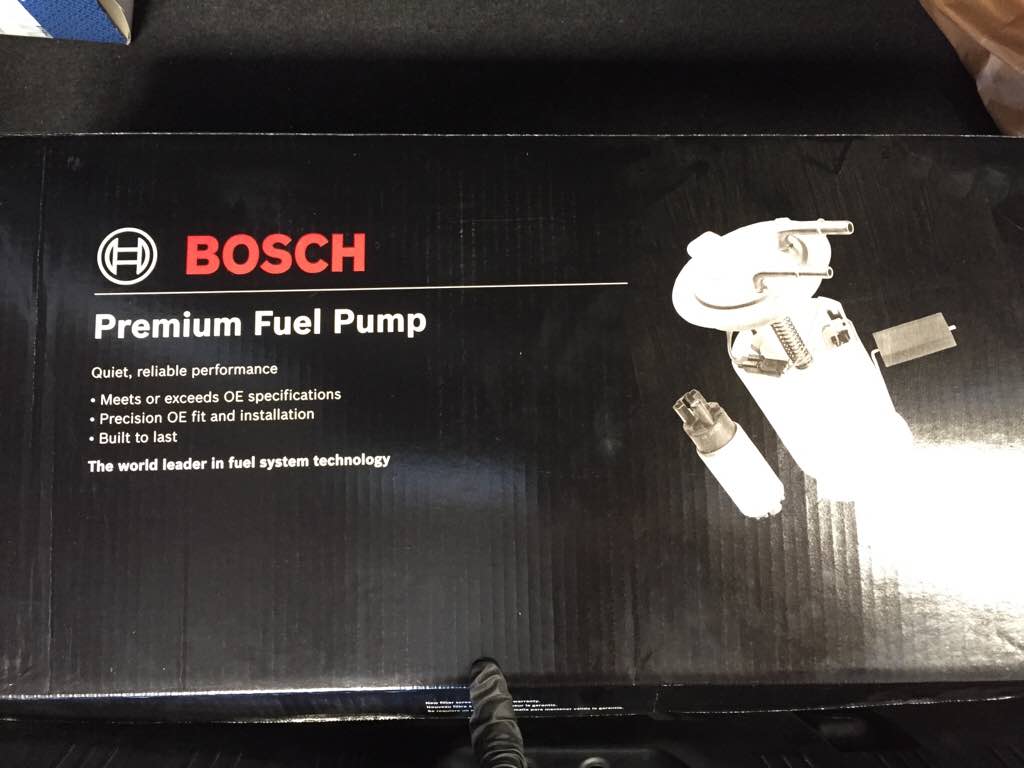
The fuel filter on the E60 is not what you normally see on previous generations like on the E39, E34 or E28, which is an aluminum canister mounted underneath the car, with an inlet and outlet hose attachment.
The fuel filter in the E60 is integrated into the fuel leveler/sender unit, it’s one in the same – so now they can charge you $200 for the filter instead of $25 on the previous generations.
What else would you expect from a car company the over-engineers stuff all the time.
And it wasn’t enough that a simple 10 min. filter replacement was turned into a 2 hour job, they had to integrate the hose cluster into the filter as well.
You can change out the filter without having to remove the fuel pump, but you cannot replace the fuel pump without removing the fuel filter assembly.
Looking at it from a production standpoint, yes it’s cheaper and more efficient to produce. The fuel tank itself has less parts, no hoses inside, it’s simpler in design.
If BMW farms out the production of the fuel pump and filter to Bosch, even better and cheaper. The fuel pump for the E60 is cheaper somehow than the E39. $277 versus $360.
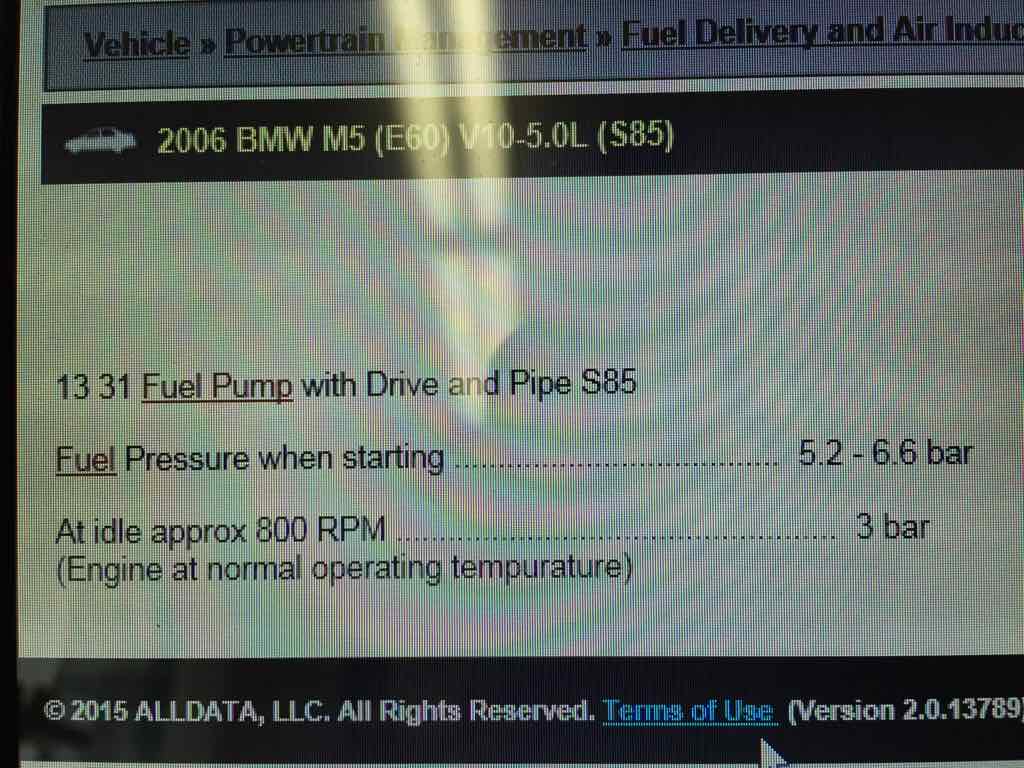
Fuel pressure should be 5-6 bar.
Found the seal ring tool online here. I’m sure someone else can find it for cheaper.