– Remove link bolt & eccentric bolt
I have no pictures of the next step, but it simply involves using your 18mm socket to loosen the bolt above the eccentric bolt that holds your integral link in place. Once this is LOOSE, move onto removing the 24mm eccentric bolt mentioned above, with a large breaker bar. These can be broken free easily enough, or can be welded in place with rust. Say a prayer before attempting and give the breaker bar a few hard kicks to break it free.
You may have to attach a wrench to the eccentric bolt nut to stop it turning, as you turn the bolt. Poke the eccentric bolt out with a screw driver, or continue to screw the bolt all the way out. It may get stuck, but just keep on pulling and turning until it comes out nicely.
You can see the top link bolt removed in this picture, with the eccentric bolt removed, however you should just loosen the upper link bolt and then remove the eccentric bolt as mentioned above:
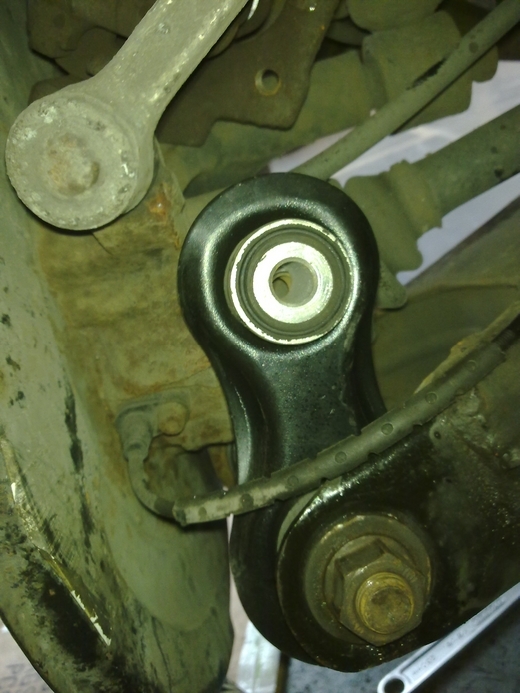
Once the eccentric bolt it out, unscrew the upper link bolt fully and you should be able to pull it down and out. Note how it fits over the ball joint as you hinge it downwards. Note that at this stage, the swing arm will want to push downwards in the way of the ball joint, simply jack it up out of the way.
Use a screw driver and a hammer to bang/pry the c-clip that holds the ball joint out of place.
– Custom ball joint removal tool
This is where my handy ball joint removal tool comes in, see below:
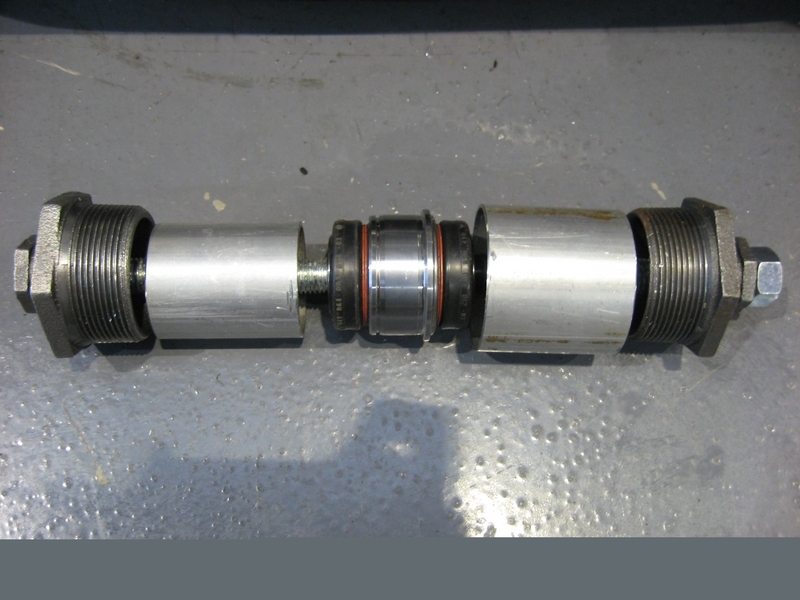
It’s comprised of regular 3/8″ threaded bar, two different pieces of custom length exhaust, two 3/8″ nuts, four washers and two large pipe fittings at each end. If you want to make this tool, the only semi-difficult thing to get is the exhaust parts, which need to fit exactly around the ball joint. Once my local exhaust shop angle ground the correct lengths for me, I got a local engineering crowd to machine the edges of the exhaust lengths perfectly square for me.
In the picture above, the tool is set up to PUSH the ball joint OUT, so its configured for REMOVAL.
Here it is pushing the ball joint out of the carrier:
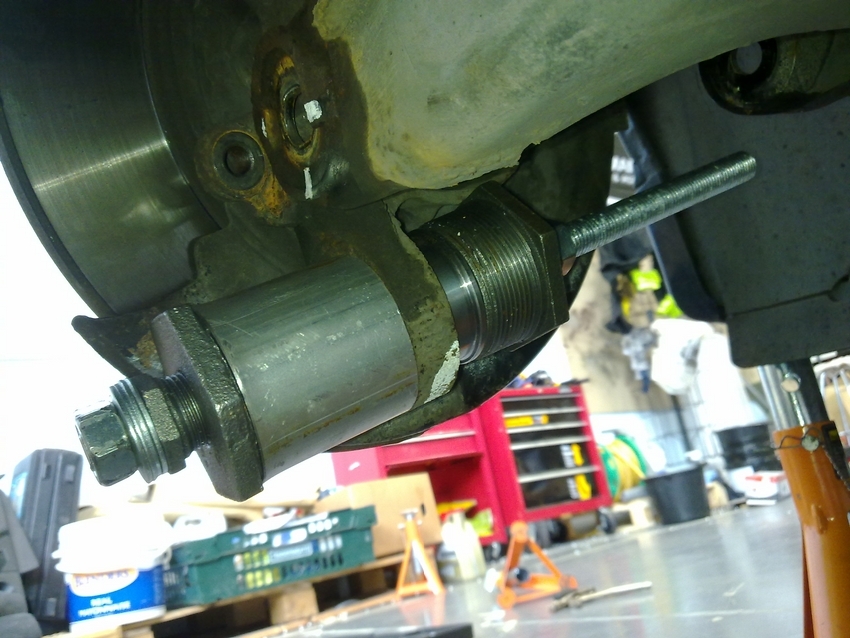
Note that the PUSH part of the exhaust fits perfectly over the left hand boot of the ball joint, yet is still LOWER in profile than the metal part of the ball joint. This is crucial so that the exhaust can push the metal part of the joint only, whilst still being able to slip through the carrier that holds the joint in place. The right side exhaust piece simply needs to be larger than the ball joint so that it fits into it nicely, precision here is not required, however keep it as small as possible so you can manoeuvre the tool.