
Article by: BlackBMWs
Applies to: All BMW e39 chassis models with the M62 engine.
E39 Brothers,
Yesterday, I replaced my engine mounts. I have 83k miles on my 1999 540it with the M62TU engine.
I decided to swap all the mounts as I suspected they were weak or failed. The OE motor mounts are fluid filled rubber bushings mounted in a metal cup. The transmission mounts are a simple rubber bushing with attached metal plates and attachment studs.
After reading a number of posts on various boards, the M62 mounts typically fail due to the increased torque of the V8 over the I6 motors. I figured it was a safe bet my M62 mounts were due.
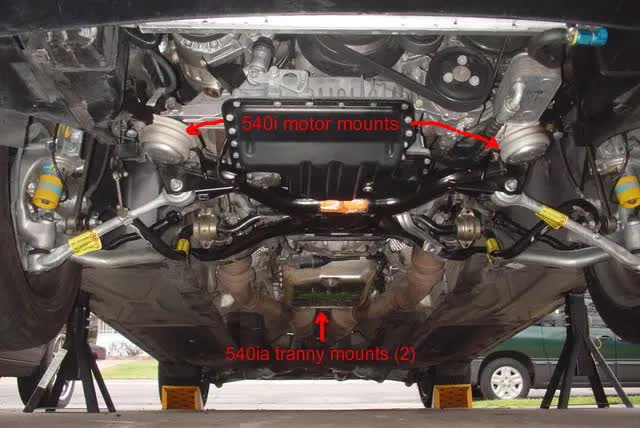
This is an easy DIY and in retrospect, well worth the effort for me in engine and auto shifting feel.
———————————————————————–
For this DIY, I used the following tools and 3/8″ 13mm and 16mm sockets. I also used a 1/4″ 13mm socket and 6″ extension. 13mm combo and ratchet wrench.
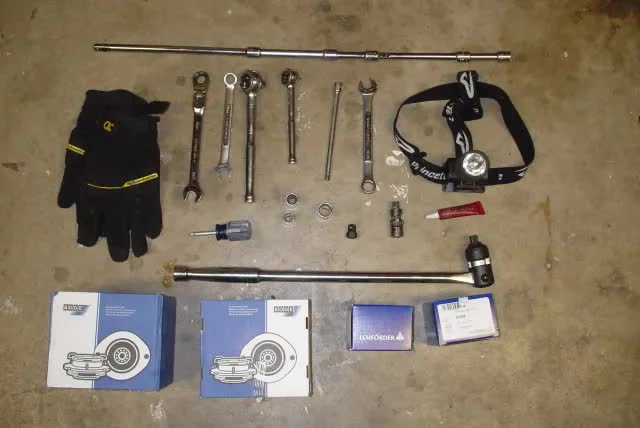
Not pictured are a 3/8″ torque wrench, magnetic pick up tool, safety goggles, 4 wheel chocks, 4 jack stands, 1 floor jack, a 12″x16″x1/2″ piece of plywood and a floor creeper.
I purchased the Boge OEM motor mounts for $66 each and the two Lemforder OEM transmission mounts for $13 each. Jared@EACtuning have these mounts on their site.
I’d rate this a 3 of 10 on difficulty of a DIY. 2 hours included to prep, replace the four mounts, take photos and cleanup.
———————————————————————–
Prep:
I lifted the car up on four Jack stands. I raised the bottom of the car high enough for me to get under both the front end and center of the car where the transmission mounts are located.
Remove the front lower engine cover with a Philips screwdriver.
Now ready to replace the motor mounts.
———————————————————————–
Replace Motor mounts
Each motor mount has three attachment points. Two 13mm flange nuts attaching the mount to the chassis mount points on the underside of the mount. There is a 16mm flange nut on the top of the motor mount that secures the motor mount to the engine mount.
I first loosened the two 13mm nuts on the bottom of each of the two motor mounts.
Passengers side:
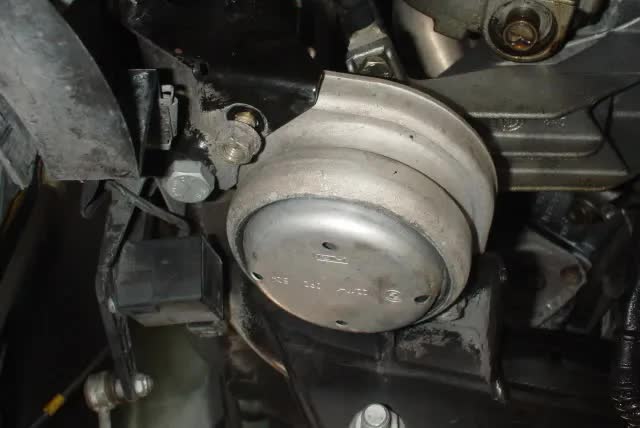
Drivers side:
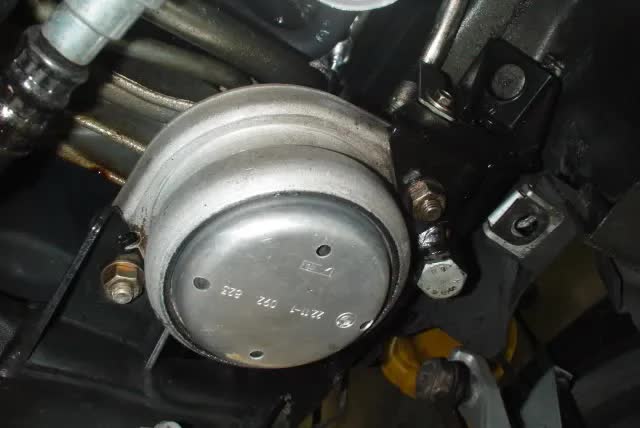
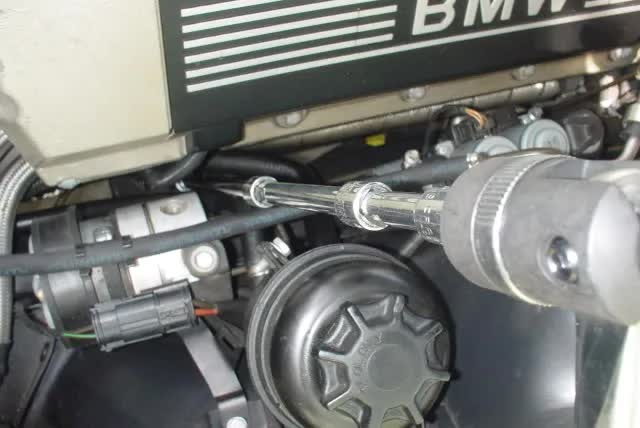
Next, I removed the 16mm flange nut on the top of the motor mount. I removed each nut from the top of the engine compartment using a bunch of 3/8″ socket extensions and a 3/8″ flex joint. I used enough to make a 24″ length to reach the nut from the top of the engine compartment.
Passenger side:
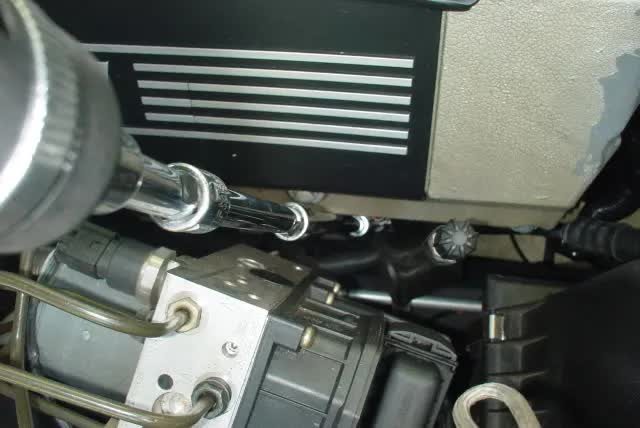 Drivers side:
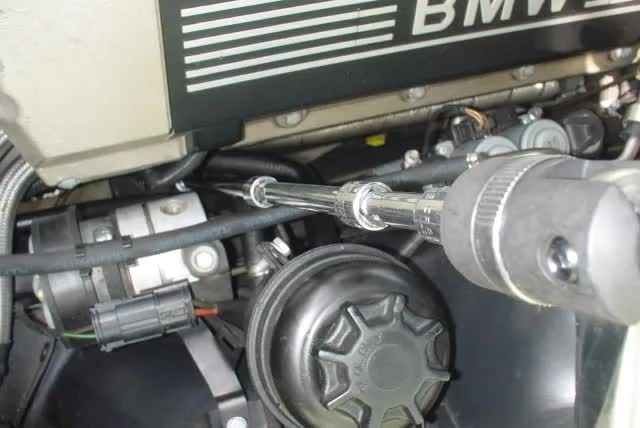
Once the top nuts were off the motor mount, I raised the motor slowly using my floor jack on the oil pan with a 12″x16″x1/2″ piece of plywood to distribute the jack point across a wider area across the oil pan. Make sure the board will clear the front sub-frame just aft of the oil pan.
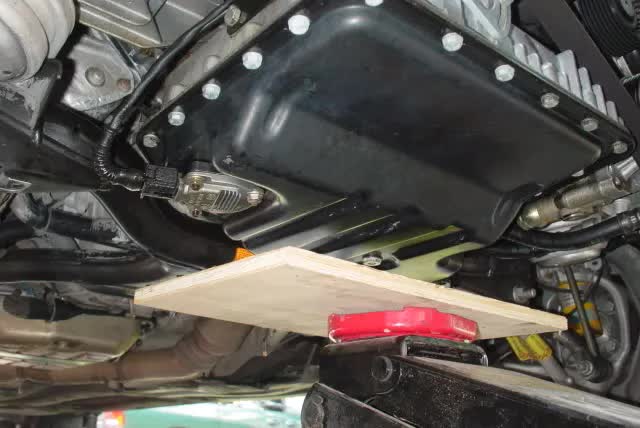
Lift the motor until the passenger motor mount is able to be removed. Lift a bit further and remove the drivers side motor mount.
Note: I have a Zionsville electric Fan installed on my 540it, so I did not have to worry about the engine cooling fan hitting the fan shroud. For folks with the original fan setup, I would spin off the fan to permit enough movement without no damage to the fan or shroud.
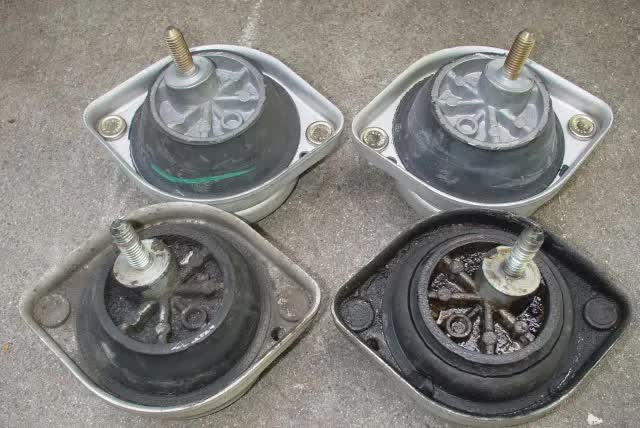
Here’s a shot of the new and old mounts side by side.
Here’s a shot of the drivers side motor mount connection points. For the engine motor mount point, the forward hole is the one used for my M62 motor.
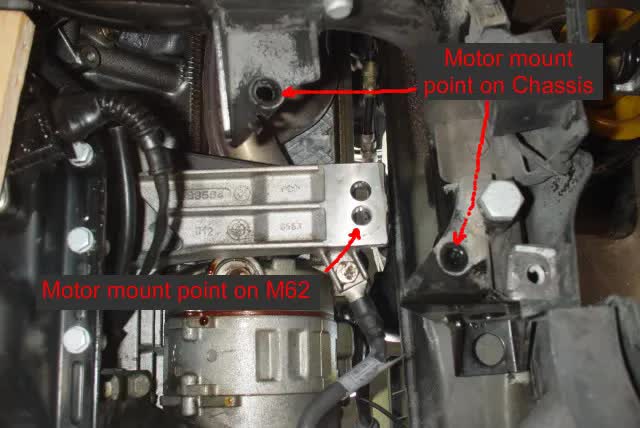
I cleaned up the flange nuts with brake component cleaner before reassembly. I put blue Locktite on the top threads of the motor mount studs. I positioned the motor mount on the engine brackets and loosely attached the 16mm flange nut to hold each of the two mounts in place.
To get the drivers side nut started as it is a very tight space, I used a magnetic retrieval tool to position and attach the 16mm flange nut.
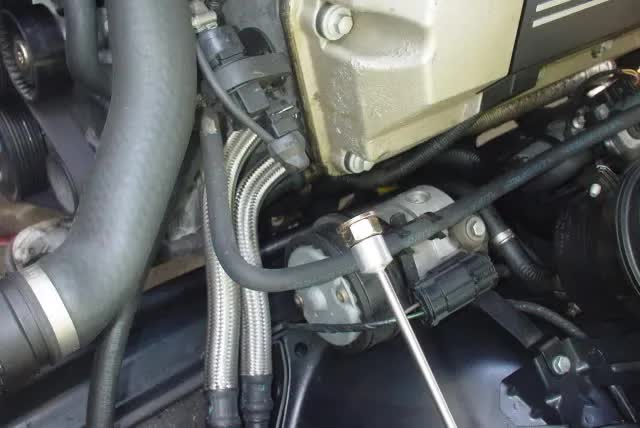
Here’s the magnetic retrieval tool used as a nut starting tool on the drivers side 16mm top flange nut. Turn till snug. (I see the gunk on my hoses, leaking power steering hose is a future DIY. ) Repeat on passenger side 16mm nut.
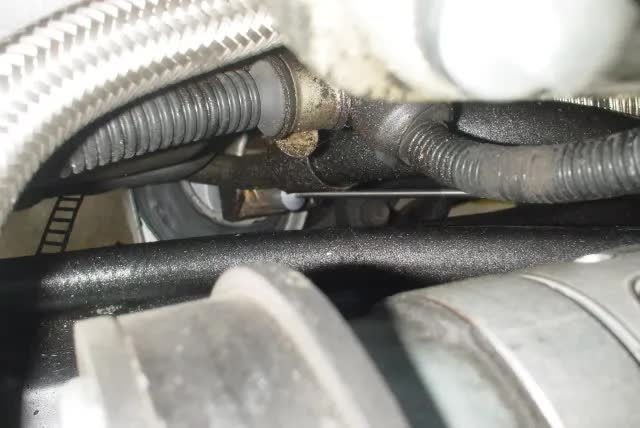
I slowly lowered the motor until the drivers side lower studs reinserted into the chassis mounts. I did have to position the mount to align the studs during the lowering process. (of course, not while I was actually in the process of lowering the motor.) Once the studs were in place, I added blue Locktite on the two studs and attached the two 13mm flange nuts. Repeat the procedure for the passenger side.
Once the motor is fully lowered, tighten all the lower nuts to 22nm and the upper 16mm nuts to 47nm.
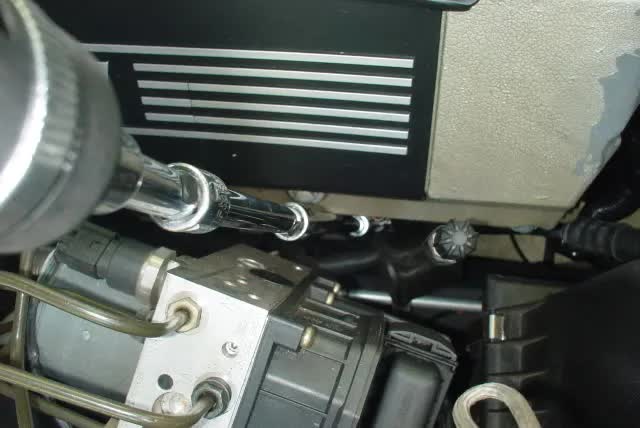
Done!