
Article by: BlackBMWs
Applies to: All BMW e39 chassis models with the automatic steptronic transmission.
E39 Brothers,
Yesterday, I replaced my transmission mounts. I have 83k miles on my 1999 540it with the M62TU engine.
Replace Transmission mounts:
There are two Transmission mounts positioned in an aluminum support brace aft of the transmission output shaft just under the Guibo flex coupling.
There is a lower and upper stud to each transmission mount. The two transmission mounts are sandwiched between the end of the transmission case and the aluminum support cross member.
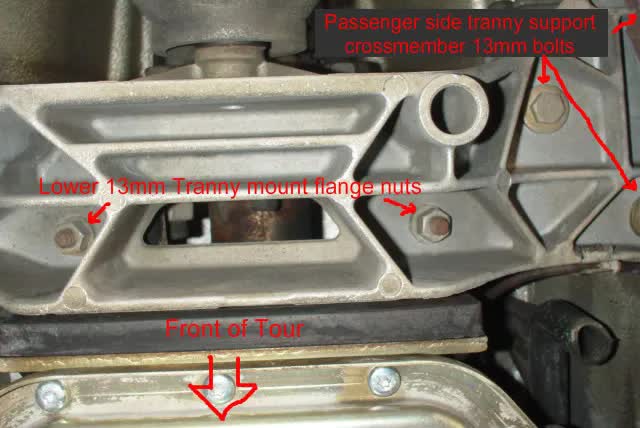
The procedure here is to remove the 2 13mm flange nuts from the bottom of the two transmission mounts, remove the six 13mm bolts holding the transmission support cross member, remove the 2 13mm flange nuts from the top of the two transmission mounts, remove old mounts/reposition the new transmission mounts and reattach all bolts and nuts.
There are two different 13mm flange nuts. The difference being the top securing flange nuts have a wider washer attached to it. Note the difference when reinstalling them.
I first supported the transmission case using a 12″x16″x1/2″ piece of plywood on my floor jack to distribute the support pressure from the floor jack.
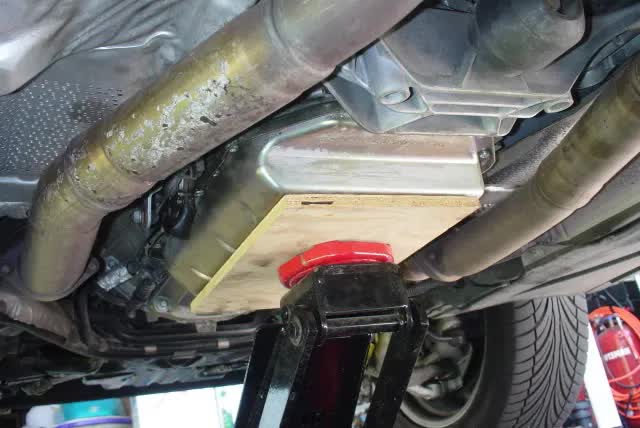
On the 540it, the exhaust pipes obstruct two of the three 13mm bolts on each side of the transmission support cross member.
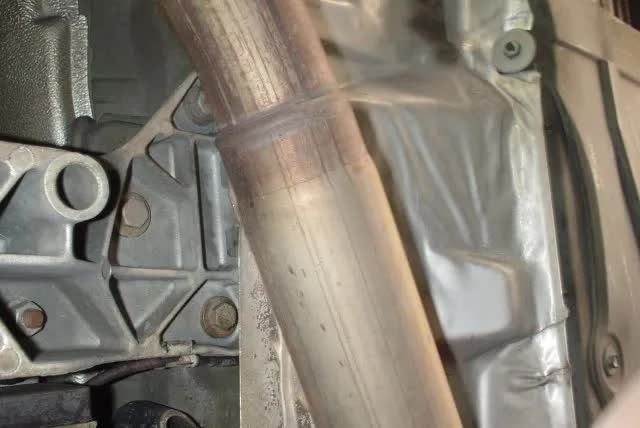
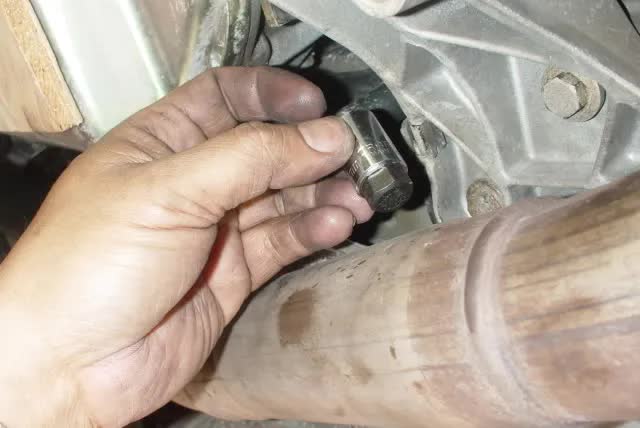
I used a combination of 3/8″, 1/4″ ratchets with 13mm sockets and extensions. On one of the bolts, I used a 3/8″, 13mm socket with a 3/8″ socket cap and a 9/16″ combo wrench to turn it.
I did have to bend the heat shield out of the way to access the retention bolts. At a point, I used an open end, 13mm wrench to finish the removal. Once the support cross member is loosened, the two transmission mounts should slide out.
As anticipated, both transmission mounts were damaged, one was completely detached, so I only had one damaged mount securing the transmission in place.
BTW, this is where safety glasses came in handy as the detached mount plate fell off once the Transmission support member was loosened and fell right onto my safety goggles. Without the goggles, It would have fell on my left eyeball. It left a scratch on my goggle lens.
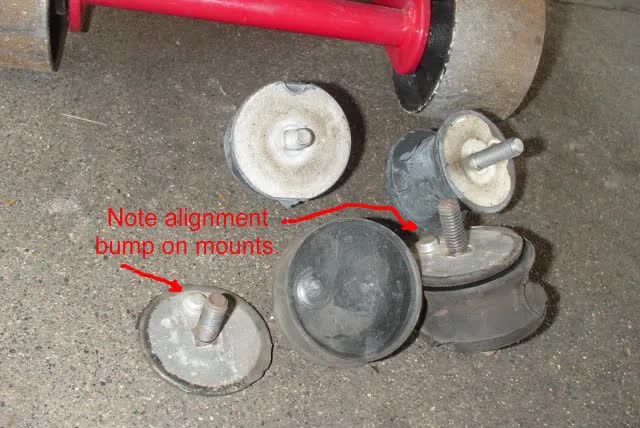
Position the transmission mounts with the portion with the positioning bump facing up and aft in the u-shaped attachment point. The positioning bump fits into the Transmission Mount Attachment Point on the transmission and keeps the transmission mount from spinning while you are tightening the upper 13mm flange nut. Tighten the nut to 22nm. I tightened the nut to “real tight” with an open end, 13mm wrench as I could not fit a torque wrench into the tight space.
Position the transmission cross member and replace the 13mm bolts and tighten the bolts.
Passenger side shown:
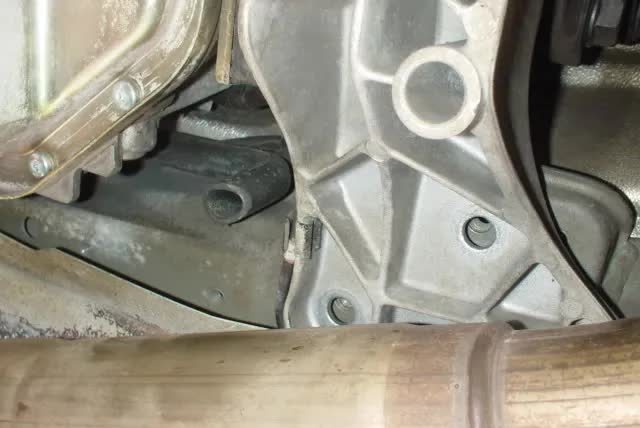
Replace the flange nut for each of the lower transmission mount nut and tighten to 22nm.
Finish up . . .
Reposition the heat shield that was bent out of the way. Remove the floor jack and any you’re done with the transmission mounts.
Once I was done with both sets of mounts and after checking for tools in the way, I started the engine to check for any weird noises or new fluid leaks. No noises or fluid, Motor and transmission mount installations complete!
———————————————————————–
Observations:
- At 83k miles, I had one completely separated transmission mount, one separating transmission mount and a failed Motor mount. Only the passenger Motor mount was intact, but starting to develop cracks in the side of the rubber mount.
- After installation, I could feel more responsive and solid acceleration on throttle inputs. Before the fix, on initial acceleration, there would be a slight pause. Now, seems like direct, immediate and appreciated application of BMW V8 power.
- I could feel smoother transition on auto up-shifts, less noticeable than before.
- No more downshifting clunk or jerk at low speed auto downshift 3-2 and 2-1. Folks have said the low speed jerk was normal, which I can say is true, if you have broken transmission mounts. Otherwise, it should be way less pronounced.
The ride is eerily smoother… Just started noticing that. Less vibration… Just like a performance luxury car. - This would have been a PITA DIY if I did not have a magnetic retrieval tool and a bunch of socket extensions to get to the top 16mm flange nut for the motor mounts. The drivers side is just too tight to get a hand in there.
- For the transmission mount, I needed a 3/8″ socket cap and corresponding 9/16 open end wrench to get to the 13mm flange nut without messing with the exhaust. This probably saved 30 minutes.
- The Guibo has small cracks in it, I’ve added to my 100k DIY list. Should have snapped a pic for comparison later. I’ll check it at 90k. Not too difficult to swap out.
- One realization after reading a post lower in this thread, is that I do not have the original engine cooling fan, fan clutch and fan shroud as I have a Zionsville SPAL electric fan unit installed, so lifting the motor may require removing the fan/fan clutch to not have the fan hit the fan shroud.
Drivers side motor mount:
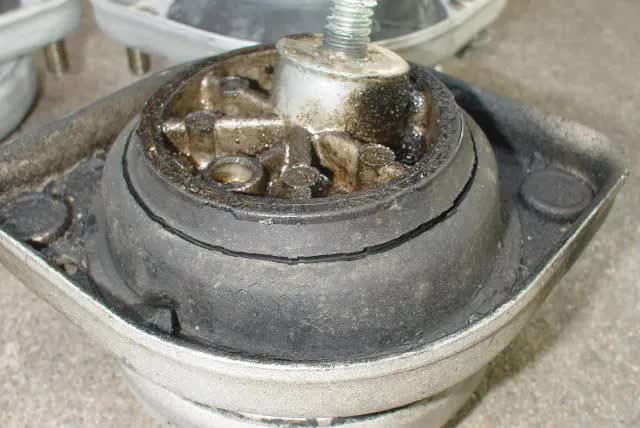
Passenger side motor mount – Slight cracking observed and squished as compared to new.
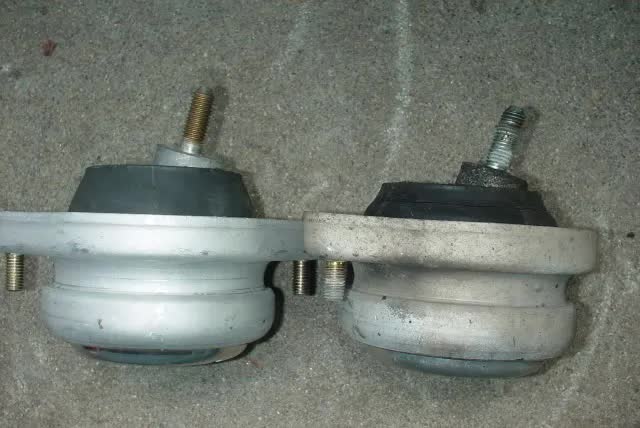
Drivers side transmission mount totally separated. Passenger side transmission mount starting to separate. Both old transmission mounts were compressed and shorter than new.
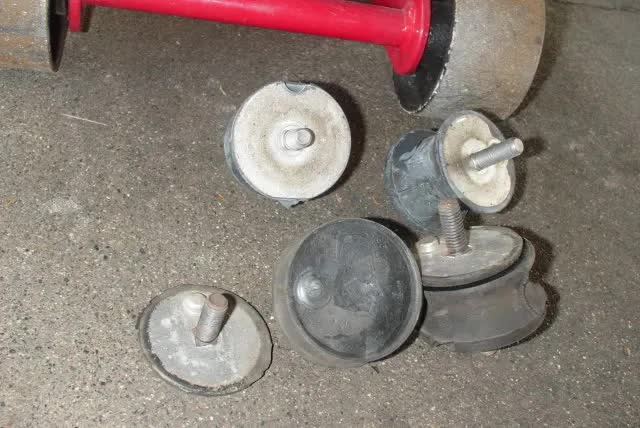
So, at 83k miles, this ended up being a repair, rather than a preventive maintenance. In comparison, before and after the repair, it is now clear that sounds and feel I had on auto shifts were because of the broken and weakened mounts.
This is one of those DIYs where you can feel the difference when you’re done. While the fix was noticeable with my Steptronic transmission, I imagine my 540i/6 brothers would really feel the difference with the manual transmission. Don’t go halfway and just replace the motor mounts, do em all to get the complete benefit . . .