E39 Touring Rear Subframe Bushing Replacement
Article by: BlackBMWs
Article applies to all e39 Touring models.
Touring Brothers,
No rain today, so I took a vacation day to replace the Rear Suspension Subframe Bushings on my 1999 540i Tour.
These Subframe Bushings are the connection point between the Rear Suspension Subframe and the bottom of the Tours undercarriage. The Rear Suspension Subframe contains the shocks, air springs, differential, axle, rear control arms, wheel hub, brakes and wheels. You know, important stuff. All fastened to the body with these four Subframe Bushings.
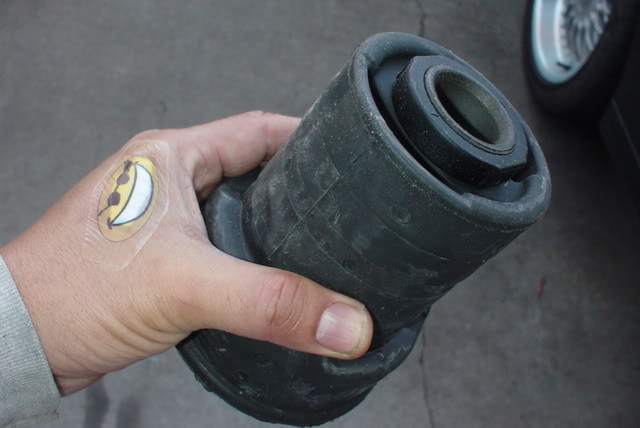
These bushings are a common failure point for E39 Touring models. I had read various posts that these Subframe Bushings start to fail around 80-100k miles. The E39 Sedans don’t seem to have this same problem. My non-sport 540it has 81k miles on it. Upon a brief inspection during my rear shock replacement, I found the two front subframe bushings on the rear suspension subframe had developed cracks in them and that was enough for me to decide to replace all 4 of them.
In previous DIYs, I had replaced the rear shocks and front suspension components. I have been seeking to renew my overall suspension from a soft, loose, questionable ride to a firmer, tighter, quieter, confidence building, awesome daily driving experience. This DIY is one in a sequence of DIYs to renew my Ultimate Driving Touring Machine.
———————————————————————–
Preperation: Tools and Consumables
———————————————————–
For this DIY, here’s most of the tools and consumables I used:
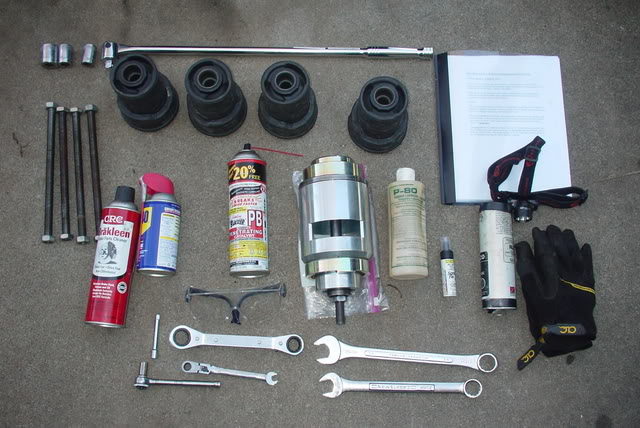
Not pictured are 4 wheel chocks, a floor jack, clean shop rags, 1/2″ ratchet, 1/2″ Torque Wrench, 2″ long 1/2″ inch socket extension and deep 21, 22 and 24mm sockets. I also printed off a copy of the DIY instructions as reference while I was performing the task. The Bentley manual was not much use for this DIY.
I also did not have to use the Brake Cleaner in the picture for this DIY, although in different posts, it was recommended to have it handy, just in case…
I purchased the Subframe Bushings from EAC Tuning for $107 shipped each. Took about two weeks for delivery from the dealer.
The key to getting this job done is the Subframe Bushing removal tool. I was lucky enough to rent one.
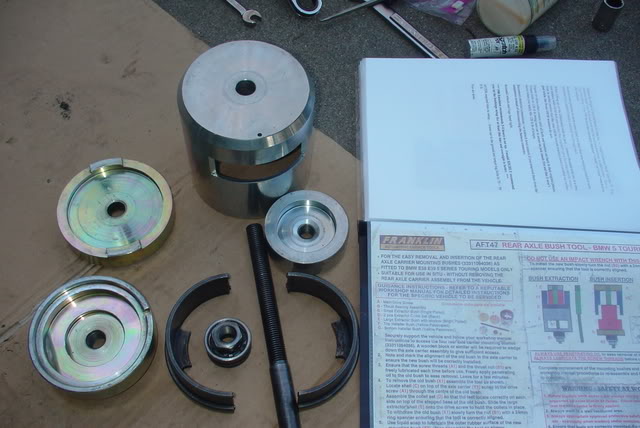
The rental kit includes: The Franklin bushing tool with DIY instructions, tool description/instructions, four subframe extension rods and nuts, Moly grease and rubber bushing emulsion fluid.
I won’t duplicate the instructions that come with the tool, as there’s not enough room for one post, but will show the main points in the process. The instructions are well written and easy to follow.
This DIY took me 5 hours. I suspect the next install we do tomorrow will go much faster, as I took my time and stopped to take photos along the way today.
———————————————————————